Automate Your Projector Setup with the Broadlink RM4 Pro

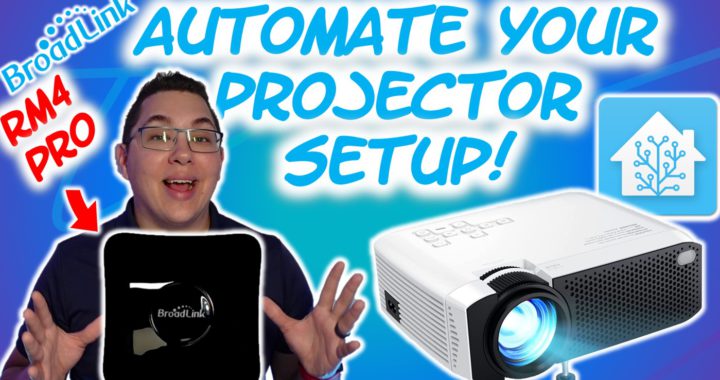
Hey Smart Homers! In this article I’ll show how I used the Broadlink RM4 Pro to automate my projector and motorized screen for a hands free experience. If you prefer a video, I’ve posted one on YouTube. If you watch it and enjoy it, please consider subscribing!

Before I really started building my smart home, I bought a 100-inch motorized projector screen (controlled by an RF remote) and a projector (controlled by an IR remote) for watching movies. As I added more to my smart home, I really wished I could automate these devices. This problem is now solved with a Broadlink RM4 Pro and Home Assistant. Now I can control both without needing the remotes, and can even use Alexa voice commands to control them.

RF vs. IR

Before I actually show how I did it, I want to quickly explain the difference between RF and IR. This is important information so that you are able to troubleshoot any future potential issues with your setup. Basically RF and IR are two different wavelengths on the electromagnetic spectrum. RF stands for Radio Frequency, and IR stands for Infrared. Both of these have longer wave-lengths than actual visible light, so you can’t see them. As you can see on the diagram below, RF has a longer wavelength than IR. This is important because it results in RF signals being able to pass through walls and other solids (to a certain extent of course). Though invisible, Infrared light cannot pass through solids because it of its longer wavelength.

Electromagnetic Spectrum

This difference between RF and IR will be important later.

How the RM4 Pro Works

Ok, so now I’ll explain how the RM4 Pro works. The RM4 pro works as both a transmitter and receiver for RF and IR signals. The device can “learn” signals from IR/RF remotes, and then can transmit those signals to the various devices that those remotes control. The RM4 Pro can be integrated with Home Assistant to allow for automations and scripts using these remote signals.
Important Note: The RM4 Pro only supports RF devices that operate at 433 MHz, so you check your remote to see what frequency your RF devices use before you buy this.

Connecting the RM4 Pro to WiFi

The first thing you’re going to need to do is set up the RM4 Pro in the Broadlink app. The only use we will have for the Broadlink app is that it will connect your RM4 Pro to your WiFi network. Once this is done, the app won’t be needed anymore.

First, plug in your RM4 Pro (power) and download the “Broadlink – Universal Remote” app. Once it is installed, open it follow the required steps in order to sign in. If you haven’t already, you’ll need to create a Broadlink account. Once you’re all signed in you should be at the “Welcome home” screen. Tap “Start to use” and then tap “Add device”. Allow any permissions it requests, and then it will begin scanning for nearby devices. Tap “WiFi devices” and then follow the instructions it shows. Once connected, you should see your RM4 Pro in the device list on this screen. Now you’re done with the app! Just close it out without proceeding any further.

Next, head over to your router settings (this will vary depending on what router you have) and find the IP address of your connected RM4 Pro. It’s a good idea to reserve that IP address for Home Assistant integration.

Setup in Home Assistant

Next, It’s time to head over to Home Assistant. Click on “Configuration”, “Integrations”, and look for the Broadlink integration. Your device should already be discovered and show up on this page, but if it doesn’t, click “Add Integration”. Search for Broadlink, and click the Broadlink integration. The “Connect to the device” box will pop up, requiring you to enter the IP address of your Broadlink device that you found earlier. Enter that IP address and click Submit. Once it’s integrated, click “Configure” on the integration, and give your RM4 Pro a name and area if you like.

Teaching a New Dog Old Tricks

Ok, now comes the grind. We’re going to have the RM Pro listen for codes sent by remotes, and save those codes so Home Assistant can send them. This part is really not too difficult, but just takes some time depending on how many remotes you want to learn from. I only had two remotes for this project: one for my projector and one for my projector screen. The projector remote uses Infrared while the screen’s remote uses RF. Each button press must be learned individually. The first thing we do is head over to developer tools. From there, click services, and on the services page, search for the “remote.learn_command” service. In the Targets field, click “Pick entity” and choose your RM Pro from the list. We are going to run this service for each button press we want to “learn”, changing the information in the fields shown below each time. Check the boxes next to Device, Command, and Command Type. The Device field lets you give a name to the device that you will control, for example, “projector”. The Command field lets you give a name to the command, for example, “power”. These two fields are completely custom, so you can call them whatever you want. After this, choose the Command Type from the dropdown menu for the 3rd field. My projector operates via IR, so I chose IR. Finally, click call service, and you should see a notification appear in Home Assistant telling you to press the button on the remote. Point the remote at the RM Pro and press the button. This should cause the notification to be cleared, and there you have it, you’ve learned the first code!

Now you can repeat this step for each button on your remote that you want to have the RM Pro learn. Note that, because of what I explained before about IR not being able to pass through solids, I found that you need to point the remote straight on at the RM Pro’s orange light where the IR receiver is. This is important for when you decide where you want to put the RM Pro – it needs to be in the same room as the projector, and facing it properly so that the projector can receive the signal it sends.

Next we can program our RF remote, which is only a slightly different procedure than with IR. In the service tab again, change the name of the device in the Device field to the name of the RF device. I name it “projectorscreen”. For my screen, I’m only programming up, down, and ok buttons, so in the Command field I put “up”. Change the command type to RF, and then click “call service”. You’ll see a notification appear in Home Assistant telling you to hold the button that you are programming. The RM Pro then sweeps across a range of frequencies looking for the signal that your remote is putting out. Keep holding until the notification goes away and then let go. Another notification will appear telling you to press the button once again, so give it a single press (no need to hold it) and that notification should also be cleared. As with the IR remote, repeat this step for each button you want to program. Once that’s complete, you’re all set to start sending commands via Home Assistant! Not so bad, eh?

Commands can also be “batch-learned”; multiple commands can be learned in a row. To do this, just put a list of commands (one per line) in the command field. Then you can learn them one by one.

Testing the Commands in Home Assistant

You can then test these commands by changing the service to “remote.send_command”, selecting your RM Pro as the target again, putting the name that you chose for your device in the Device field, putting in the name of the command that you want to send, and then clicking “Call Service”.

Scripts in Home Assistant

Maybe we want to send a sequence of multiple of these commands by tapping a button. In this case, we can write a script, and then call that script with a Lovelace button card. On the scripts page, choose “Add Script”. Give it a name, and then in the “Sequence” section, set the action type to “Call Service”. The service will be the same one you just tested (“remote.send_command”) and the same target. Specify the Device and the command. When making a script, you can add multiple commands in a sequence. You can also add delays in between commands if need, and you can also control other devices as well, like lighting. I’ll show a sample script later on.

Virtual Projector Remote in Home Assistant

Another cool thing that you can do is use the “custom:tv-card” to make a virtual remote in Lovelace. The card has a bunch of pre-defined buttons that can be tied to a service. Tapping the buttons on the card will call the service that you define. I used this card to combine both my projector and projector screen remotes into a single virtual remote. The card has predefined buttons for selecting  a TV’s channels (going up and down), so I used these buttons to raise and lower the projector screen. I used the source button to select the input for my projector. If you do not specify a service for a particular button, that button will not be displayed on the card (pretty nice). Below I have left the config YAML for my custom:tv-card setup.

type: custom:tv-card
 entity: sun.sun
 name: Projector Setup
 tv: true
 power:
   service: remote.send_command
   service_data:
     entity_id: remote.broadlink_rm4_pro_remote
     device: projector
     command: power
 up:
   service: remote.send_command
   service_data:
     entity_id: remote.broadlink_rm4_pro_remote
     device: projector
     command: up
 down:
   service: remote.send_command
   service_data:
     entity_id: remote.broadlink_rm4_pro_remote
     device: projector
     command: down
 left:
   service: remote.send_command
   service_data:
     entity_id: remote.broadlink_rm4_pro_remote
     device: projector
     command: left
 right:
   service: remote.send_command
   service_data:
     entity_id: remote.broadlink_rm4_pro_remote
     device: projector
     command: right
 select:
   service: remote.send_command
   service_data:
     entity_id: remote.broadlink_rm4_pro_remote
     device: projector
     command: ok
 back:
   service: remote.send_command
   service_data:
     entity_id: remote.broadlink_rm4_pro_remote
     device: projector
     command: exit
 source:
   service: remote.send_command
   service_data:
     entity_id: remote.broadlink_rm4_pro_remote
     device: projector
     command: source
 info:
   service: remote.send_command
   service_data:
     entity_id: remote.broadlink_rm4_pro_remote
     device: projector
     command: menu
 channelup:
   service: remote.send_command
   service_data:
     entity_id: remote.broadlink_rm4_pro_remote
     device: projectorscreen
     command: up
 channeldown:
   service: remote.send_command
   service_data:
     entity_id: remote.broadlink_rm4_pro_remote
     device: projectorscreen
     command: down
 home:
   service: remote.send_command
   service_data:
     entity_id: remote.broadlink_rm4_pro_remote
     device: projectorscreen
     command: okCode language: CSS (css)

Automating the Entire Setup

I have a pretty cheap projector, and every time I turn it on I have to change the input source to HDMI so that my Chromecast with Google TV with be displayed. If we want to watch something on the setup, we have to lower the screen, turn on the projector, change the input source, and then we can control the Chromecast with the Chromecast remote. I don’t mind navigating Google TV with a remote, but I wanted to automate the rest of the process so that the kids can get the projector set up by themselves. I created a script that performs all these actions in a sequence as shown earlier. First the script sends the command to bring the projector screen down, and while that’s going (it takes a while), it sends the command to turn on the projector. Since the projector needs to be fully booted up before it can receive the commands to change the source, I put a “wait” action in the sequence. After 10 seconds, the script then sends a command to open up the Input Source menu. To select HDMI, the “right” command needs to be sent twice, and then the “select” or “ok” command needs to be sent. In order to make sure my cheap projector recognizes each command, I put a one-second delay between each. After the input source is selected, the Chromecast remote can be used to control Google TV from there. I set up a button card in Lovelace to that can be tapped to run this script and set up the projector. I also made another script that turns off the projector and retracts the projector screen.

Lovelace Buttons to Call the Scripts

To make this automation much simpler for anyone to use, I wanted trigger the whole sequence with a voice command. If you have Amazon Alexa integrated with Home Assistant, your Scripts will show up as Scenes in the Amazon Alexa app. You can create a simple automation in the Alexa app that triggers these scenes. I made a Routine that triggers the “Projector Setup” script when I say, “Alexa, time to watch a video.”. Then when we’re done watching, we can say “Alexa, turn off the projector” to run the “Projector Shutdown” script.

alias: Projector Setup
sequence:
  - service: remote.send_command
    data:
      entity_id: remote.broadlink_rm4_pro_remote
      device: projectorscreen
      command: down
  - service: remote.send_command
    data:
      entity_id: remote.broadlink_rm4_pro_remote
      device: projector
      command: power
  - delay:
      hours: 0
      minutes: 0
      seconds: 10
      milliseconds: 0
  - service: remote.send_command
    data:
      entity_id: remote.broadlink_rm4_pro_remote
      device: projector
      command: source
  - delay:
      hours: 0
      minutes: 0
      seconds: 1
      milliseconds: 0
  - service: remote.send_command
    data:
      entity_id: remote.broadlink_rm4_pro_remote
      device: projector
      command: right
  - delay:
      hours: 0
      minutes: 0
      seconds: 1
      milliseconds: 0
  - service: remote.send_command
    data:
      entity_id: remote.broadlink_rm4_pro_remote
      device: projector
      command: right
  - delay:
      hours: 0
      minutes: 0
      seconds: 1
      milliseconds: 0
  - service: remote.send_command
    data:
      entity_id: remote.broadlink_rm4_pro_remote
      device: projector
      command: ok
mode: single
icon: mdi:projectorCode language: CSS (css)
alias: Projector Shutdown
 sequence:
 service: remote.send_command
 data:
   entity_id: remote.broadlink_rm4_pro_remote
   device: projector
   command: power
 service: remote.send_command
 data:
   entity_id: remote.broadlink_rm4_pro_remote
   device: projectorscreen
   command: up
 delay:
   hours: 0
   minutes: 0
   seconds: 1
   milliseconds: 0
 service: remote.send_command
 data:
   entity_id: remote.broadlink_rm4_pro_remote
   device: projectorscreen
   command: up
 mode: single
 icon: mdi:projector Code language: CSS (css)

Wrap-Up

To sum it up, I’m blown away that I can make my dumb projector and motorized screen into smart devices, and its nuts that they are controlled by one device. This device is super easy to set up and use, and I would highly recommend it for automating your projector setup. Thanks for reading, and if you’re a fan of my work, check out some of the other articles I’ve written or head over to my YouTube channel. See ya!

Home Automation Ideas

Ten Easy Home Automation Ideas

What’s up Smart Homers! In this article I want to show you 10 different home automation ideas that you can try out in your home. See the video version here.

I always enjoy hearing ideas that other people have for automations, because it gives me ideas for new automations for my smart home, as well as ideas for ways to improve my current automations. Most of these automations are done using a hub like SmartThings or Home Assistant.

1. Bathroom Fan Automation

The first automation is a very simple one. In our house, we don’t have timer switches for our bathroom fans (which are annoying to use in my opinion), so sometimes our bathroom fan gets left on. For example, maybe I take a shower before going out for dinner, but I forget to turn the fan off because I’m in a rush. Now the fan may run the entire time that I’m gone. A simple automation can be made to turn the fan off after a maximum amount of time – say 30 minutes. Then you can turn the fan on and forget about it – no need to set a timer either. This automation is so simple that it can even be done in the Tuya Smart Life app if you have a Tuya smart switch – no hub or Assistant integration needed!

To set this automation up in the Tuya Smart Life app, tap the “Smart” icon on the bottom button bar, and then tap the plus ( + ) icon in the upper right corner. For the “Set a condition” part of the automation, you should choose “When device status changes”. Then, choose the fan switch from the list of devices, and then choose “ON”. What this is doing is triggering the automation when the fan switch is turned on. Now the “Set up task” screen is displayed. Here we will tell the fan to turn off after a delay of a certain amount of time. First, tap “Delay the action” and set the delay time for however long you’d like. I set it to 30 minutes. Tap “Next”, and then tap the blue plus ( + ) in the “Task” section to choose what happens after the 30 minute delay. Tap “Run the device”, again choose your fan switch from the list, and then choose “OFF”. Tap “Next”, and then you can name your automation and then save it! And that’s it! Your automation should look similar to the one shown below.


2. Laundry Notifications

The next automation is one that I’ve made a (fairly bad) YouTube video about. Often washers and dryers come with tones or buzzers that go off when a cycle is complete, but If the laundry machines in your house are too far away from the main living area, the alarms may not be loud enough. If you have small kids, the alarms could be too loud, waking them up during nap time. A solution to this is to create an automation that alerts you via phone notification or smart speaker when the cycle is complete. One way to do this is to use a power monitoring plug to monitor the power of the appliance, and when the power draw drops down below a certain threshold, send an alert indicating that the cycle is complete. In the video I showed how to do this with SmartThings, but it can also be done with Home Assistant. For this automation, I used a Zooz ZEN15 power monitoring smart plug for each appliance, which worked extremely well.

The theory of how a cycle’s beginning and end are determined

3. Freezer Alerts

Another power monitoring automation that is useful to set and forget is one that will notify you if your freezer stops working. We have a chest freezer in our garage, and we would lose quite a bit of food if it stopped working (it actually happened one time, and it was BAD). An automation can be written to send a notification to your phone if the power stays below a certain value for too long. You can also monitor the cycling of the freezer, and if the power draw is higher than normal, the lid may be left open or there could be other problems with your freezer. The image below shows a trend of my chest freezer’s power consumption over time.

Trend of My Chest Freezer’s Power Usage Over Time
(Lovelace Dashboard in Home Assistant)
# Alert me if the freezer dies
alias: Freezer Alert
description: ''
trigger:
  - type: power
    platform: device
    device_id: e8ae80fdf8979cc3199ce8f4c38cdb1e
    entity_id: sensor.freezer_plug_electric_consumed_a
    domain: sensor
    below: 1
    for:
      hours: 0
      minutes: 30
      seconds: 0
      milliseconds: 0
condition: []
action:
  - service: notify.mobile_app_oneplus7
    data:
      message: The chest freezer hasn't been running for 30 minutes!
mode: singleCode language: YAML (yaml)

4. Garage Door Actionable Notification

This automation is one that I’ve only created in Home Assistant – not sure if it can be done in SmartThings. Occasionally the garage door is left open while working around the house, which really affects our utility bills. I created an actionable notification in Home Assistant that notifies me if the garage door has been open for 10 minutes. The notification also has an action button on it that can be tapped to close the garage door. This way I can know that the door is open and can close it from anywhere! Let’s say I’m working on a project in the garage and I leave to go to the hardware store, and I forget to close the garage door. I’m at the store or on the way and I get the notification. I can just tap the button and close it without having to go into the app. You can also have this notification appear if everyone leaves the house and the garage door is left open. If you want to learn more about setting up actionable notifications in Home Assistant, there’s a video by Everything Smart Home that goes over how to set them up on iPhone and Android that I recommend watching. I’ve left the YAML code that I used for this automation below.

Example Actionable Notification
# Actionable Notification when Garage Door is Left Open
alias: 'Notification + Action: Garage Door 1 Left Open'
description: ''
trigger:
  - type: opened
    platform: device
    device_id: 951301691042564e1c8e1b3e0af185e3
    entity_id: binary_sensor.garage_door_1_sensor
    domain: binary_sensor
    for:
      hours: 0
      minutes: 10
      seconds: 0
      milliseconds: 0
condition: []
action:
  - service: notify.mobile_app_oneplus7
    data:
      message: Garage Door 1 was left open!
      data:
        actions:
          - action: CLOSE_GARAGE_DOOR_1
            title: Close Door
  - wait_for_trigger:
      - platform: event
        event_type: mobile_app_notification_action
        event_data:
          action: CLOSE_GARAGE_DOOR_1
    timeout: '00:30:00'
    continue_on_timeout: false
  - service: switch.turn_on
    target:
      entity_id: switch.garage_door_opener_1
  - service: notify.mobile_app_oneplus7
    data:
      message: Closing Garage Door 1.
mode: single
Code language: PHP (php)

5. Door Left Open Alerts

Another, very similar, automation is one that alerts you when a door has been left open. In the summer the kids sometimes leave the door open and let bugs and heat in, so I made an automation for each exterior door that sends a phone notification if it has been open for 10 minutes. When a door is left open for 10 minutes, a notification comes to my phone telling me which one is open. I have also set up my wall mounted control panel in my Kitchen to display the status of each door, so that you can see which doors are open with a quick glance. I made a step by step video guide on making a wall mounted control panel with Home Assistant, if you’re interested!

Wall-Mounted Control Panel (Lovelace Dashboard in Home Assistant)
# Sample code when a particular door is left open
alias: 'Notification: Garage Man Door Left Open'
description: ''
trigger:
  - type: opened
    platform: device
    device_id: 99b9e7bc94b8c43a248896588b4fa24c
    entity_id: binary_sensor.sengled_garage_mandoor
    domain: binary_sensor
    for:
      hours: 0
      minutes: 5
      seconds: 0
      milliseconds: 0
condition: []
action:
  - service: notify.mobile_app_oneplus7
    data:
      message: The Garage Man Door was left open!
mode: singleCode language: PHP (php)

6. NFC Tag on the Nightstand

The next automation is one that I use every single day, and one of the most useful to me. Most smart homers probably create scenes in their various home automation platforms that are set at certain times each day, or when certain actions take place. We have an “evening” scene that starts at 8pm every night which changes all of the smart bulb color temperatures from daylight to warm white, and turns on all the nightlights. A good friend once said, “Daylight is clean, but warm white is comforting“. Words to live by. When we go to bed, we want to trigger our “nighttime” scene, which turns off all of the lights but the nightlights. Since we don’t consistently go to bed at the same time every night, we need a way to trigger this scene when we go to bed. To do this I have placed an NFC tag on my nightstand and have an automation that triggers the nighttime scene when I put my phone on my nightstand.

It might not seem like it’s a lot easier than opening the app and triggering the scene, but just setting the phone down and triggering it is really smooth. The only problem I have with this automation is that your phone has to be unlocked in order for the NFC tag to be read. I’ve considered switching to a smart button, but the NFC tags are way cheaper and don’t require batteries. These NFC tag automations can be triggered from an Android or iPhone, but how difficult they are to set up depends on the hub you use. I’ve set this automation up on both SmartThings and Home Assistant, and Home Assistant was easier by far since it has built-in NFC reading capability. If you want to see how to set these kinds of automations up with Smart Things, Smart Home Solver has made an excellent video covering how to create these automations using both iPhone and Android.

alias: Nightstand Lights Out
description: ''
trigger:
  - platform: tag
    tag_id: fcf40478-a889-4059-bd9f-4029b15206c0
condition:
  - condition: time
    after: '20:00'
    before: '5:00'
action:
  - scene: scene.nighttime
mode: singleCode language: JavaScript (javascript)

7. Controlling a Window AC with a Nest Thermostat

Another automation I recently started using allows me to control my window AC unit with my Nest Thermostat. I only have central Air Conditioning on the 2nd floor of my house, so the basement only has baseboard heat and no cooling. I installed the window AC unit in a basement window, but I wanted to have it controlled by the basement thermostat for my heating system. The GE air conditioning unit I bought is HomeKit compatible, so I used the HomeKit integration to connect it to Home Assistant. Once working with Home Assistant, I set up an automation that turns on the AC unit and sets the temperature when the Nest thermostat temperature is higher than its setpoint. It works super well, and I’m very pleased with it!

This one was a little more complicated than the others, but not too bad. First you need to make two template sensors. The first simply takes the setpoint temperature attribute of the Nest climate entity and makes it its own sensor. Then you create a template sensor that compares (subtracts) the actual temperature measured by the thermostat and the setpoint of the thermostat (that first sensor you created). This sensor’s value will indicate how much cooler or warmer the room is than the setpoint of the thermostat.

# Make the temp setpoint sensor from Basement climate entity

  - platform: template
    sensors:
      basement_temperature_setpoint:
        friendly_name: "Basement Thermostat Temperature Setpoint"
        unit_of_measurement: 'deg F'
        value_template: "{{ state_attr('climate.basement', 'temperature') }}"Code language: PHP (php)
# subtract to get the difference
  - platform: template
    sensors:
      basement_temp_vs_setpoint:
        friendly_name: "Basement Temp vs Setpoint"
        unit_of_measurement: 'deg F'
        value_template: "{{ (((states('sensor.basement_temperature') | float)) - ((states('sensor.basement_temperature_setpoint') | float))) | round(1) }}"Code language: PHP (php)

So now I have the comparison of the two sensors, let’s look at them. I made a little Lovelace card to help me visualize the two. The image below shows that the actual temperature of the basement is 1.4 degrees cooler than the setpoint. Since the basement is cooler, we don’t want the AC on, so we should leave it.

This next image shows that the actual temperature of the basement is 2.4 degrees warmer than the setpoint. Since the thermostat only controls baseboard heat, it can’t help alleviate this situation.

In comes the automation! The following automation waits for the basement temperature to be more than 2 degrees over the thermostat’s setpoint for at least 5 minutes, and then tells the AC to turn on.

alias: Basement Window AC on if Actual Temp Above Thermo Setpoint
description: ''
trigger:
  - platform: numeric_state
    entity_id: sensor.basement_temp_vs_setpoint
    for: '00:05:00'
    above: '2'
condition: []
action:
  - device_id: 928d3f8c2b086c263410e0e7ead1f2d5
    domain: climate
    entity_id: climate.basement_window_ac
    type: set_hvac_mode
    hvac_mode: cool
mode: singleCode language: JavaScript (javascript)

I then wrote another automation to turn the AC off once it has reached the setpoint (within 1 degree) of the thermostat and remained there for 5 minutes.

alias: Basement Window AC off if Actual Temp Reaches Thermo Setpoint
description: ''
trigger:
  - platform: numeric_state
    entity_id: sensor.basement_temp_vs_setpoint
    for: '00:05:00'
    below: '1'
condition: []
action:
  - device_id: 928d3f8c2b086c263410e0e7ead1f2d5
    domain: climate
    entity_id: climate.basement_window_ac
    type: set_hvac_mode
    hvac_mode: 'off'
mode: singleCode language: JavaScript (javascript)

And that’s it! This one is set and forget!

8. Controlling a Humidifier with a Nest Thermostat

Another climate type automation that is similar the previous one involves the humidity in your home. In the winter months, our house becomes very dry and we often run a humidifier in the main living area of our house. To help control the humidity, I put the humidifier on a smart plug, and created an automation that turns it on if the humidity (measured by my Nest thermostat) goes below a certain threshold. Then I created another automation to turn it off once the humidity exceeds the threshold. This automation has worked well in both Home Assistant and SmartThings – now all I need to do is remember to add water to the humidifier when it runs out!

alias: Turn on Humidifier (Living Room Thermo)
description: ''
trigger:
  - platform: numeric_state
    entity_id: sensor.living_room_humidity
    for: '00:10:00'
    below: '35'
condition: []
action:
  - type: turn_on
    device_id: 17d4abecbfadf7295994cdf7b0ea355b
    entity_id: switch.humidifier_switch
    domain: switch
mode: singleCode language: JavaScript (javascript)
alias: Turn off Humidifier (Living Room Thermo)
description: ''
trigger:
  - platform: numeric_state
    entity_id: sensor.living_room_humidity
    for: '00:10:00'
    above: '40'
condition: []
action:
  - type: turn_off
    device_id: 17d4abecbfadf7295994cdf7b0ea355b
    entity_id: switch.humidifier_switch
    domain: switch
mode: singleCode language: JavaScript (javascript)

9. Lighting with PLEX and Google TV

Lighting with PLEX and Google TV
If you’ve never used PLEX media server, I highly recommend it. It allows you to stream audio, video, and image files that you have in your library to a variety of devices, including Chromecast with Google TV. It also integrates with Home Assistant, allowing you to control the playback and some other things, as well as use its state as an automation trigger. I created an automation that sets the lighting scene in our kids’ media area when PLEX begins playing a movie or show. This is actually very useful because then I don’t have to go over to the switch, talk to Alexa/Google Home, or pull out my phone in order to dim the lights when the movie is playing. I don’t have smart blinds or window shades, but this would be an ideal way to close them automatically. I also created another automation that turns the lights up when PLEX is paused, like if someone needs to use the bathroom or you’re getting snacks. I’ve left the YAML code below if you want to check it out.

alias: Plex Lighting (Play)
 description: ''
 trigger:
 platform: device
 device_id: 0dc9a777ac431162de04eb2690f3dc35
 domain: media_player
 entity_id: media_player.plex_plex_for_android_tv_chromecast
 type: playing
 condition: []
 action:
 service: light.turn_off
 target:
   entity_id: light.basement_lights
 mode: single Code language: JavaScript (javascript)

alias: Plex Lighting (Pause)
 description: ''
 trigger:
 platform: device
 device_id: 0dc9a777ac431162de04eb2690f3dc35
 domain: media_player
 entity_id: media_player.plex_plex_for_android_tv_chromecast
 type: paused
 for:
   hours: 0
   minutes: 0
   seconds: 5
   milliseconds: 0
 condition: []
 action:
 service: light.turn_on
 target:
   entity_id:
     - light.basement_can_lights
     - light.basement_string_lights
 mode: single Code language: JavaScript (javascript)

10. Arming Your Security System When Leaving

If you have cameras that you use for security, or any other security devices, you may have them arm automatically at a certain time in the evening. But you may have to manually arm the security system when you leave the house during the day. It can make life easier to have an automation that automatically arms the system when you leave the house, an disarms the system when you leave. I have an automation set up that will “arm” my Blink camera system as well as Alexa Guard when both myself and my wife leave the house. To do this, I used Home Assistant with the Zone feature that detects if my wife or I are in the “Home” zone based on the location of our phones. If we both leave the zone, it arms both systems. You could also have Home Assistant alert you if you’ve left any doors open or unlocked when leaving. When one or both of us return home, another automation disarms the system conditionlally. If it is after 8pm, the systems stay armed.


Anyway, that’s all I’ve got for you – thanks for reading all the way to the end! I hope these automation ideas were helpful and gave you some ideas of your own. If enjoyed this feel free to check out the other articles I’ve written! Also, check out my YouTube channel!