
What’s up Smart Homers? This is the written version of a recent video I made comparing smart buttons. Recently I’ve been trying to figure out what smart button or smart remote is best for my smart home, but there are so many different options, and even when you see them online, you really don’t have a good idea of their size or quality until you get your hands on them. I decided to buy a bunch from a few different brands and compare their prices and features. I’ll also give some ideas for how they can be used around the house.
Overview
Here are the technical specs of the different buttons I tried. Because prices vary, I rated them from 1 to 5 dollar signs (“$”), where “$” is 0 to $9.99, “$$” is $10 to $19.99, etc. all the way up to $50. Note all blueprints are for ZHA.
| Name | Protocol | Battery | Buttons | Actions | Price | Blueprint |
| Aeotec NanoMote Quad, MiniMote 2 | Z-Wave + | LIR2450, Rechargable | 4 | 8 | $$$$$ | Yes |
| Aqara Wireless Mini Switch | Zigbee | CR2032 | 1 | 4 | $$ | No |
| IKEA Tradfri Remote | Zigbee | CR2032 | 5 | 10 | $$$ | No |
| Hank Z-Wave 4-Button Scene Controller | Z-Wave + | LR44 LIR2450, rechargable | 4 | 8 | $$$ | Yes |
| FIBARO “The Button” | Z-Wave + | ER14250 | 1 | 6 | $$$$$ | Yes |
| MOES 4-Gang Tuya Scene Switch | Zigbee | CR2430 | 4 | 12 | $$$ | Quirk |
| Sonoff Zigbee Wireless Switch | Zibee | CR2450 | 1 | 3 | $$ | Yes |
| Shelly Button1 | WiFi | Built In, rechargable | 1 | 4 | $$$ | No |
| Aeotec/SmartThings Button | Zigbee | CR2450 | 1 | 4 | $$$ | No |
| Linkind 5-Key Remote Control | Zigbee | CR2450 | 5 | 0 | $ | Yes* |
* For this remote, there is a much better Blueprint if you are using Zigbee2MQTT.
Button Requirements
The requirements for my button selection are as follows:
1. They have work with Home Assistant (but let’s be honest, there’s not much that doesn’t these days)
2. They cannot require a hub – they have to work directly with Home Assistant via the ZHA integration (Zigbee Home Automation). Often manufacturers will say that a hub is required, but usually they can be bypassed easily. An exception to this would be Flic buttons, which I have not seen paired with Home Assistant without their hub.
3. They have to be under 50 dollars (US). This should be pretty easy, but you’ll see that Z-wave devices get a little pricier than the Zigbee or WiFi ones.
4. They need to be available at Amazon.com or Walmart.com.
There may be some popular buttons that are not in this review, but it’s probably because they don’t fit my requirements.
Single-Button Smart Buttons
Let’s start by looking at the single button smart buttons.
Sonoff Wireless Switch
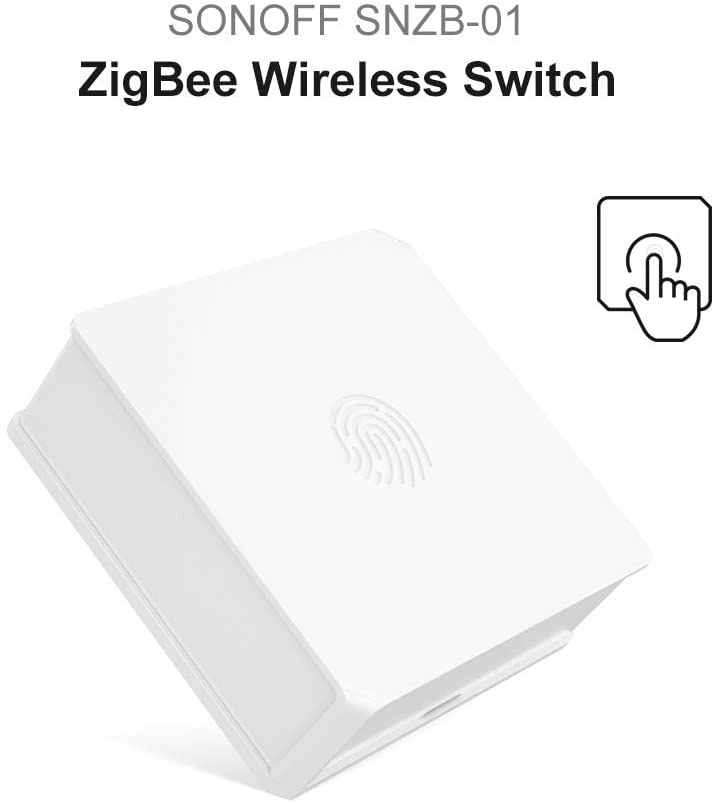
The first one I want to look at is the Sonoff Wireless Switch. This is one of the cheapest of all of the smart buttons I’m looking at in this article. It has a sharp, square design that isn’t super comfortable in the hand, but it has an interesting, (hardly noticeable) fingerprint design on the front of the switch, which is not a fingerprint reader of any kind – its aesthetic only. The entire body of the switch acts as a button so you depress the entire face. This makes it so that you can accidentally press it when you pick it up, and sometimes clicks aren’t always registered. It comes with adhesive backing, so it can be suck under a desk or table, and would be easy to press without looking.
This Sonoff button uses Zigbee communication, and pairing this button with Home Assistant was a breeze using ZHA – all I had to do was press and hold the reset button with a sim card tool until the LED flashed red causing the button to be recognized immediately.
In order to use the 3 actions that this button offers, you need to install a blueprint for it, which I have linked in the description. Once I did that, the device functioned as expected, allowing me to trigger routines with a single press, double press, and hold. The only issue I had with this button was getting off the battery cover. I had to pry it off with a screwdriver.
Aqara Wireless Mini Switch

The next one I want to show you is the Aqara smart button. This is on of the most popular buttons for Home Assistant users. It is about the same size as the Sonoff, but a but thinner, and WAY better looking. It features rounded corners which makes it comfortable to hold, modern grey and white coloring, and a large round button in the middle. The LED indicator is on the face of the switch so it is easy to see.
The button uses Zigbee protocol, and although Aqara’s description of this switch on Amazon says that an Aqara hub is required, that’s not really the case. I’ve paired many Aqara devices with ZHA with no trouble, and this was no different. Pressing the small reset button located on the side of the button allowed me to easily pair it with ZHA. Another advantage this button has over the Sonoff is that it features 4 actions rather than 3. You can use a single press, double press, hold, or release as an automation trigger, and there is no need to install a blueprint to begin using this button in Home Assistant! I have this button on my nightstand as an alternative to my NFC tag triggered automation I’ve shown in a previous video on my YouTube channel. At four dollars more, it’s an obvious choice over the Sonoff button.
SmartThings Button
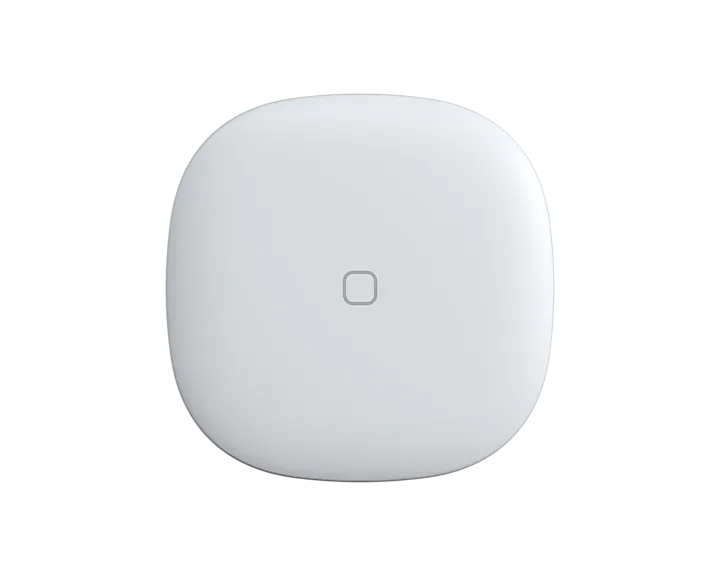
The SmartThings button is one used by many people across the different smart home platforms. Originally made by Samsung, you can now find these buttons on Amazon, but now sold by Aeotec since Samsung is getting out of the hardware side of the smart home industry. This button is easily one of the most aesthetically appealing to me of all the single-press buttons we will cover in this review. Its solid white design with that little rounded square in the center of the face (that doesn’t do anything) gives it a very unique look. Like the Sonoff, the entire body of this switch acts as the button. This button as feels much higher quality than Sonoff or the Aqara.
This button is also a Zigbee device, and is easily paired with ZHA. Once paired it can be used right away with no blueprint. It supports 3 actions, single press, double press, and hold, but also has another feature that none of the other buttons in this review do – it has a temperature sensor! The temperature sensor is immediately available in Home Assistant once it is paired. This button has been sitting in my office for quite a while, and I use it to control my office lighting scenes as well as report the temperature of the office. At 30 dollars, you are certainly getting what you pay for in my opinion.
Shelly Button 1
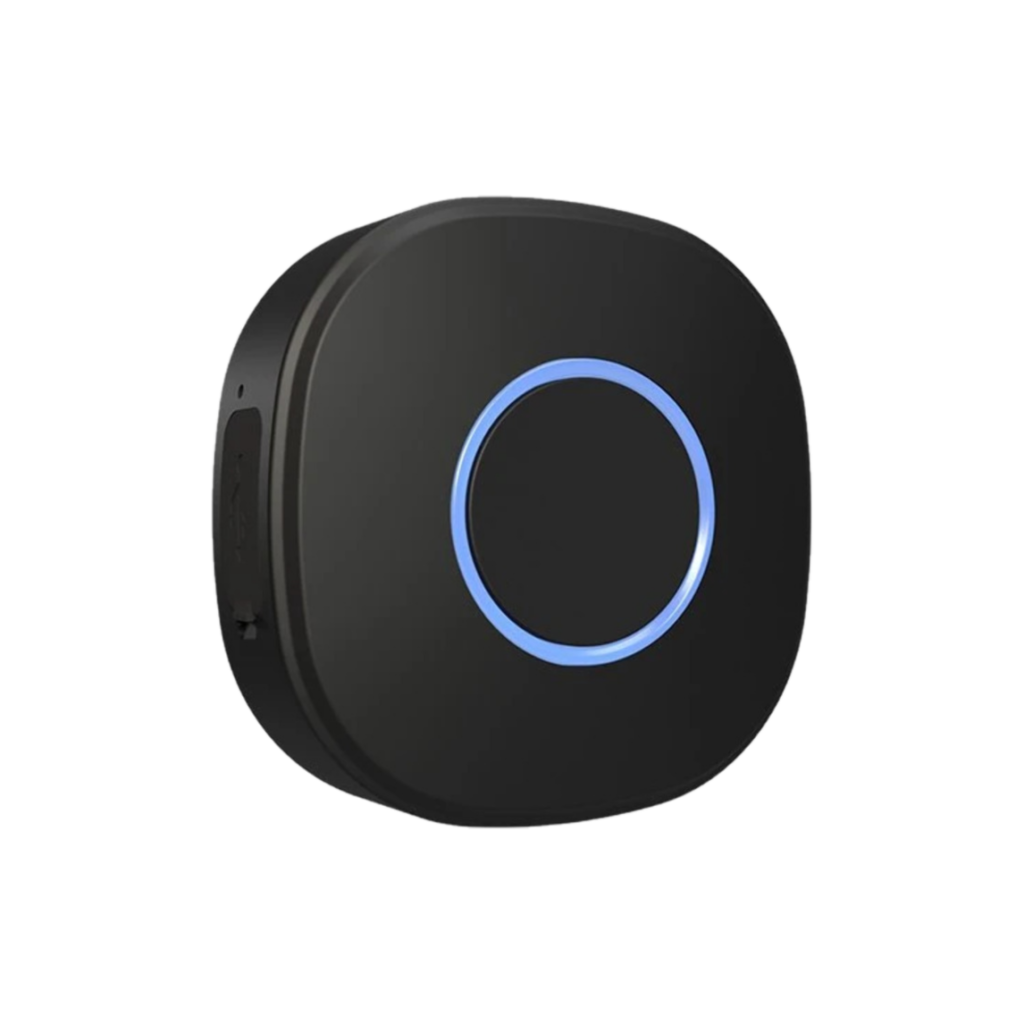
The Shelly Button1 is different than the rest of the single button remotes today for a few reasons. You can get it in either white or black, and it has an LED indicator ring on the front around the button. It also has a built-in rechargeable battery with the option to power it via micro-USB cable. The button is also IPX5 certified, so a little sweat or rain drops won’t hurt it. The design is very sleek, and the LED indicator ring ads a nice touch. The button also has a hole for a keyring loop for taking it with you places.
This button is also different than the rest because it uses WiFi communication. Although I don’t prefer WiFi smart home devices, the advantage to the WiFi button is that it can be used to trigger automations when you are somewhere else where there is WiFi, but not on your home network. To do this it needs a connection to the Shelly Cloud, which I know is an automatic “NO” for a lot of smart homers. This means that you can have the button at a different location, and as long as it has connection to the internet, it can trigger automations at your home. The setup process for this button is a little tedious, but is clearly described in a video on the Shelly YouTube channel. Once connected to the Shelly app, it should be automatically discovered and can be added to Home Assistant via the Shelly integration. In Home Assistant, 4 automation triggers are available without the need of a blueprint. However, that’s where I started having a lot of issues with responsiveness of the button. Tapping the button after not having used it for a while caused the LED ring to flash white for a few seconds before turning green. Once green, it will actually trigger an automation when you press the button. The only way to stop the button from sleeping was to leave it powered by USB continually. However, I noticed that there was a firmware update available, and once I updated it the button was a lot more responsive, although not quite as quick as the Zigbee devices I tested. This may be expected from a WiFi device, but it’s hard to justify buying this button over some of the others at the price it is at. The only reason to do so in my opinion is because of its unique look.
Fibaro “The Button”

“The Button” by Fibaro is one of the most unique of the many smart buttons I’ve used. It is styled to look like an emergency button, but it can be integrated with Home Assistant to control scenes or trigger automations. Even though it has largely negative reviews on Amazon, its unique look made me have to try one out. It has a plunger-style push-button, with a variety of bright colors to choose from. It also comes with an adhesive so that the button can be adhered to a surface of your choice.
The Button uses Z-Wave communication protocol, and easily pairs with Home Assistant via Z-Wave JS. With a blueprint, the button is capable of 7 actions: single press, double, triple, quadruple, and 5x presses, as well as a hold, and release. Because of its appearance, this button might work best as an emergency/help button if you have someone elderly in your home that needs to be able to call you quickly. You can set up an automation that sends an audio message on all of your Echo Dots or Google Homes when the button is pressed. The only issue I had with this button is that the batteries are not standard coin batteries, so I had to buy some as backups. Overall, the unique look of this button doesn’t really justify the high price for me.
Multi-Button Remotes
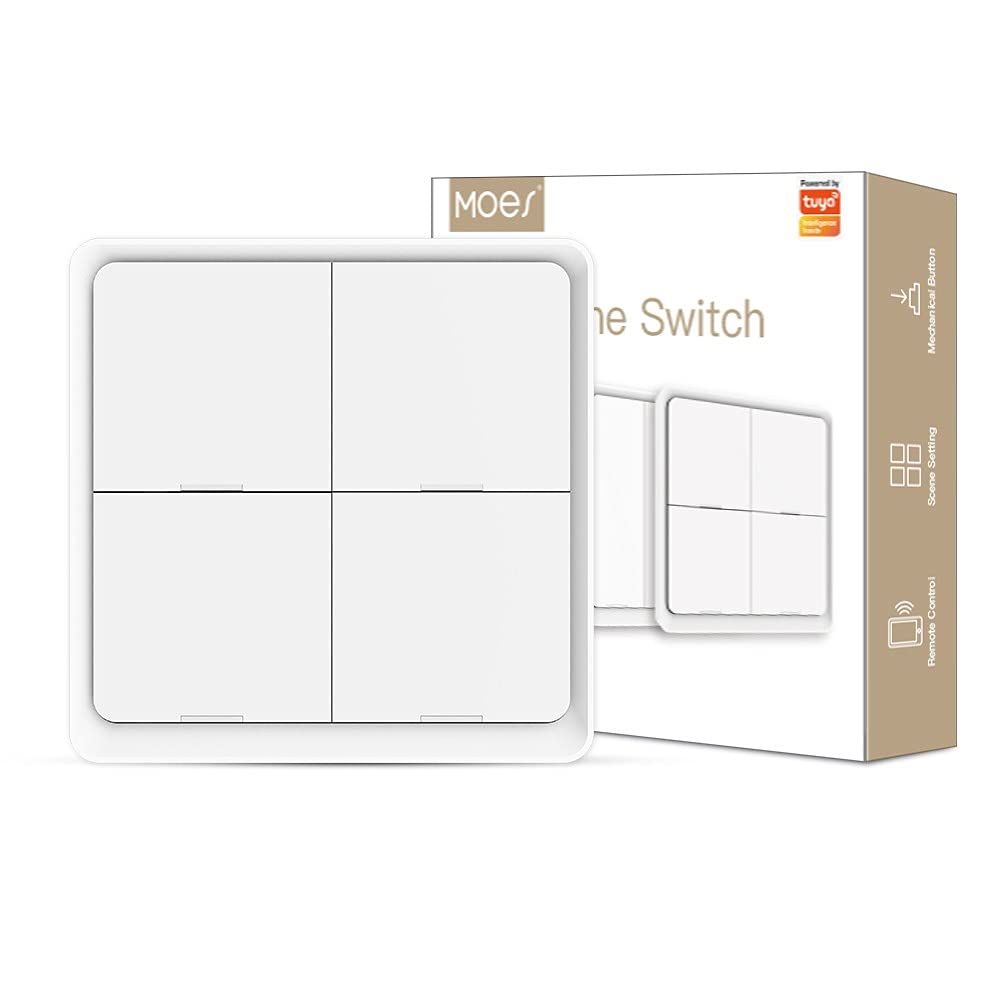
Hank Four-Key Scene Controller
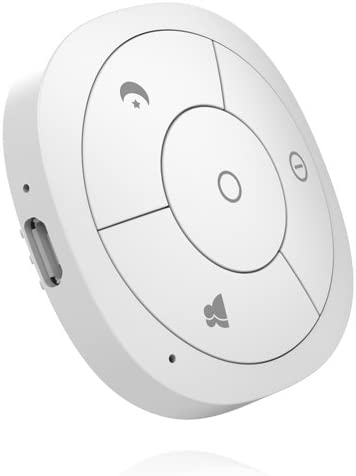
The Hank 4-Key Scene Controller is impressively priced for a Z-wave device. It has 3 equally sized buttons, one with a moon and star on it, one with two people, and one that appears to be an I/O on/off symbol. The fourth button is directly in the middle, and it has a small circle on it. The button has a clean and simple look to it, but it feels kind of cheap. Some of the buttons have different amounts of click than the others when depressed, which is weird. The battery is rechargeable, and can be charged by the micro-USB port on the one side
As I mentioned, this is a Z-Wave device, which paired pretty much instantly to Home Assistant via Z-Wave JS. However, each button has only 2 actions, a single press and hold, but a blueprint needs to be installed in order to use them.
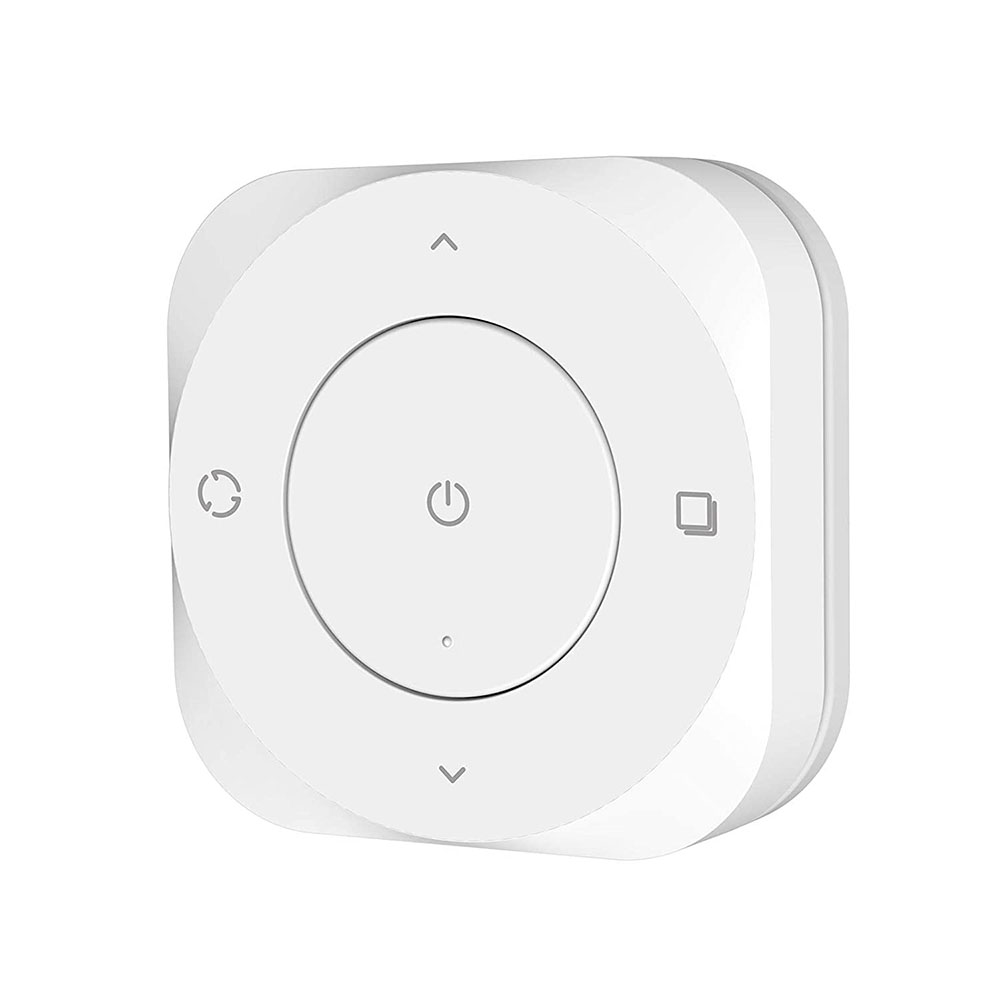
IKEA Tradfri Remote
Next is the IKEA Trådfri Remote. This Zigbee remote is made for other IKEA Trådfri devices using the Tradfri hub. However, the hub is not required to use it with Home Assistant.
The remote feels very high quality, the nicest feeling of any of the buttons I’m looking at in this review. The perfectly round button in the center, with four equally sized buttons surrounding it, and the white/grey combo gives it a modern look that only IKEA can manage. The front of the remote is white with a matte finish, and it’s easy to see the button icons. The back is grey, with some sort of grippy plastic, which makes it very easy to hold onto and allows it to stay put on slippery surfaces. The feel of it makes you want to keep picking it up for some reason! It also comes with a magnetic wall plate that can be mounted to the wall, and then the remote can be stored on the wall plate, held in place magnetically. Since it’s so good looking, it may be something you’re comfortable with mounting out in the open where anyone can see. The remote has 5 buttons, a brightness up, brightness down, left arrow, right arrow, and an on/off button.
Typically, this would be used with a smart Trådfri light bulb to control its brightness and power state, and then the left and right arrows would be used to switch to a different bulb to control. However, in Home Assistant each button can be used to trigger whatever automation or scene you want. There are a total of 10 actions, a single press and a hold for each button. The pairing of this device using ZHA was not exactly straightforward. The instructions mention holding the pairing button (which is found under the battery cover) for 10 seconds to pair the device, but that didn’t seem to work for me. I googled around and someone mentioned that you need to press the pair button 4 times in order to reset and pair it. When I did this, a hidden LED indicator on the front middle button lit up showing me that it was pairing. After that it worked fine, with no need for a blueprint! There is a blueprint available if you want to use the brightness and power button to control a single light. I’ll link that for you. At around 25 dollars, this is getting a lot more than you pay for.
Aeotec NanoMote Quad
The Aeotec NanoMote Quad is also a very unique device. This Z-Wave remote features 4 buttons, 3 around the edges, and single button in the middle. It bothers me that the buttons are not all equally sized, but a cool feature is that each button has raised nubs on them. The top button has a single nub, the bottom left has two, and the bottom right has 3. This helps you know by feel which button you are touching. This is awesome because if it’s in your pocket or you are in the dark, you don’t have to see the remote to know which button you’re pressing. This button also has a rechargeable battery that can be charged via the micro-USB port. It also has a keychain ring that you can attach by taking off the battery cover and slipping it through a hole in the body of the button. It seems like they designed it to be something that you can carry around with you in your pocket or on your keyring, which I can see being pretty useful with those raised nubs.
Adding this device to Home Assistant via Z-Wave JS was super easy, but a blueprint will need to be installed in order to use the 8 actions. Each button can be single pressed or held to trigger an automation. Since Z-Wave has a bit longer range than Zigbee, this could be used in your car as a garage door opener remote if you have a smart garage door opener but don’t have a remote in your car. I set button 1 to open/close both garage doors, button 2 for the left garage door, and button 3 for the right garage door. The center button I set up to toggle the garage lights.
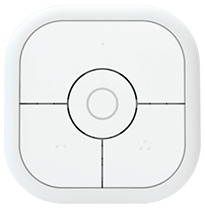
4-Gang Tuya Scene Switch
The Tuya 4-Gang Zigbee Switch is a remote you can find sold by multiple sellers on Amazon, so I think it’s one of those ones that gets rebranded a lot. Despite this, the remote is pretty cool. It is easily the largest of all of the ones that I’m looking at in this review, featuring four large and easy-to-press buttons. It comes with adhesive strips for the back, and is clearly meant to be adhered to a wall or other surface. I picked this one up specifically because I saw a video by Smart Home Solver where he used a Broadlink Button as a toddler remote. However, with a Broadlink Button, a hub is required, so I chose this instead. Large stickers or pictures can be place on each button to help kids use it. I decided to use this button with my projector setup. In a previous video, I showed how I automated my entire projector setup using the Broadlink RM4 Pro. Now the kids have a remote mounted to the projector cart that can trigger these automations with a button push.
This remote is meant to be used with a Tuya Zigbee hub and the Tuya app, but it can set it up in Home Assistant via ZHA. However, when setting it up I found that it would not register the button presses, and ended up having to work with others in the Home Assistant community to get it working. I ended up having to install a custom Zigbee quirk for it to function. This process is a bit complicated, so I can’t say I recommend this switch to a beginner. Instead of the 12 actions that were advertised, this remote only has 6, even with the custom quirk installed. The left two buttons each only register a single press, while the two on the right register a single press and a hold action. Although the switch only costs 27 dollars, only getting half of the actions that were advertised is a bummer, and I’m considering returning the switch. I’ll leave a link to the GitHub pull request related to this switch.
Linkind 5-Key Remote Control
OK, here’s the last button that I have tested with Home Assistant. It’s also the cheapest of all of them. I was browsing through the different options on Amazon, and I saw the Linkind 5-Key Remote Control for an unbeatable price of 10 bucks. This remote has pretty poor reviews, mostly because it doesn’t seem to work with its own ecosystem. However, since it is a Zigbee device, I decided to try it out with Home Assistant. A quick google search showed me that there is no blueprint for it for ZHA, although there is for Zigbee2MQTT, so I did what any smart homer would do – I made it work. I actually spent way too much time on this little remote, but I wrote my first, from scratch, ZHA blueprint for it, so that most of its functions can be used in Home Assistant.
Hardware wise, this remote has 5 buttons. It also has a magnetic wall plate similar to the IKEA remote. The wall plate has holes for screws as well as an adhesive sticker for sticking it right to a surface. The device is made to control a single or group of RGBW lights. The blueprint I wrote allows you to control the brightness, color temperature, and RGB color of any light entities that you choose. Due to the nature of the Zigbee commands that it sends, the remote has 5 brightness levels, 4 color temp settings, and 6 preset colors. Each of these are selected by cycling through them using the up/down arrows. Pressing the left button (looks like a refresh symbol) changes the selection mode between brightness, color temp, and color. The center button turns the light(s) on and off, and the right button doesn’t actually send any Zigbee commands (as far as I can tell), so it does nothing.
I’ll leave a link to my blueprint, but it definitely needs further development.
This button could be used to control a group of smart bulbs at the same time in a room. An example would be controlling the lamps in your living room all at once. The ability to easily adjust their brightness simultaneously might make this 10-dollar switch worth picking up.
Final Thoughts
Favorites
For single buttons, I would recommend the Aqara Button as the best budget option. The low price combined with the ease of install and modern look makes this button an easy recommendation.
If you’re looking for the best bang for the buck, I would recommend the Samsung/Aeotec SmartThings Button. The quality feel of it as well as the extra temperature sensor makes this button a one-of-a-kind!
For multi-button remotes, I’d recommend the IKEA Trådfri Remote without hesitation. It’s one of those devices that just makes you want to pick it up. On top of that, it has more actions than any of the other devices in this review.
A runner up to this remote is the Aeotec NanoMote Quad. Although it has fewer buttons and actions than the the Trådfri remote, it has those raised nubs that are surprisingly useful. Since it uses Z-Wave protocol, the ability to use it as a garage door opener from outside the house is awesome.
Least Favorites
Here are the ones I would NOT recommend.
First, the Shelly Button1. This was easily the biggest disappointment because it had so much going for it. The almost 2-second delay that occurs when the button has been pressed after it has been “sleeping” is too much, and the button doesn’t have enough other features going for it for me to recommend it.
Next, the Hank Z-Wave 4-Key Scene Controller. This remote really has nothing special to offer except for the low price for a Z-Wave device. Since there are other remotes out there like the Tradfri remote and the Aeotec NanoMote, I can’t recommend this one.
If you liked this review, keep an eye out for more on my website. Also, be sure to subscribe to my channel, since I’ll be doing more review videos, as well as guides and videos on automation ideas.
Anyway, thanks for reading!
Hi, you write in your article you don’t need an hub to connect the button, but in case of the IKEA Tradfri Remote, when you start up the IKEA app, the first thing he aks is to connect to the Tradri hub. Can you explain how to connect this remote button with Google Home without the hub ?
Hi Gert, sorry I missed this! To connect the button to Home Assistant, you need a Zigbee USB dongle plugged into your Home Assistant device to act as a Zigbee radio. This makes Home Assistant your hub rather than the IKEA hub. There is no direct way to connect these devices to Google Home unfortunately.