Intro
What’s up Smart Homers, my name’s Aaron. In this article I’m going to show you a ton of different mmWave presence sensors. I’ll show you some of the testing I’ve done, and tell you which ones are my favorites and which are my least favorites!
One of the first things people do when starting out with smart home tech is automate their lights. Typically they’ll use some sort of motion sensor combined with smart bulbs or smart switches. If you read my motion sensor comparison article, you’ll remember that I compared a TON of different PIR motion sensors, but they all had one problem: they couldn’t detect human presence. Instead, they work by detecting changes in Infrared Radiation, meaning there has to be significant movement in order for the sensor to pick up human activity.
Recently there’s been an abundance of sensors of a different style popping up called millimeter-wave (mmWave) sensors, or human presence sensors. Instead of passive infrared, these use mmWave radar to determine if there is human presence. These can pick up the most subtle of movements, as small has the movement caused by human breathing.
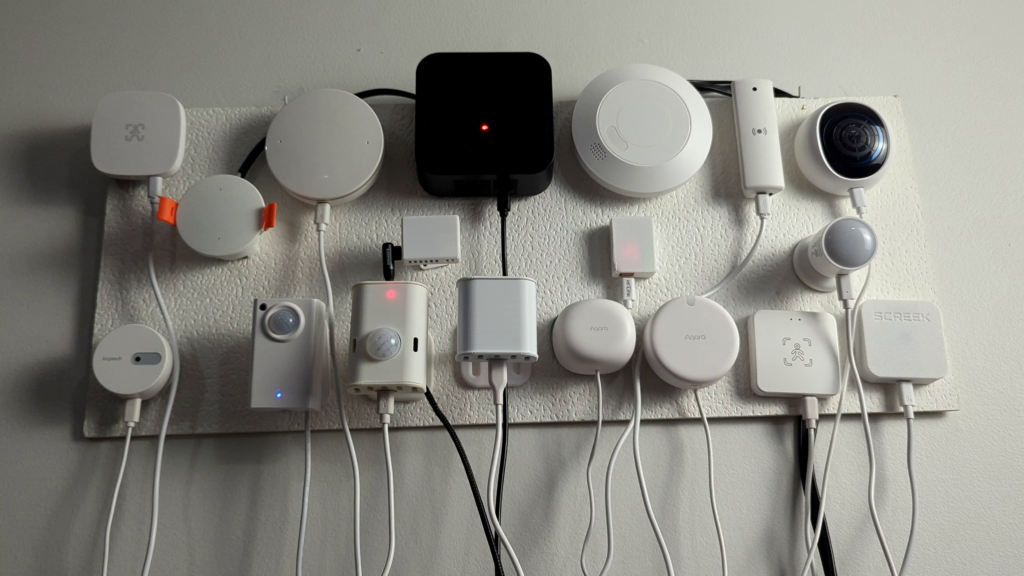
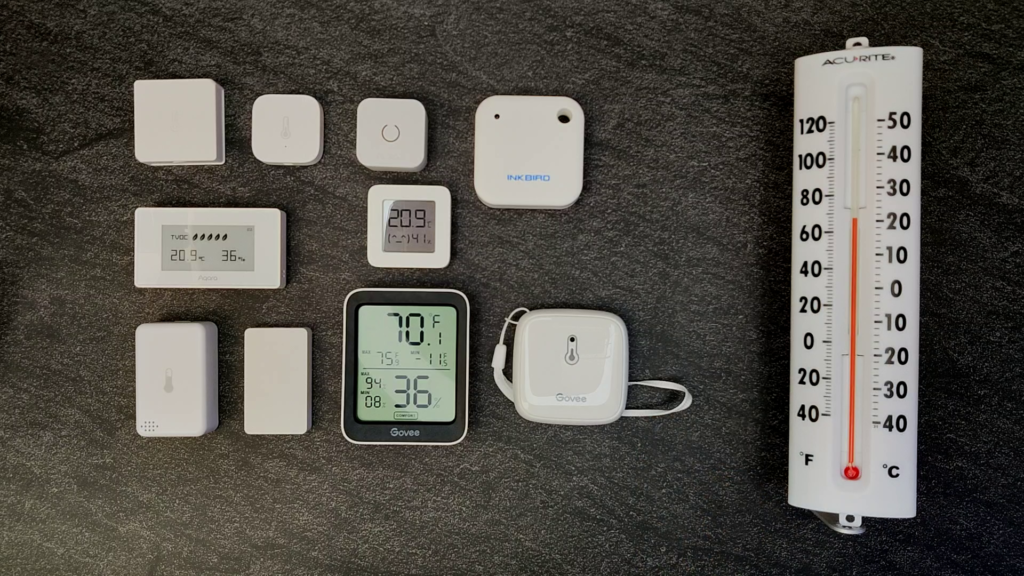
I bought 16 of these presence sensors, and I’ve tested each to see how they work. I’ll compare their prices and features, and then I’ll show how they work my smart home platform of choice, Home Assistant. If you don’t use Home Assistant, I can’t guarantee that these are gonna work for you.
Note: I’ve put affiliate links for each sensor in this article. Using these links helps out my work financially at no cost to you.
For all of these devices, I’ve tried to avoid those that rely on cloud connectivity, because those devices can stop working if the company hosting the cloud goes bust. Also, while a couple of the sensors will work on WiFi, some use Zigbee, which is a different wireless protocol and requires a special hub or radio set up to get them working.
Also, none of these devices are battery powered, because mmWave sensors are not passive like PIR sensors, and they use enough power where batteries are not practical.
In Home Assistant, I’ll be using Zigbee2MQTT to add these devices, as device support is much better for Z2M than ZHA, Home Assistant’s default integration for Zigbee devices. However, I will show what entities are exposed in ZHA so you can see that.
Tuya ZY-M100-S
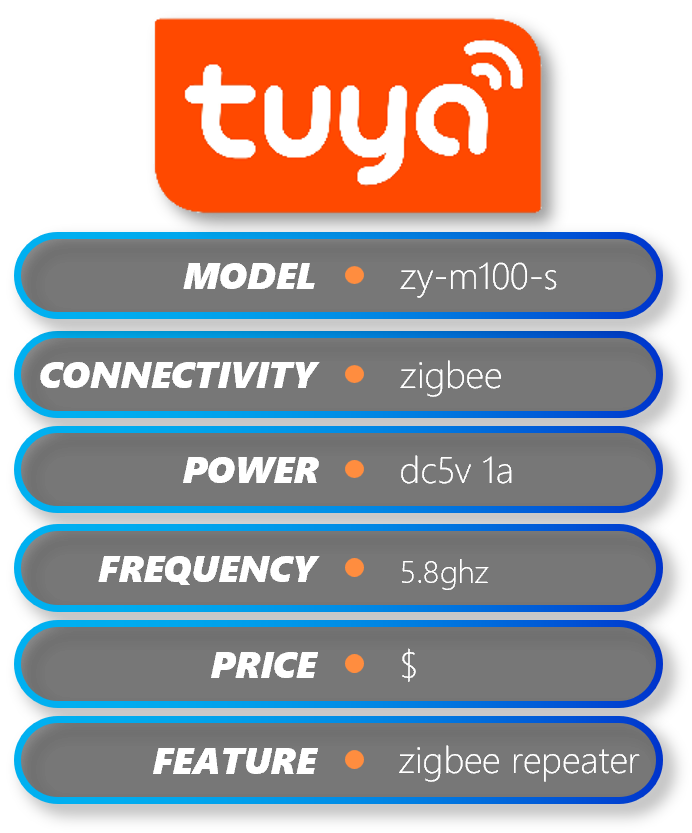


The first one we’ll look at is the Tuya ZY-M100-S. This sensor has a nice, clean look, that I think can blend in well with the modern smart home. It has a white and grey aesthetic that reminds me of Aqara devices, but may be a little less polished. On the front you have an icon that indicates it’s a human presence sensor, and on the back you have some devices info and some ventilation holes. The front also has two holes, one for light level sensing, and one for an LED. The bottom edge has a pairing button and a USB-type-B port for powering it. It comes with the cable, but no adapter.
The seller that I bought this device from provided an adhesive stand to mount it to a wall or horizontal surface, but if you end up buying it from somewhere else, you can buy the stand separately on AliExpress for a dollar.
Pairing
To put this device into pairing mode you just plug in the USB cable and connect it to power. The red LED lights up and then goes out for a minute. Press and hold the pairing button for about 8 seconds until it flashes, and then it will blink repeatedly to let you know it’s in pairing mode. Once paired, the light will go out.
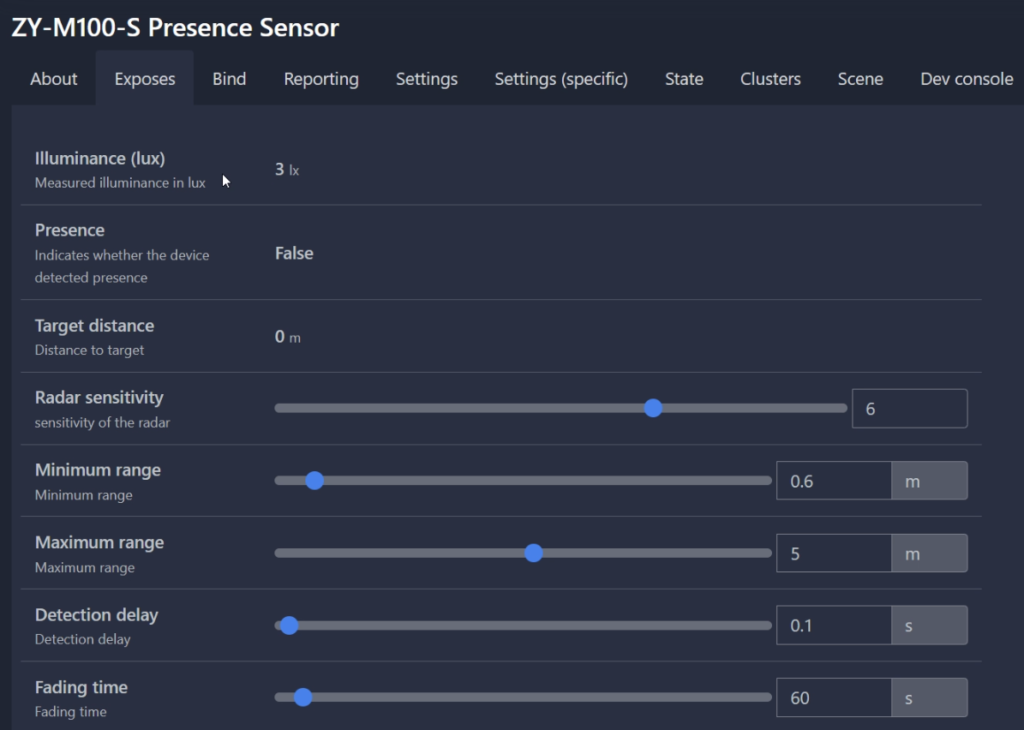
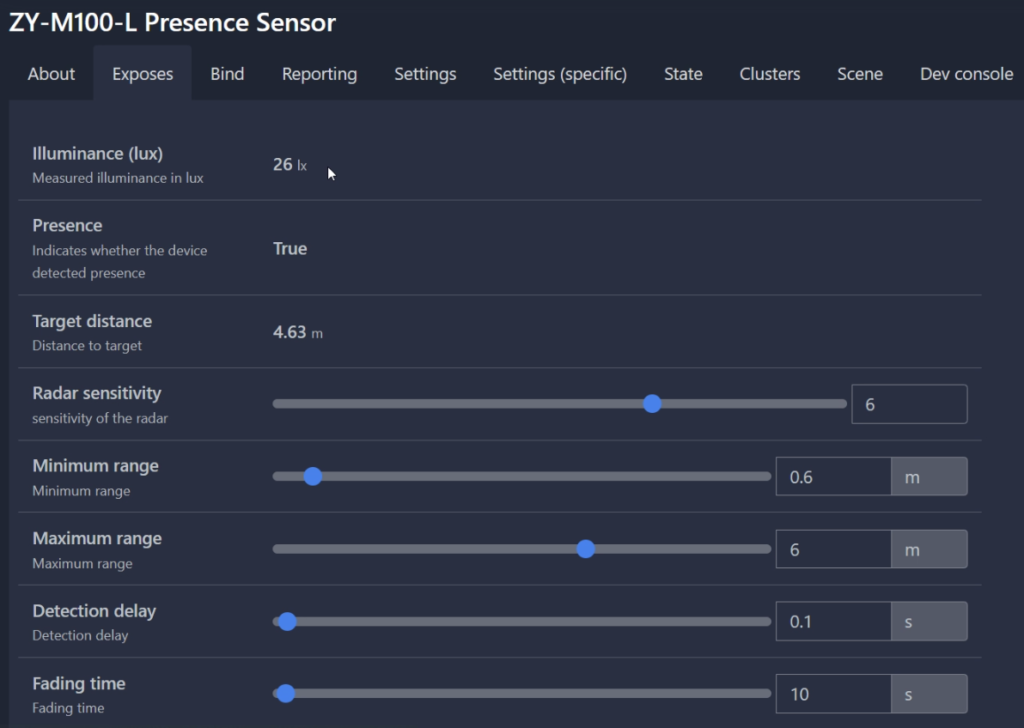
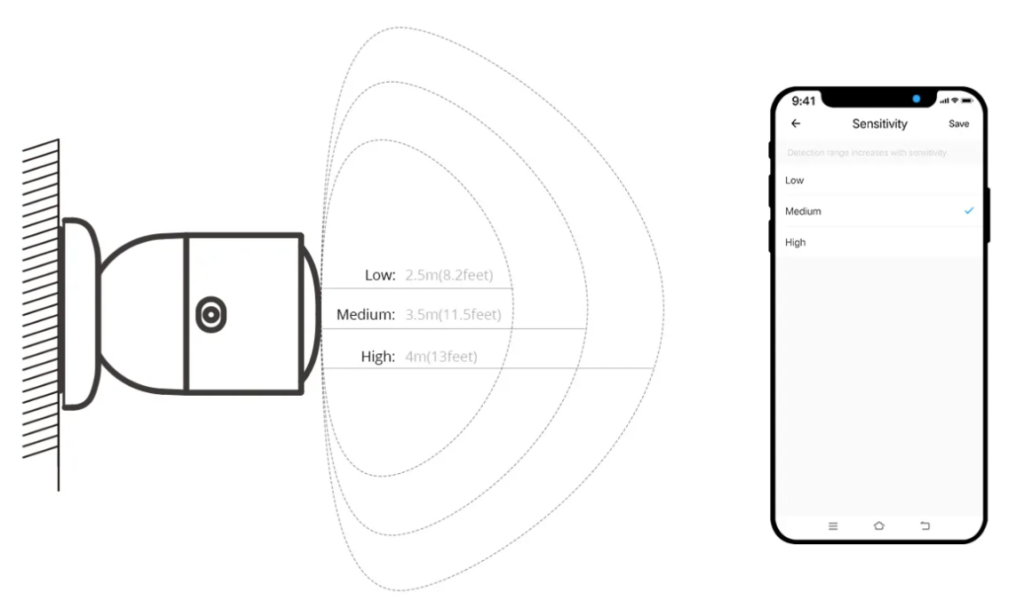
In Home Assistant you get Illuminance, Presence, and Target Distance sensors, but you also get options to adjust Radar Sensitivity, Minimum and Maximum detection ranges, detection delay, and fading time.
Features
Despite this being a fairly cheap sensor, it has quite a few adjustment options. Target distance tracking was not very accurate, so I wouldn’t rely on that data, but since it has the sensitivity and detection delay adjustments, it’s pretty easy to dial in for a living room sized room.
Tuya ZY-M100-L
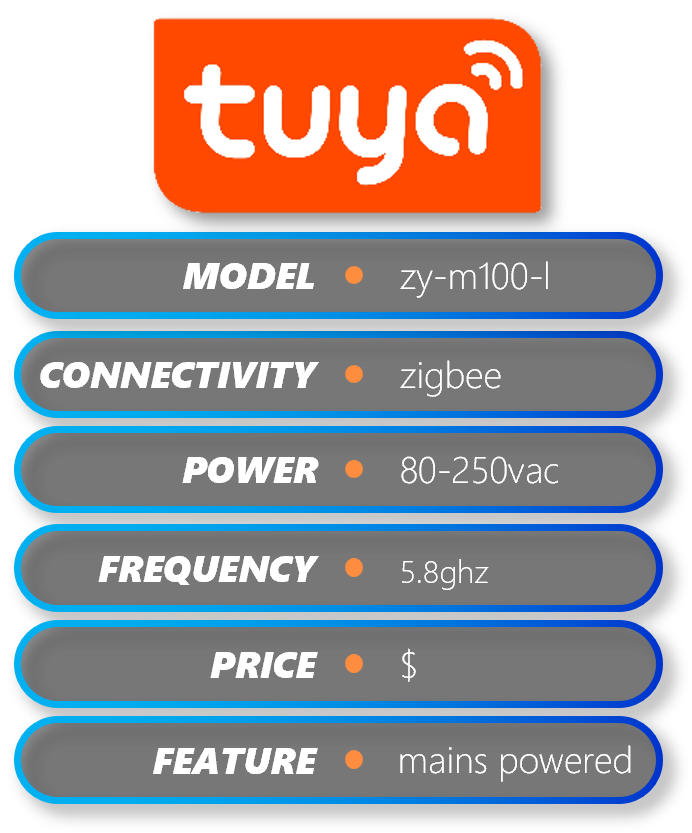
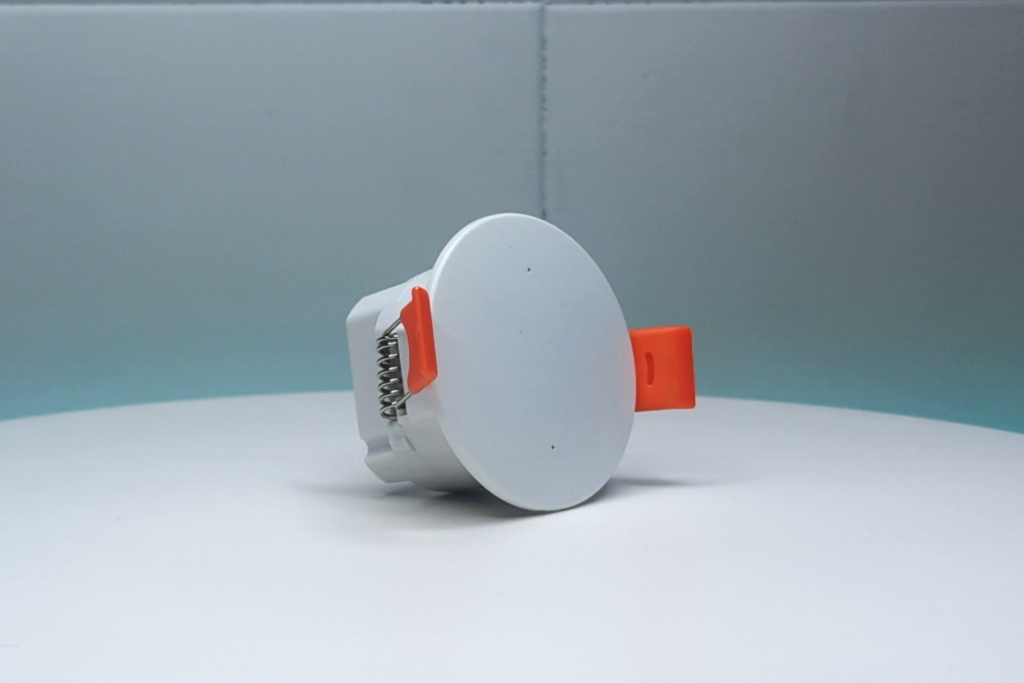

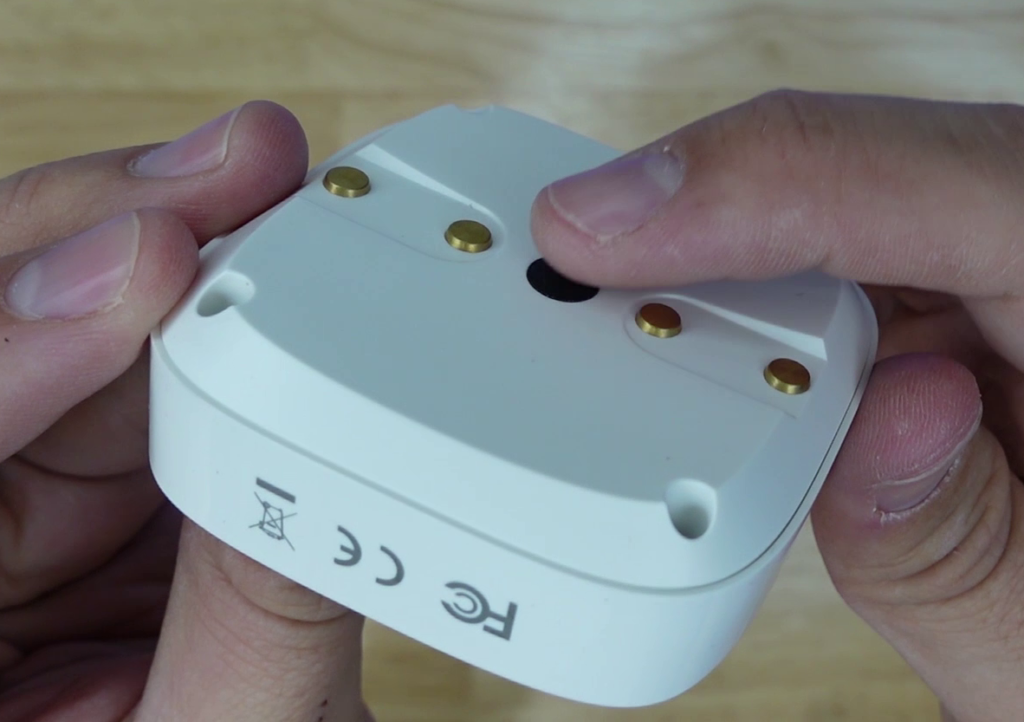
This next one is very similar, except that it’s a ceiling mount unit rather than a wall or stand mount. It has a round, flat face, with a lip that extends wider than the body of the device. The front has two holes like the previous device, one for light level sensing, and one for the status LED. The two orange flipper arms are spring-loaded, and the idea is that you use a hole-saw to cut a hole in your ceiling, fold the arms against the body, and pop it into the hole. The retaining arms will snap into place, holding it against the drywall, and the lip on the face will retain it from passing up into your ceiling. You need a 2” or 50mm diameter hole in your ceiling for this device.
On the back, you’ll also notice that this has two spring-terminals for Line and Neutral wires, because this device is powered by 80-250 Volts AC rather than 5V DC. It also has a paring button back there, as well as some device information.
Pairing
To get this thing working we need to connect power, and while this would typically be hard wired once installed in the ceiling, I’ll just test it by connecting it to a short electrical cord. This would be the same with residential wiring – to insert the wires you just depress the spring terminal, slide the wire in, and release. Do this for both the line and neutral wires, and then plug it in if you’re using a cord, or turn the breaker back on if you’re installing it in the ceiling. If you look at the side of the device you’ll see an LED flashing through the side wall, and that should indicate that it’s in pairing mode. If it doesn’t flash, hold the pairing button on the back until it does.
This device exposes the exact same things that the previous device did. In Home Assistant you get Illuminance, Presence, and Target Distance sensors; and options to adjust Radar Sensitivity, Miniumum and Maximum detection ranges, detection delay, and fading time.
Features
I really like the idea of a ceiling mounted sensor, and this one is pretty inconspicuous. With that style you really wouldn’t think target distance measurement would be very important, but this sensor had much better target accuracy than it’s wall-mounted brother!
ZG-205ZL
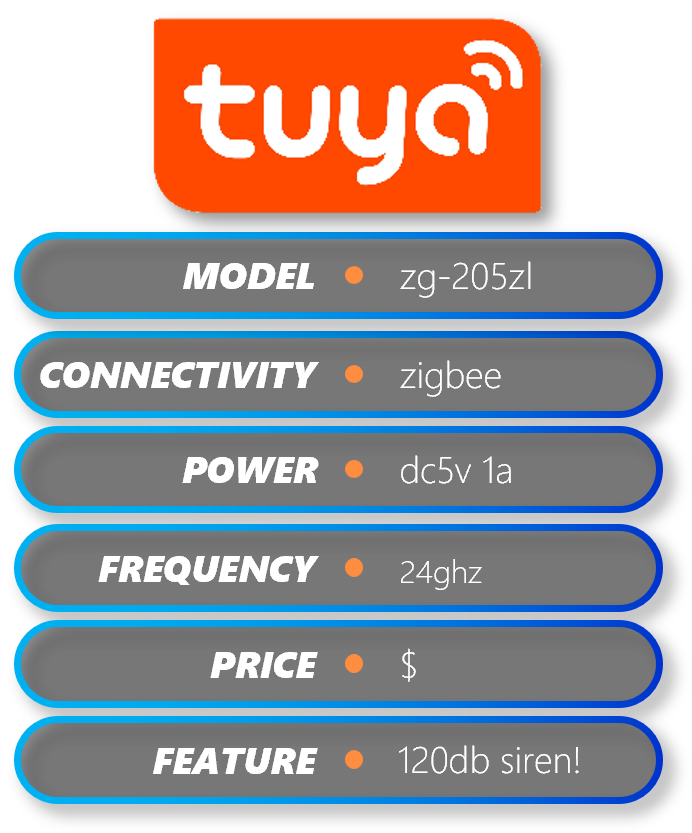
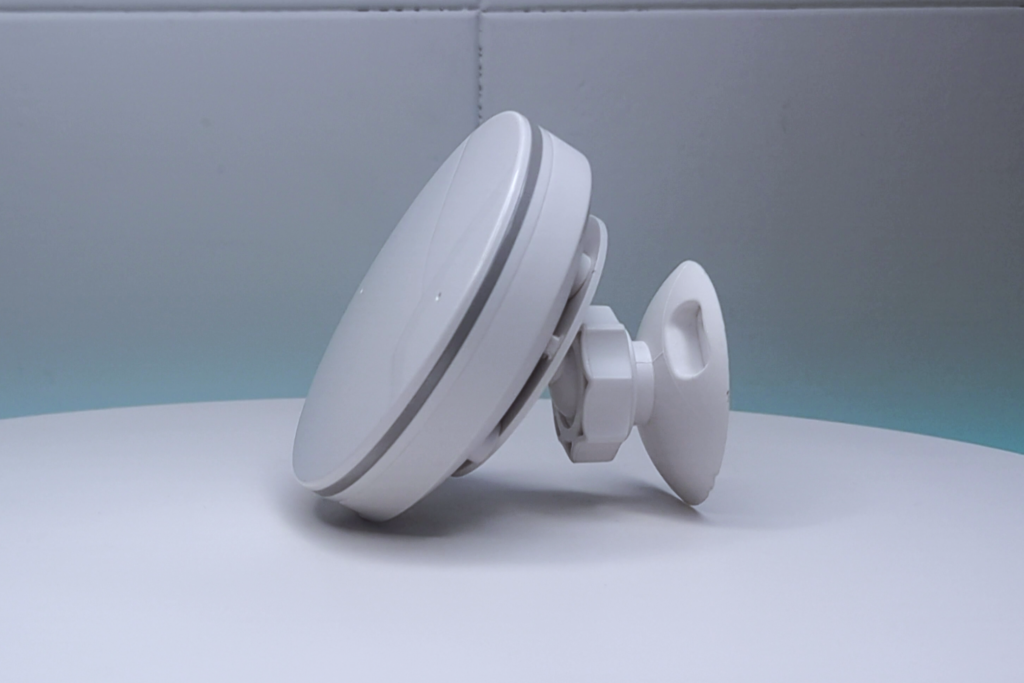

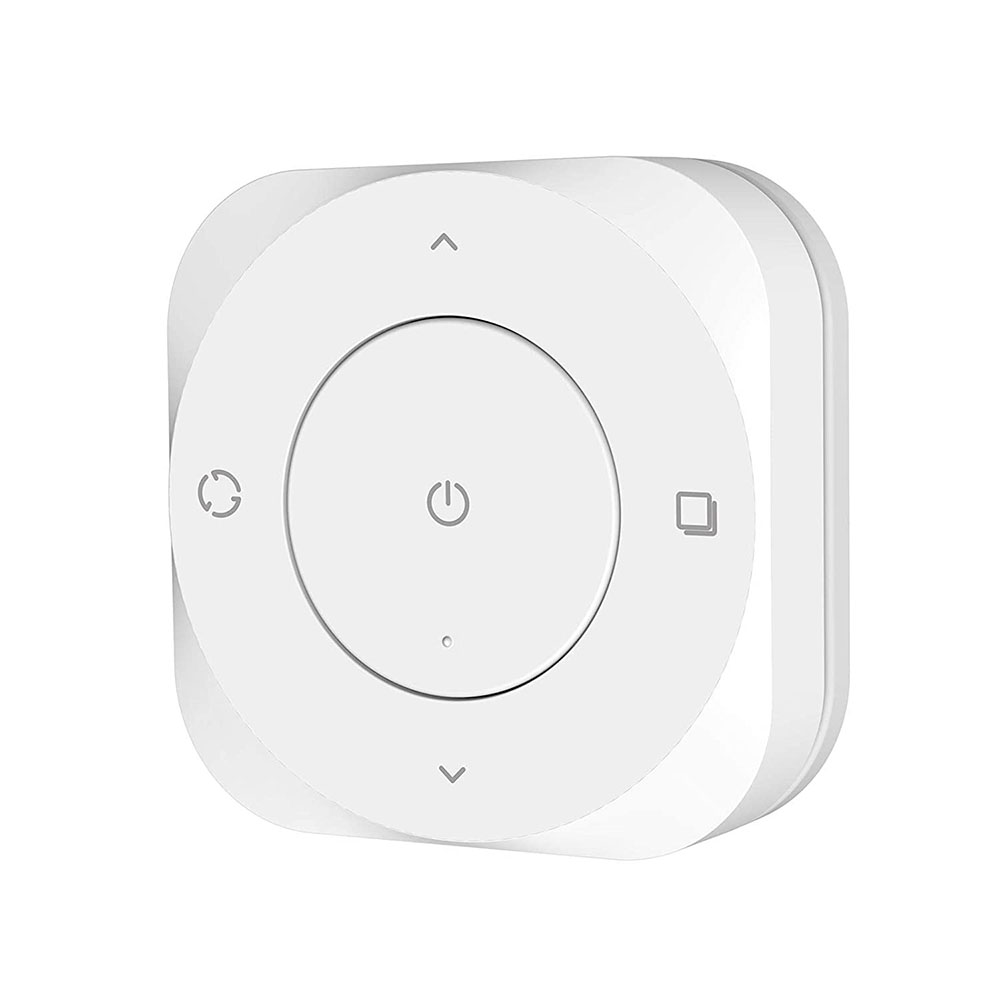
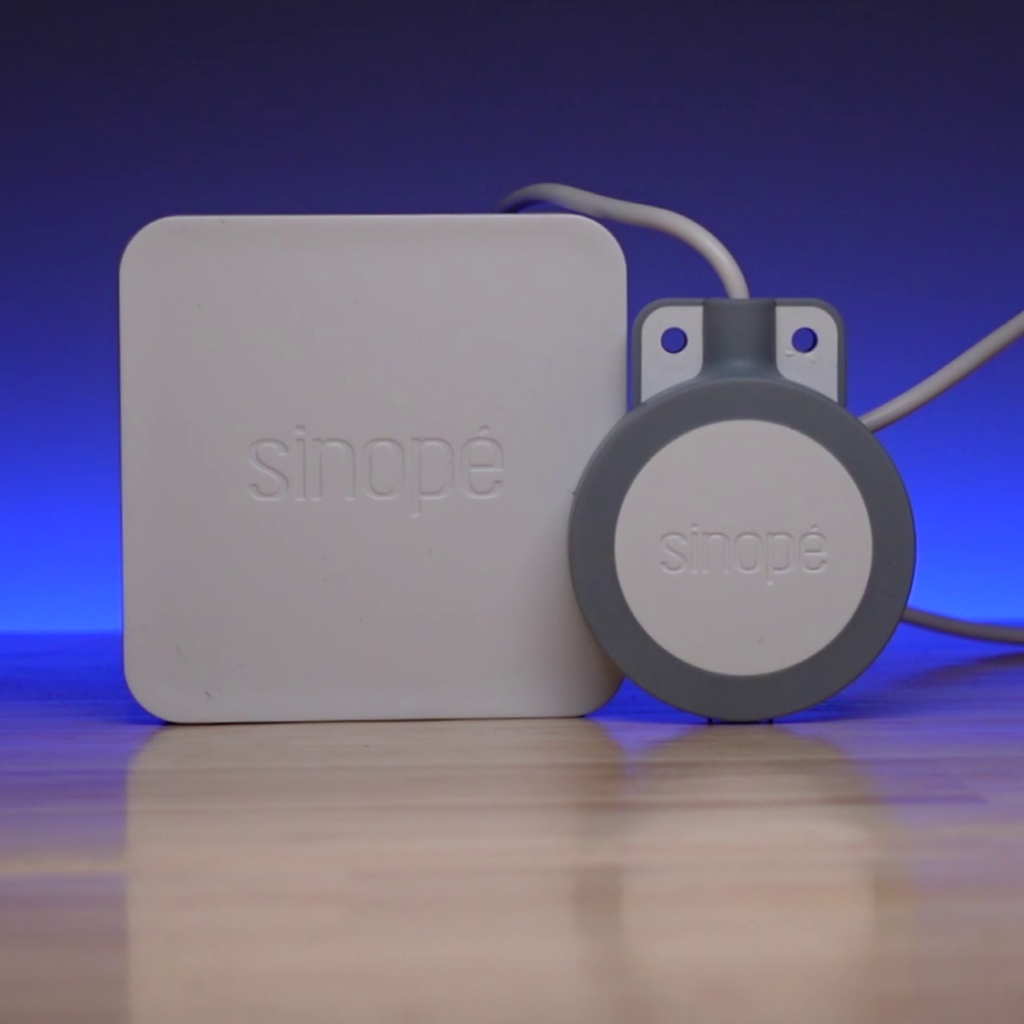
This next device takes things to another level in terms of features. It appears to be meant for use in a ceiling-mount application, but the feature that really stands out is its alarm capability. The device is puck-shaped, but it comes with a stand that can either be mounted with adhesive or screws. One thing I really like is that they provided an extra-long USB-type-B cable for the 5VDC that it requires, so you hopefully won’t need to buy a cable separately. It also comes with a reset pin tool because that’s how you put it into pairing mode. On the back of the device, you can see a bunch of speaker holes, because this device has a 120dB alarm! The alarm can be set to a couple different modes, where regular is a typical alarm sound, and the doorbell mode plays a tune. You can also see holes to attach the mount. On the edges of the puck, you can see a translucent ring, which actual has some LEDs behind it and will flash at different times. There are two holes on the front like we saw with the previous ones, at least one of them is for illuminance sensing. Overall, this device is a bit big, but to me it’s looks well designed, and I like the style.
Pairing
To get this device paired with Home Assistant, we just plug in the provided USB cable into power. When you do that, the LED ring round the edge of the device lights up white, but then goes out. It’s still not in pairing mode, but it will flash blue when it detects presence. To put it into pairing mode, use the provided sim card tool to depress the reset button found on the back of the device. Hold it for three seconds, and then you should see the LED ring start flashing red. It will stop flashing red and flash blue once when it has finished pairing.
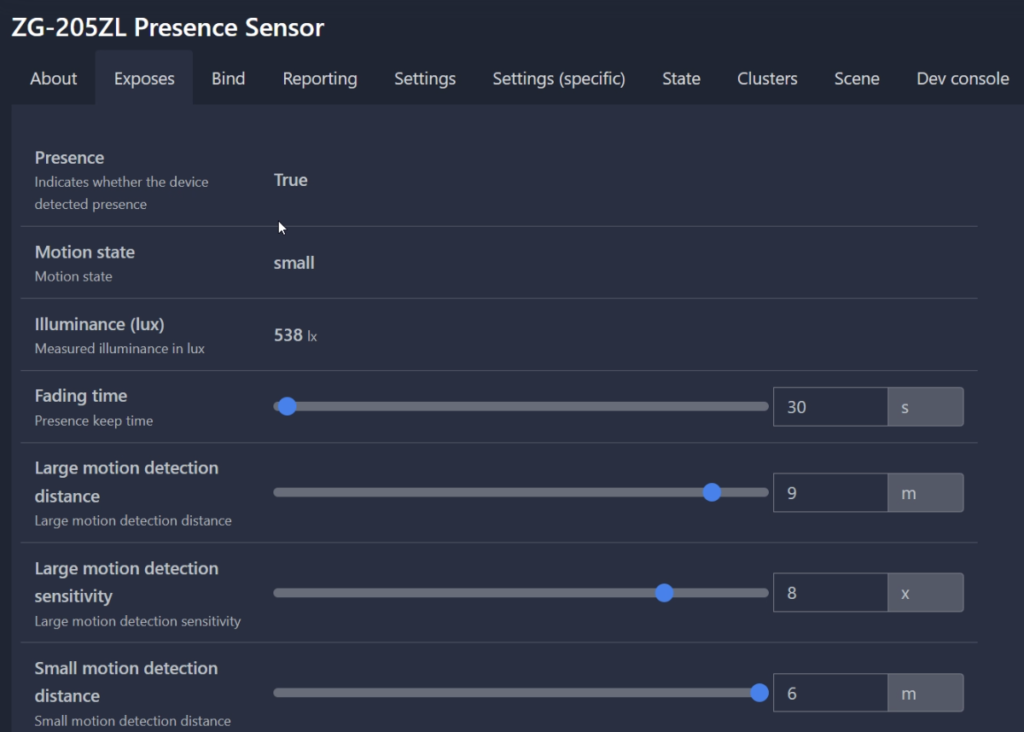
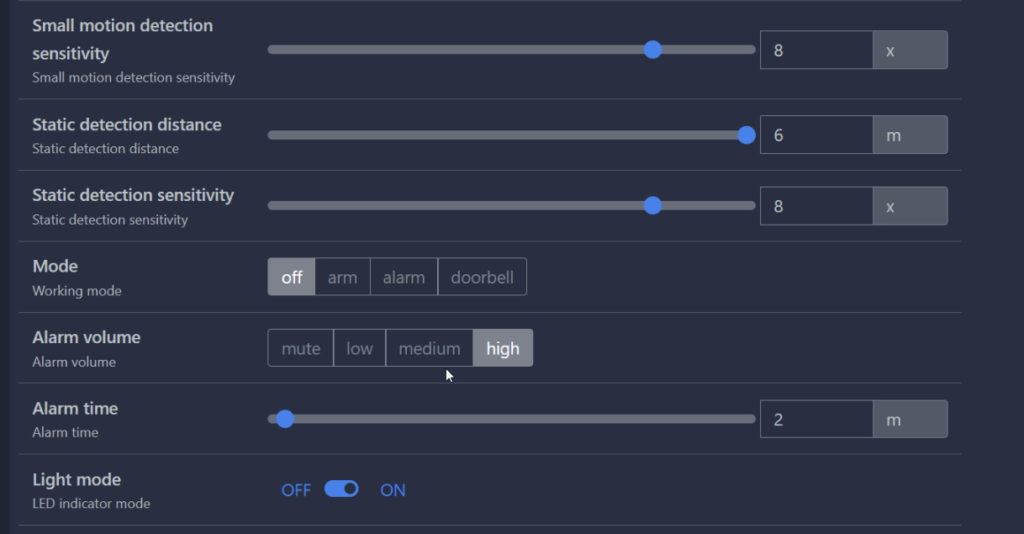
In Home Assistant you get Presence, Motion, and Illuminance sensors, and a ton of fine tuning adjustments including Fading Time, Large Motion Detection Distance and Sensitivity, Small Motion detection Distance and Sensitivity, and Static Detection Distance and Sensitivity. This sensor also has an alarm mode, which can be set in 4 different modes: off, arm, alarm, and doorbell. Off plays no sound, arm triggers an alarm when presence is detected, alarm turns the alarm on until turned off, and doorbell plays a tune. You can set the alarm to 4 different settings: mute, low, medium, and high, and you can also set how long the alarm will sound in minutes. You can also turn the Light Mode to off, so the LED indicator doesn’t flash if that’s annoying to you.
Features
So this alarm is super loud, and I can see how you might use it as a warning to intruders, though this one isn’t really meant for indoor use. The only thing I wish they’d add with this one is a target distance sensor, but overall, nice job.
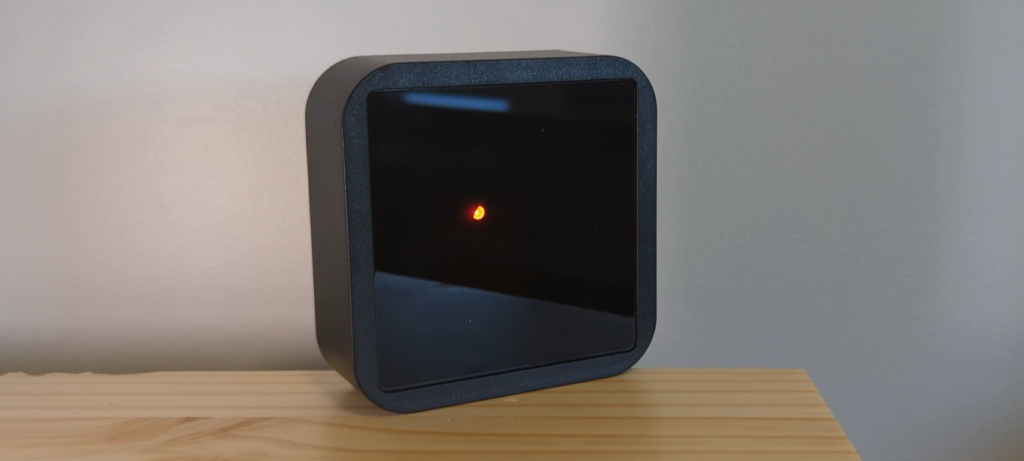
Tuya PH-PS
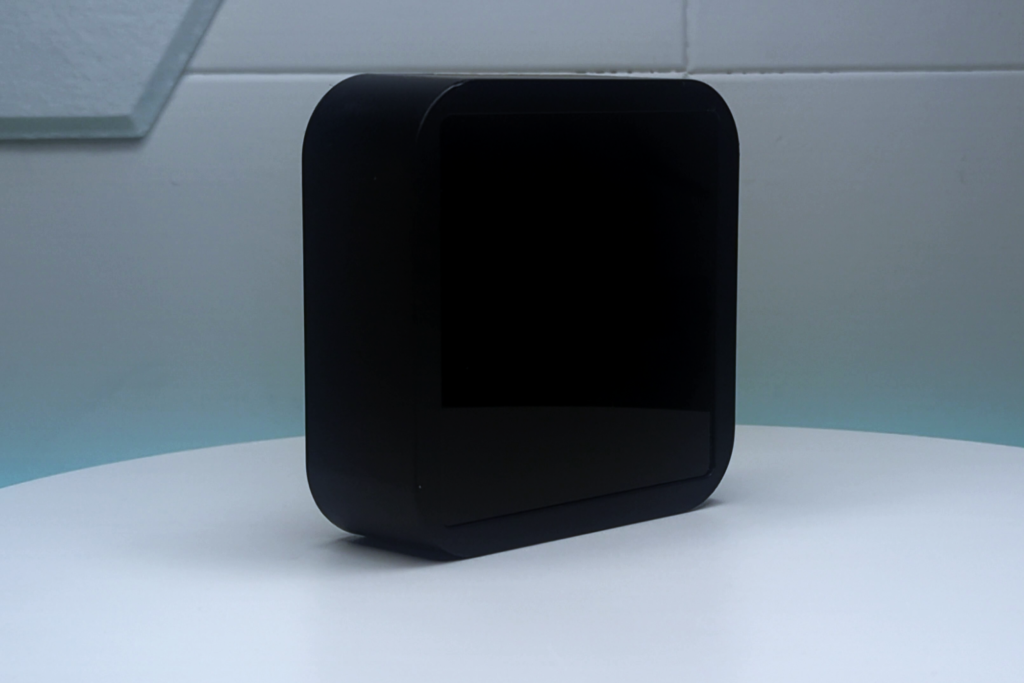

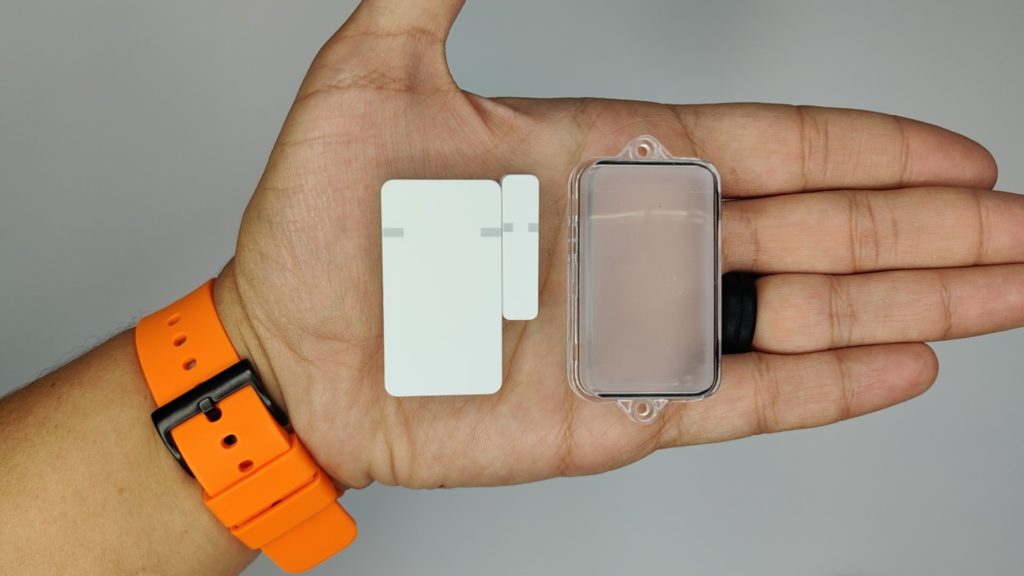
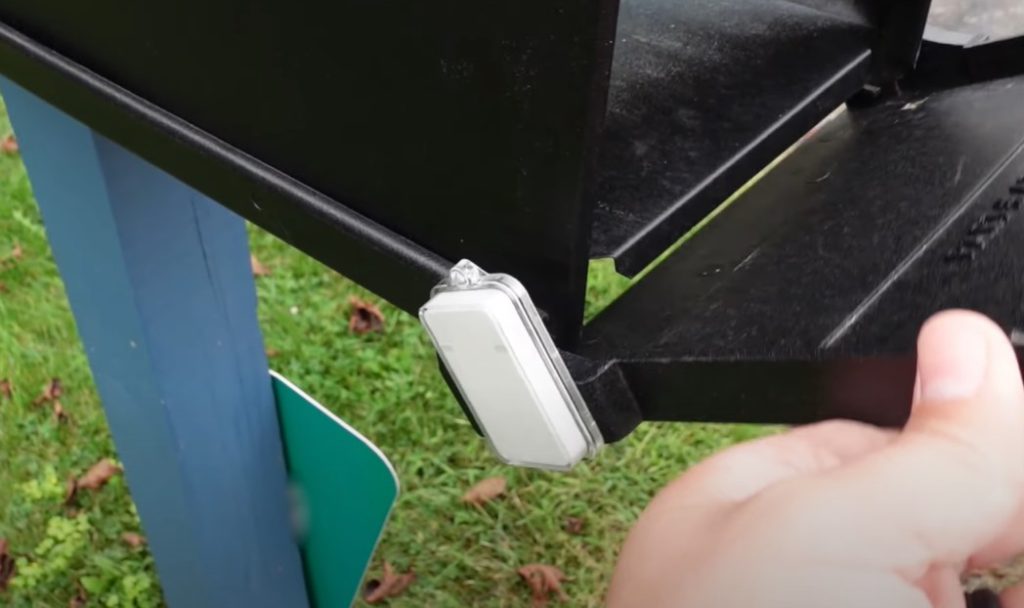
This next sensor is one of the ugliest I’ve ever seen. It’s almost like they bought a project box and put a sensor inside it. It’s a huge square-shaped box that’s solid black, but the front has a tinted plastic window on it. The back has a slotted hole for wall or ceiling mount, and there you can also see the reset/pairing button. On the side you can see the USB-type-B port for powering the device, and it comes with a decent length cable.
Pairing
To pair this device with Home Assistant, you just plug it in with the provided cable and you’ll see the light in the window come on. It will turn red and stay that way, so then you’ll need to put it into pairing mode by pressing and holding the pairing button on the back of it for a few seconds until the LED turns blue and starts flashing. Once it has paired it will turn red again.
In Home Assistant you get the bare minimum. You get Presence, Duration of Attendance, and Duration of Absence sensors, and an LED state toggle to turn off the LED if you want. That’s literally it.

Features
I’m not gonna waste any more time on this sensor – it would randomly sense things and randomly not with no accuracy at all, and would sometimes stay in detected mode for an hour when no one was there. Don’t waste your money on this one. Next!
MTG275-ZB-RL

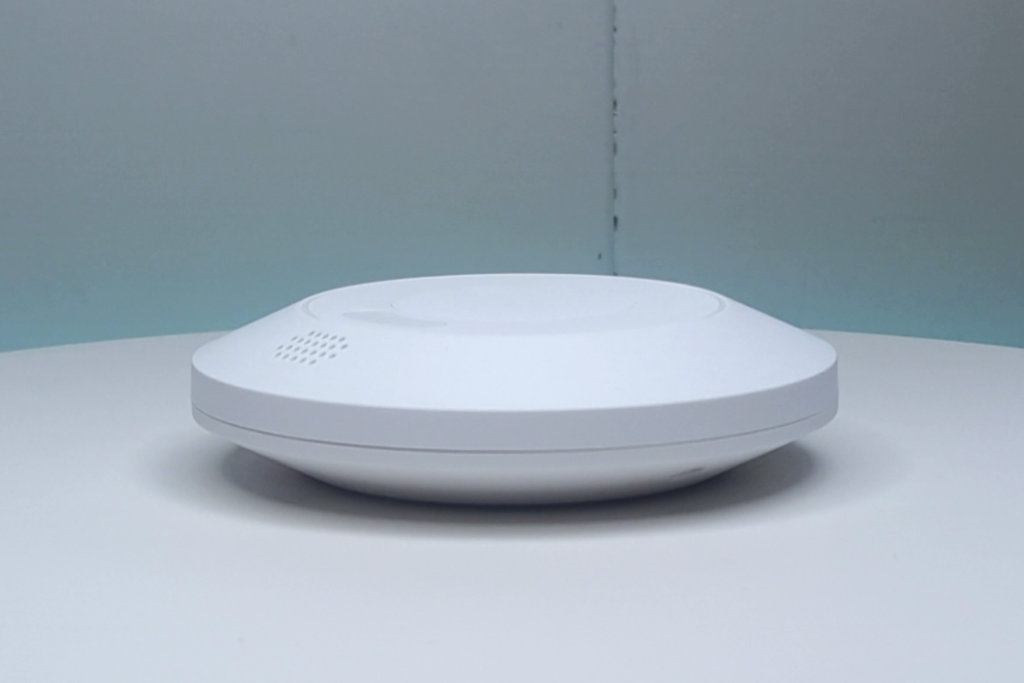

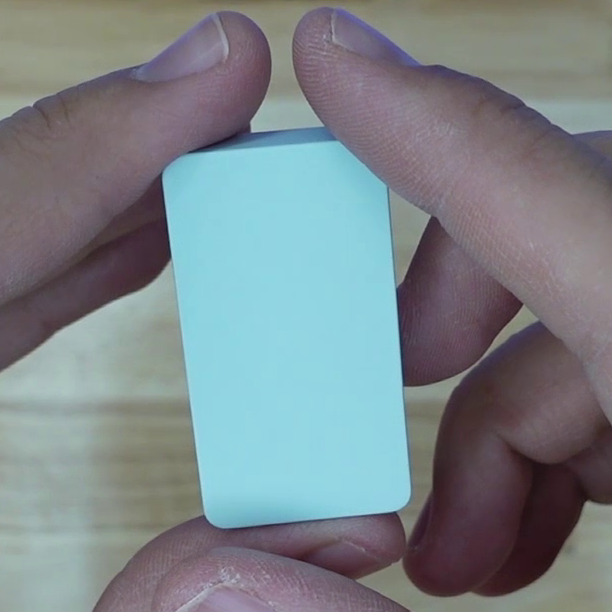
This next Tuya sensor is a ceiling mount style with a circular design, making it look a lot like a smoke or carbon monoxide detector. It comes with some screws and anchors, and also a 3M adhesive pad for adhesive mount. The front has a circular cover, and the cover has a translucent white window for allowing the light from the underlying LEDs to be seen. It also has a section with perforated holes, but I’m not really sure why they are there unless they just repurposed a smoke detector shell.
On the back you can see a hole for some terminals for Line and Neutral wires, because this device is powered by 85-265 Volts AC.
To remove the cover, simply twist the face of the device and it will come right off. Underneath, you can see the terminals more clearly, and you can also see the status LEDs and a pairing button. It also gives you access to the holes for screw-mounting the device to the ceiling. There are four terminals, two for power and two for passing power through the device. I’ll explain what this is for in a bit.
Pairing
To power this thing up, you just connect power wires to the terminals. Like I did with the mains powered sensor we looked at a few minutes ago, I’m just going to use an electrical cord to power this one. Once you install the wires or cord you can plug it in or turn on the breaker. I actually messed up here and didn’t pass the wires through the hole in the back of the sensor, so the lid won’t go back on. Make sure you pass the wires through that hole first before connecting or else it will be a bit of a pain. When you plug it in the LED on the front will turn red for a few seconds, then switch to blue, and then it will start flashing. It’s automatically in pairing mode, but if it isn’t, hold the pairing button on the front of the device for a few seconds.
In Home Assistant you get Presence, Illuminance, and Target Distance sensors, and you get quite a few controls. You get Radar sensitivity, Entry sensitivity, Illuminance threshold, Detection range, Shield range, Entry distance indentation, Entry filter time, Departure delay, and Block time.

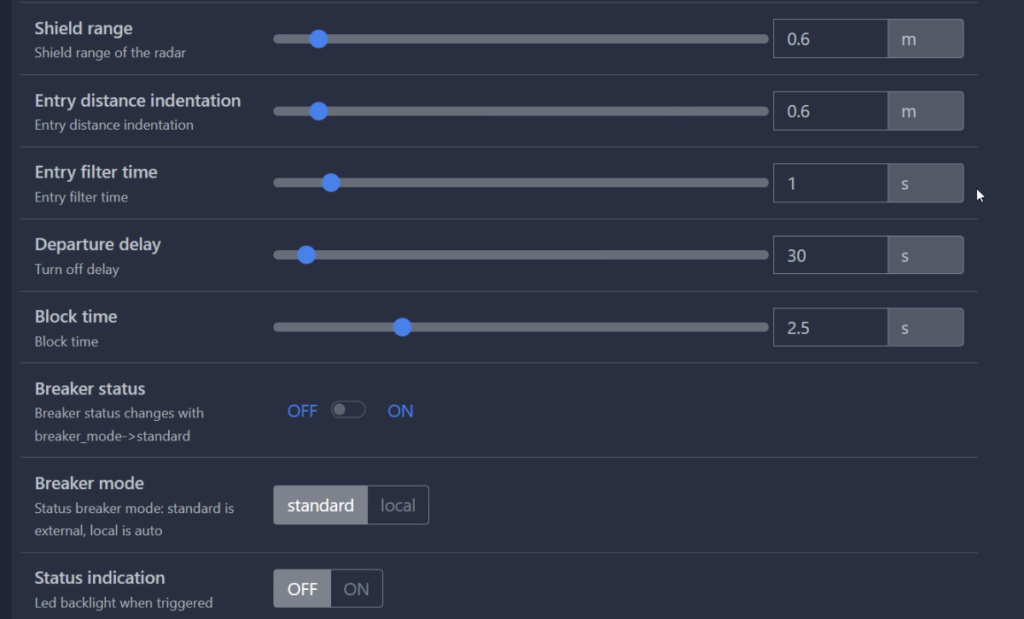
Entry Sensitivity is set to filter out minor movements at the edge of the sensing range.
Entry Distance Indentation is the distance from the edge of the detection range that you want to filter with the Entry Sensitivity parameter.
Entry Filter Time is used to say how long an “entry” should be detected before it is considered such.
Departure Delay is how long it should wait when a target disappears before it says there is no longer presence. It prevents “false disappearance”.
Shield range is the space closest to the sensor that you want presence ignored.
Block Time is like a cooldown before presence can be detected again.
It also has Breaker Status and Breaker Mode. Breaker status allows you to turn the internal relay on and off. This is where the two extra terminals come in. Powering a light from those terminals will allow you to turn it on and off by changing the Breaker Status. Now let’s say you want a light to come on when presence is detected. You can set the Breaker Mode to “local”, and when presence is detected, the internal relay turns on, sending power to the connected light. That’s kinda cool!
The Illumination Threshold controls the internal relay as well, and setting this will keep the internal relay on if the actual illuminance of the room is below the threshold.
Finally, we have Status Indication, which turns on or off the LED that flashes when presence is detected.
Features
One thing about this sensor that I like is that it just kinda looks like smoke detector, so people won’t know that it’s actually a presence sensor. If they could just add a smoke detector sensor in here, that would be perfect!
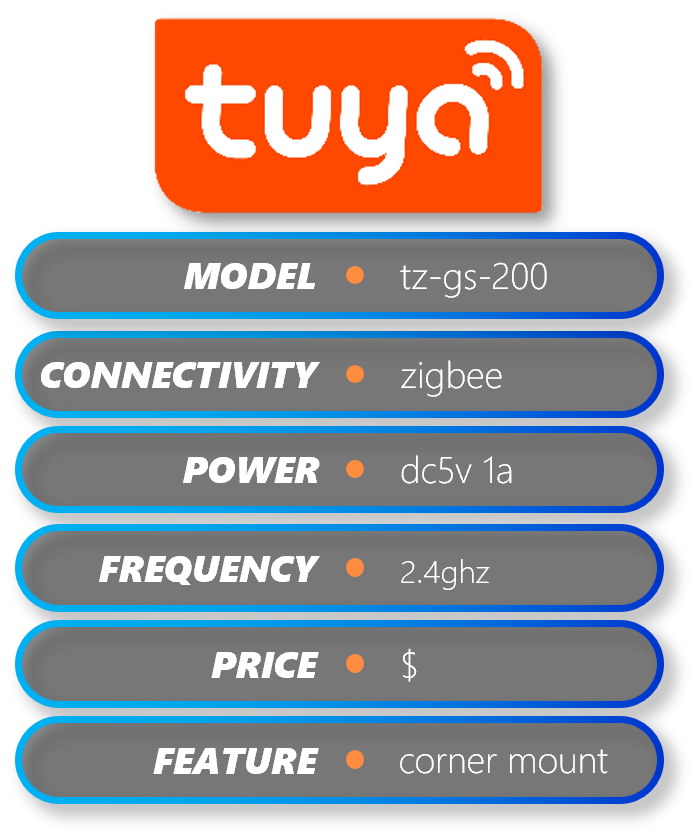
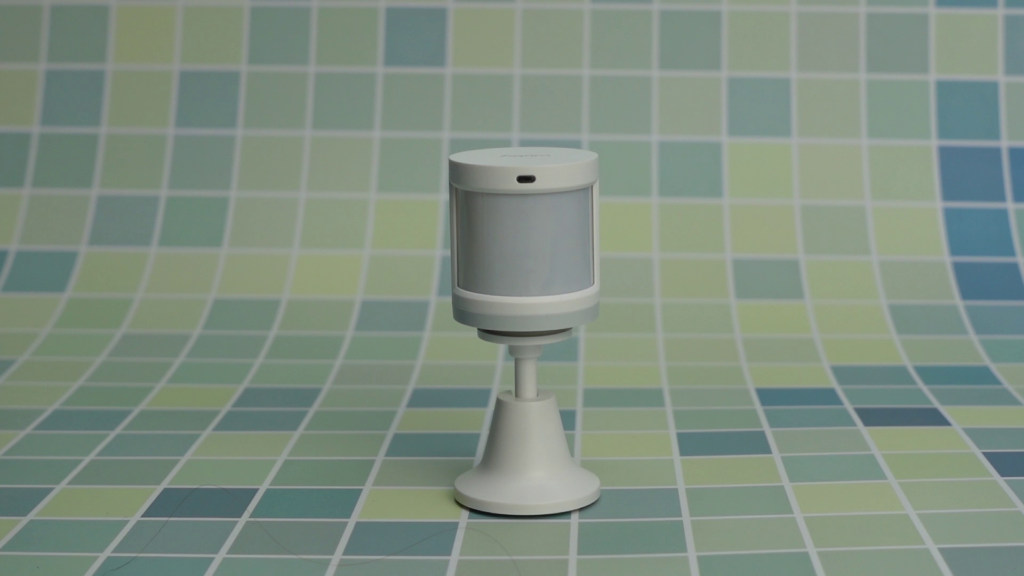
TZ-GS-200
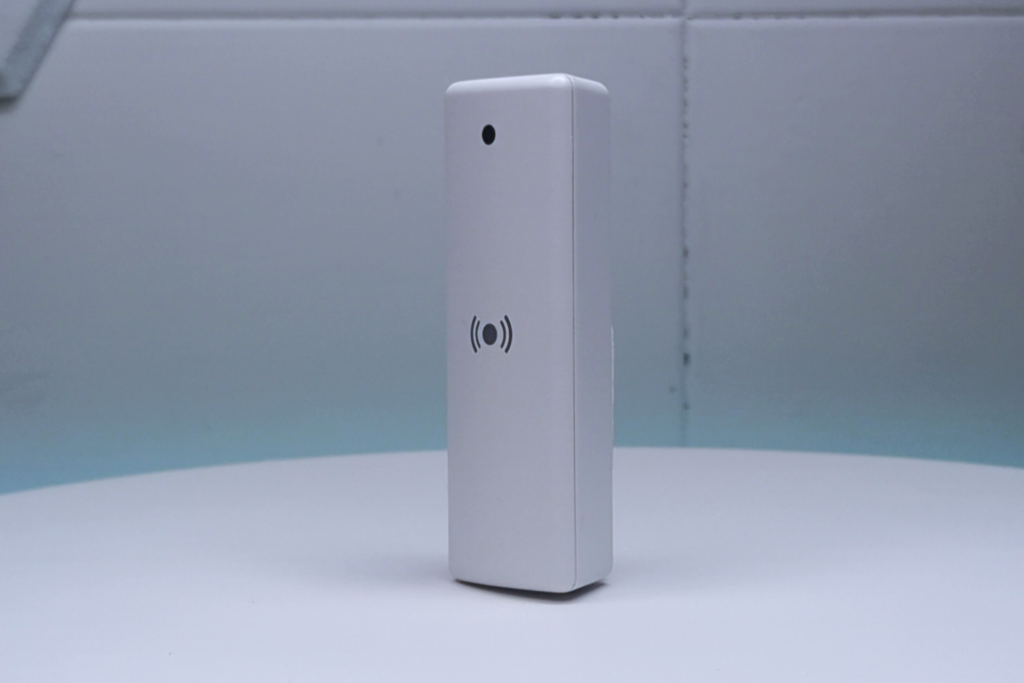

This next one has a tall, slim body with a radar symbol in the center of it, and a small window at the top for an illuminance sensor. On the back you can see some info about the device, and on the bottom you can see the micro-USB type B port for powering it and a pairing button. This device didn’t come with any adhesive, so you’ll need to have your own if you want to stick it to the wall.
Pairing
Just a note before we get this paired, as of recording this article, this device is not officially supported by Zigbee2MQTT in Home Assistant yet, but it is under testing and I hope will be ready soon. However, the functionality that I show here may change a little bit by the time it is fully supported.
Anyway, first we need to plug it in. When you do that, the white LED on the bottom of the device starts flashing. To put it into pairing mode, press and hold the pairing mode button on the bottom for a second or two until the white LED begins to flash rapidly.
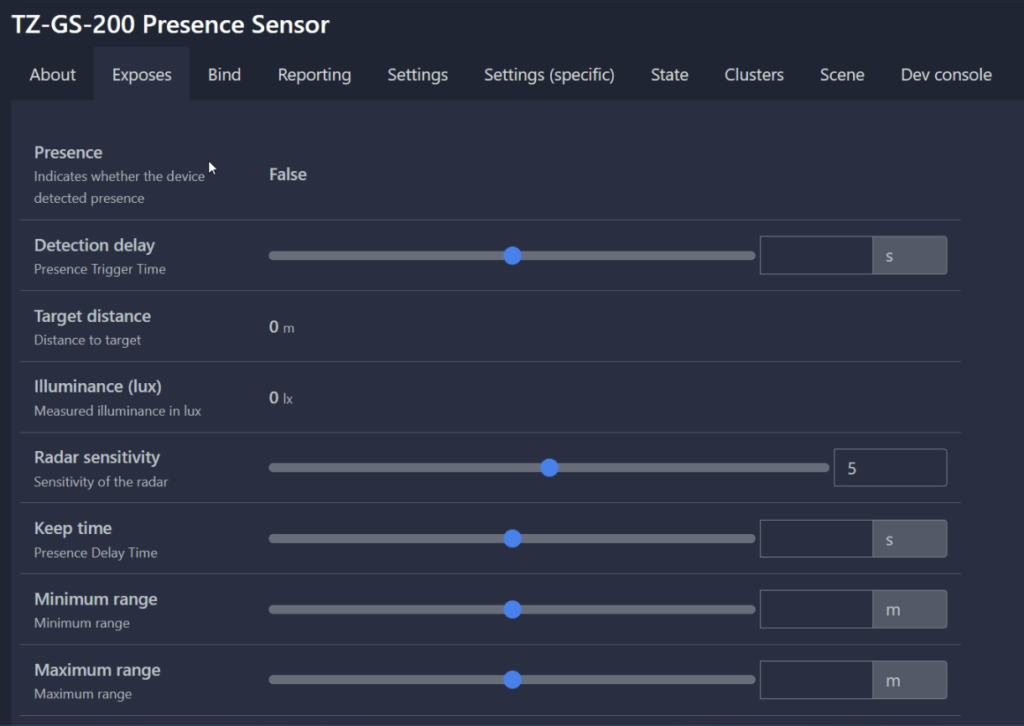
In Home Assistant you get Presence, Target Distance, Fading Time, and Illuminance sensors, as well as three flags, Breath, Small, and Large. These flags refer to the amount of energy that a target “emits”, or the amount of movement that the target has. These flags just turn to “True” when there is that type of movement, but I don’t think they really work right now.
There are also a bunch of adjustment options: Detection delay – how long presence should be detected before the Presence entity says it is True, Radar Sensitivity – how much energy should be considered True presence, Keep Time – time Presence should stay true before checking again, and finally, Min and Max detection ranges.

Features
While I do like the minimalist look, this sensor only has a 90 degree FOV. I guess it’s meant to mount in the corner, but that small angle limits it a lot. The documentation also says it is a 2.4g sensor, which is weird since usually these are 5.8 or 24g sensors.
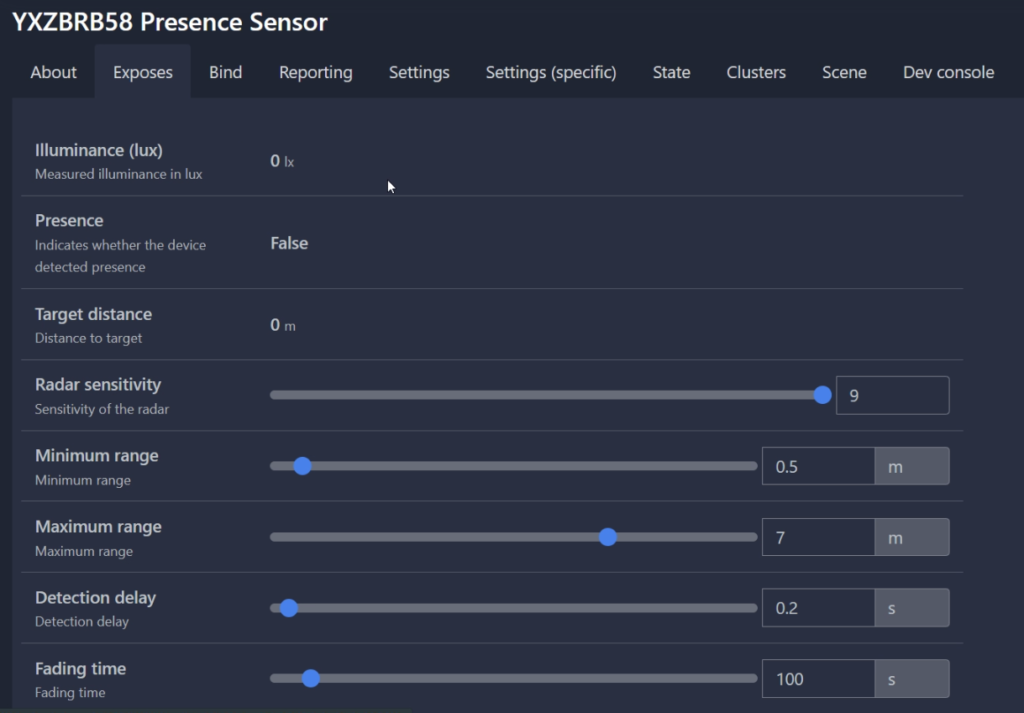
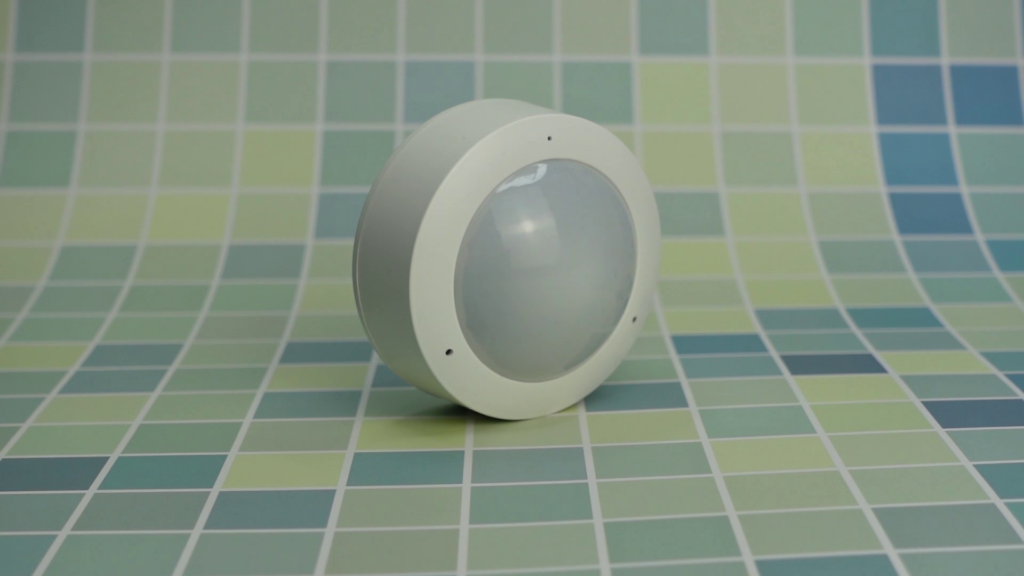
YXZBRB58
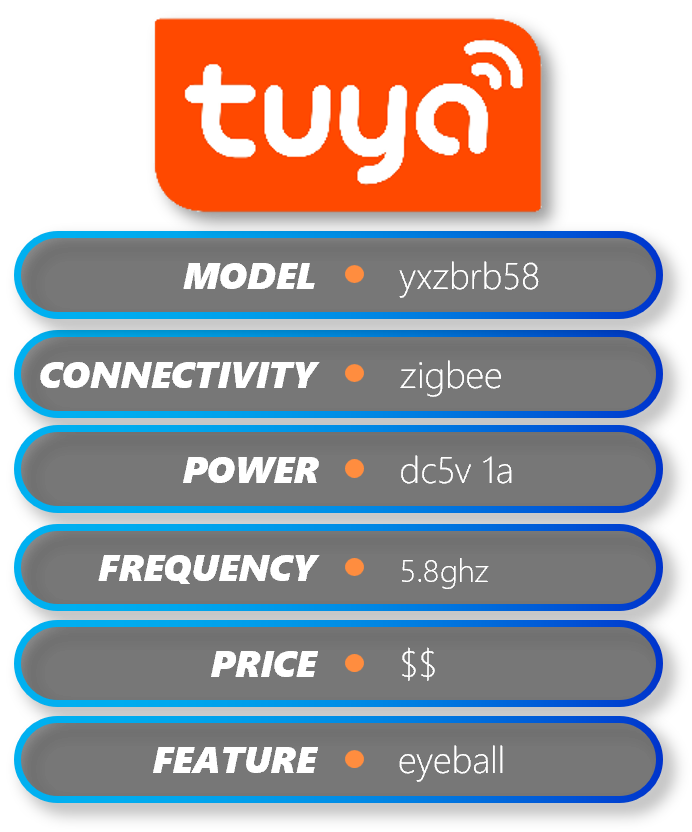
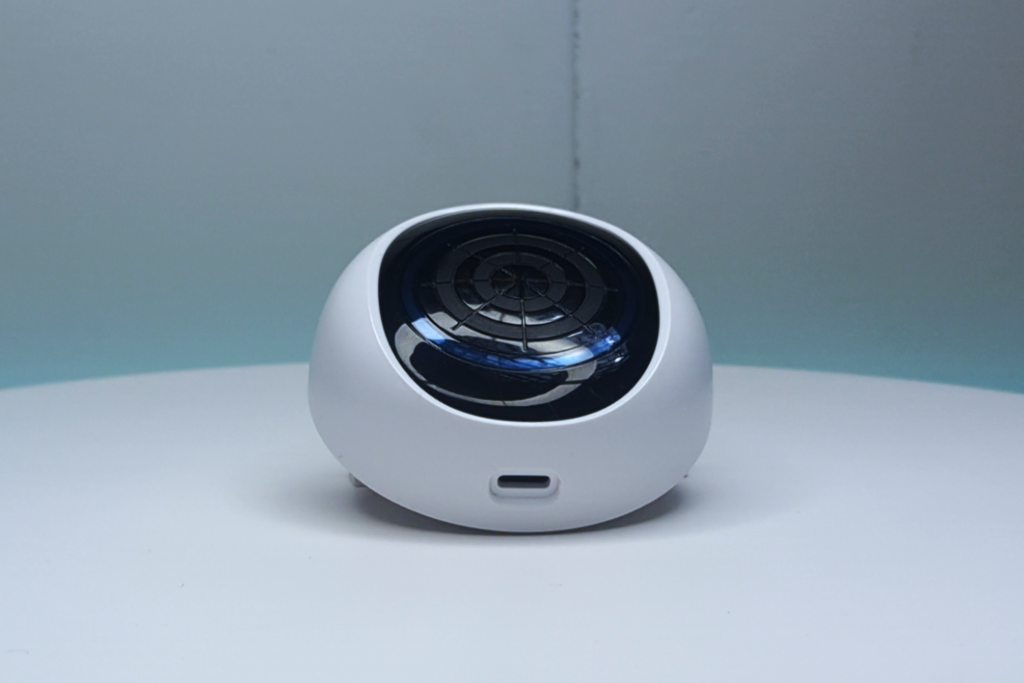

The next one I have nicknamed the Eyeball Sensor since it sort of resembles and eye. It has a circular white body, but the front have a black oval shape with a radar style pattern on it. There is a blue circle which you’d expect would light up based on the product images, but it actually doesn’t. I’ll show that later. The back of the device is actually a backplate that twists off, and it has two holes in it for screw mounting. Underneath the backplate you see a pairing button as well. Once again, it comes with adhesive as well as screws, so you can choose how you mount it. It also comes with a decent length USB type C cable which makes it easier to power.
Pairing
It’s a pretty simple process here, just plug in the USB C cable and then you’ll immediate see a blue LED turn on for a few seconds. Hold the pairing button on the back until the blue light begins to flash, and it’ll go into pairing mode.
In Home Assistant you get Illuminance, Presence, and Target Distance sensors. You also get the typical controls, Radar Sensitivity, Min and Max ranges, Detection Delay, and Fading Time. There’s also a Radar Scene option which would adjust the controls to presets for Bathroom, Bedroom, and Sleeping scenes. Detection delay is super important of course, because it helps you filter out false triggers

Features
To me this is one of the worst looking sensors of a bunch, and if you’re going for obscurity, this sensor is not gonna help. Despite its looks though I’ve been pretty impressed by this sensor with all of the adjustments and the accuracy of the target distance.
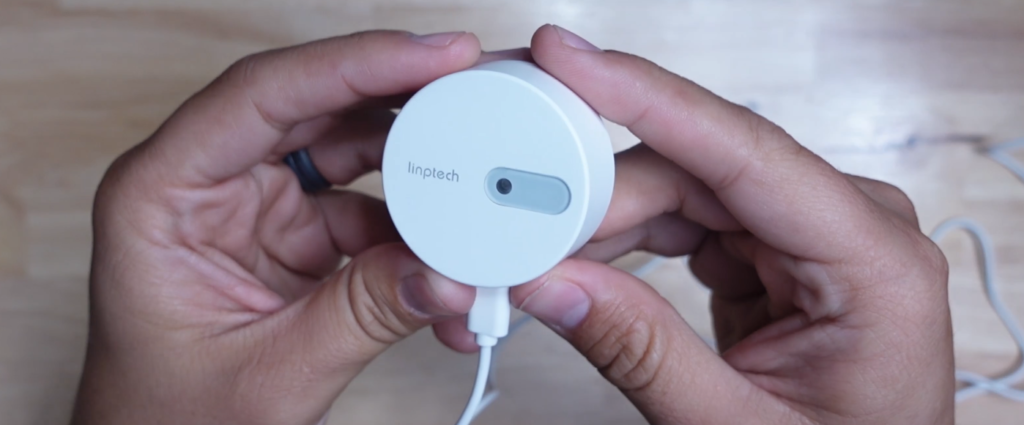
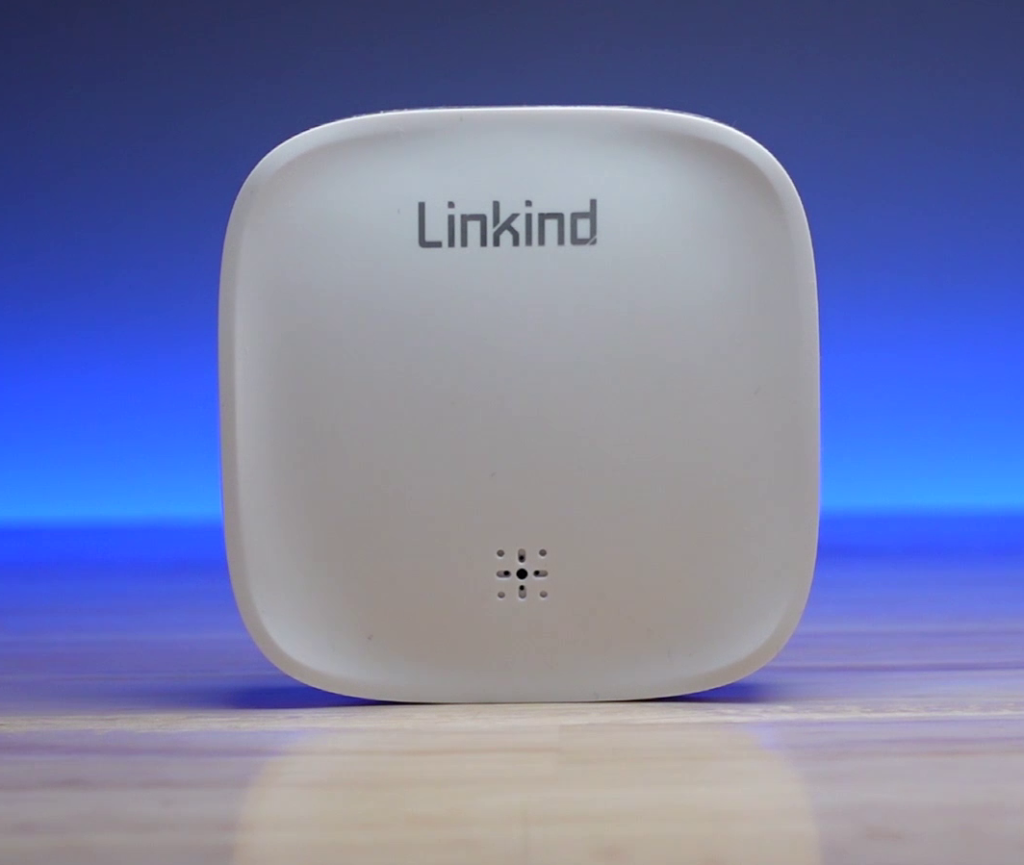
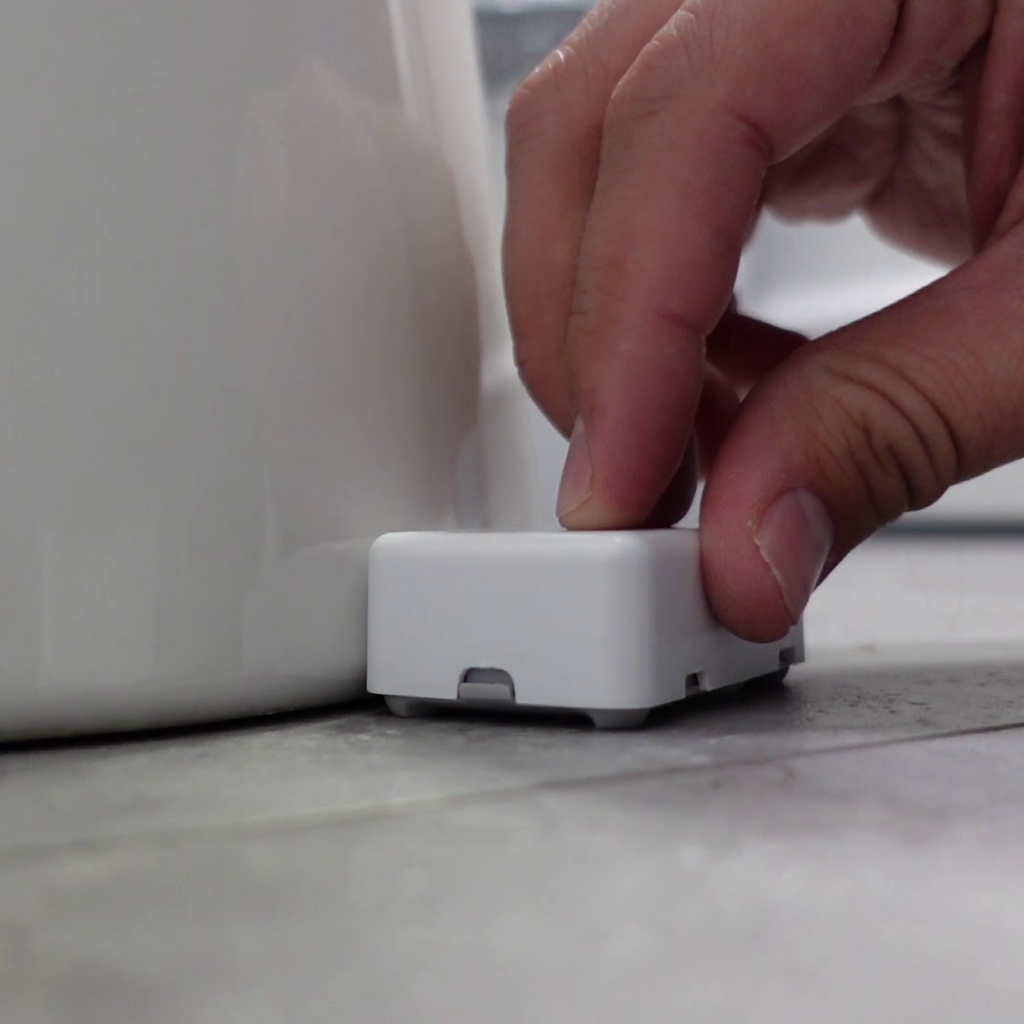
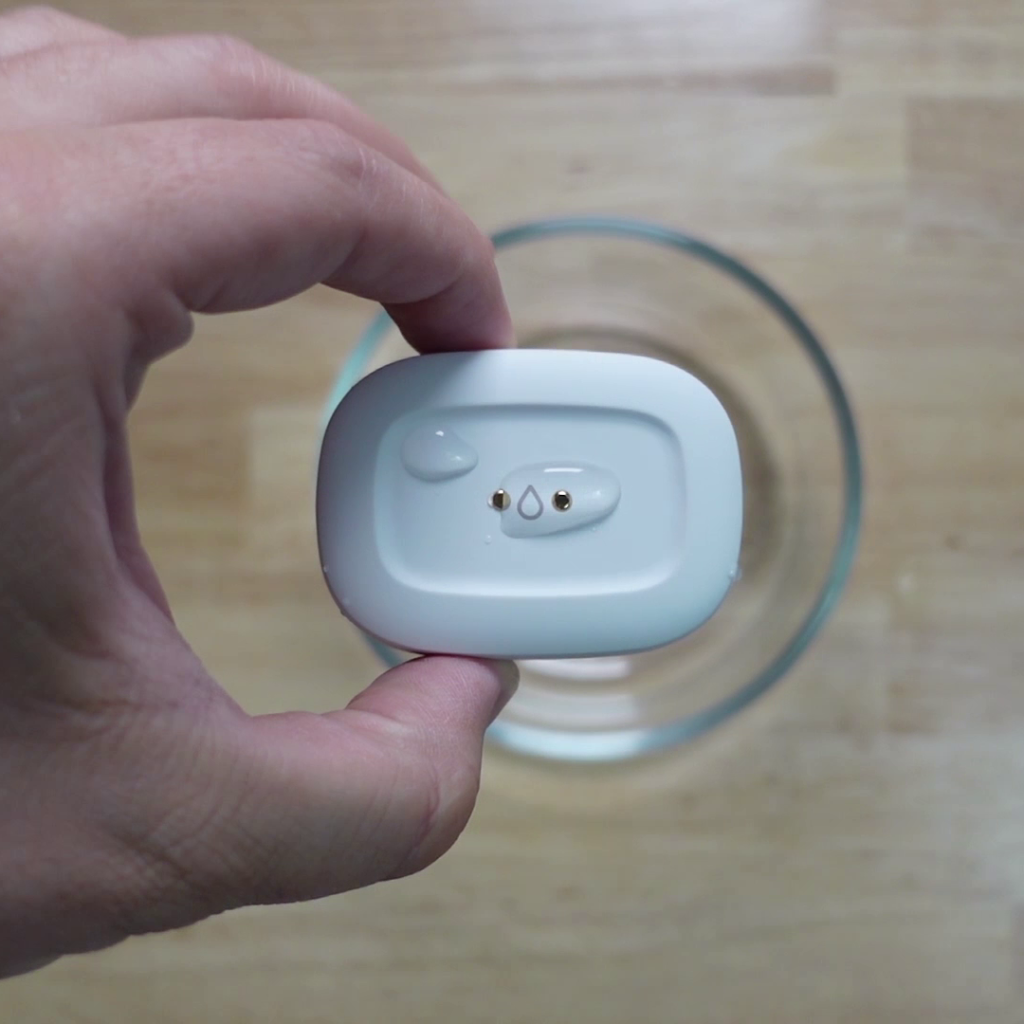
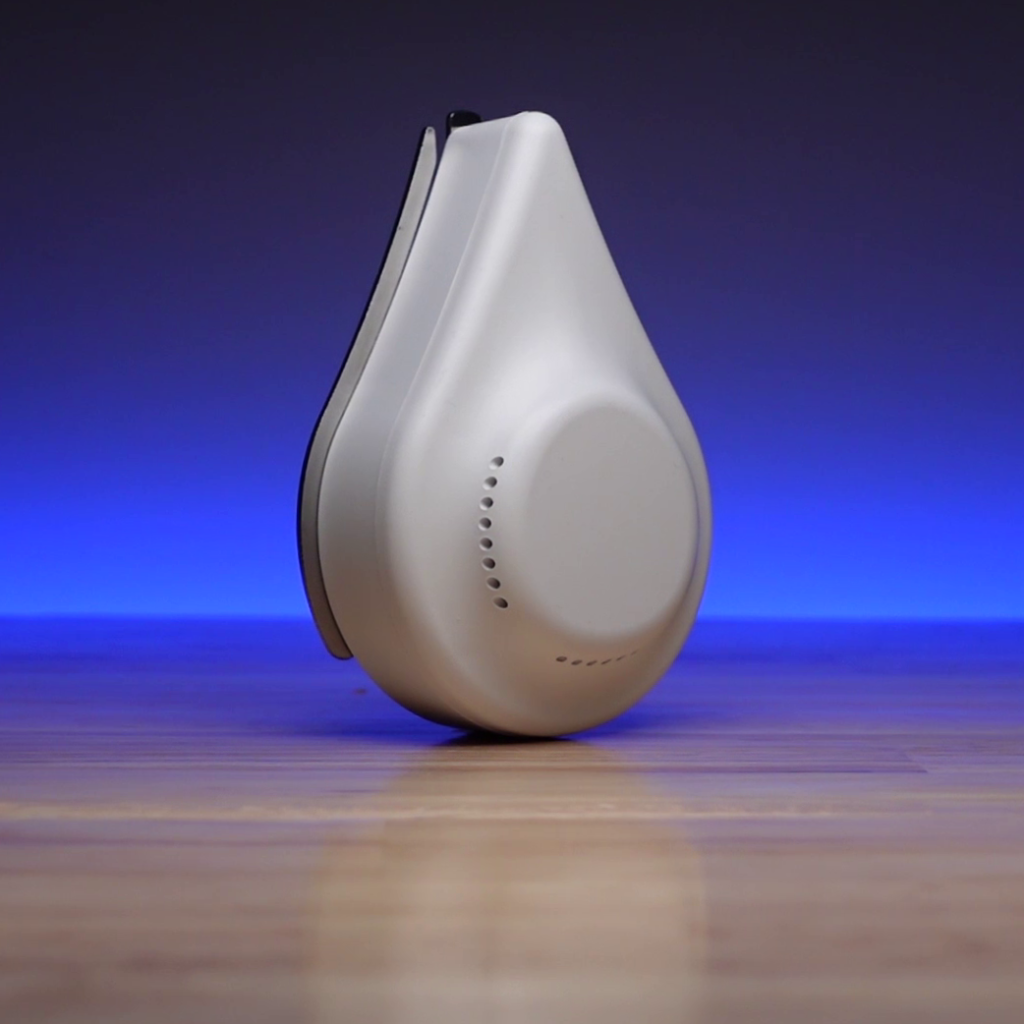
Linptech ES1ZZ(TY)
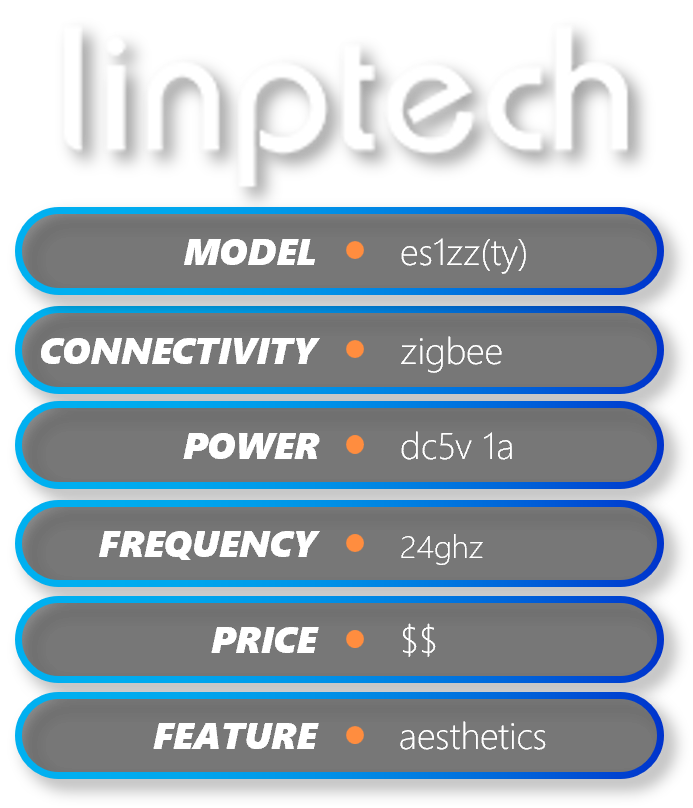
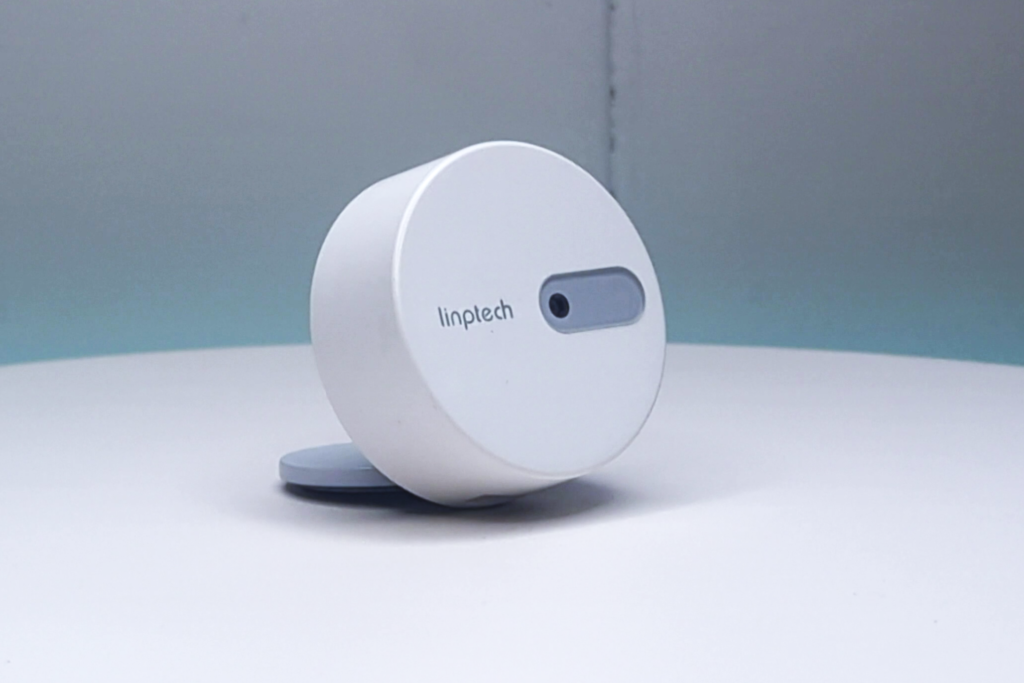


This next one is probably the best looking of all the sensors we’ll be testing today, and it’s the Linptech ES1 presence sensor. It is also branded as a Moes sensor in some cases, but this one was sent to me by Linptech to test out. They actually sell two versions, one that communicates over BLE Mesh, and one that communicates over Zigbee. I started out by trying the BLE mesh sensor, but I couldn’t get it to communicate with the Xiaomi gateway 3, so it’s kinda useless to me.
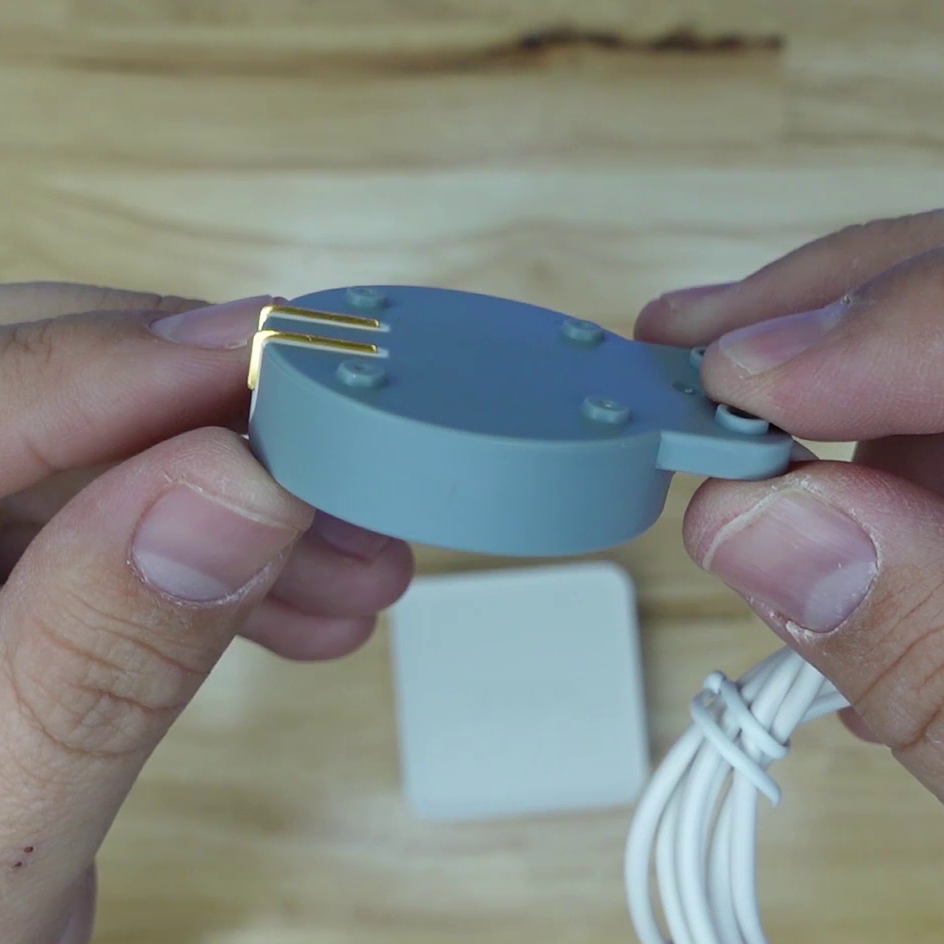
The device reminds you a bit of Xiaomi/Aqara type construction, the clean white body with the grey accents. The front of the device has grey section with a hole for an illuminance sensor, and there’s an LED behind it as well that flashes when presence is detected. The grey section is also a button, and is used for pairing. It has a metal base that’s attached magnetically, and the base can be mounted with the supplied adhesive. The magnetic base allows for swiveling and tilting of the entire body of the device, which is really nice. It comes with a nice long USB type C cable for power.
Pairing
When you first plug it in, you’ll see the LED on the front turn blue, then red, then blue again, and the it will flash blue slowly. To put it into pairing mode, you just hold the button on the front for about 5 seconds, until the LED begins flashing blue more quickly than before. It will revert back to slow blinking when it has successfully paired.
One thing to note with this sensor is that it was not compatible with Zigbee2MQTT when I bought it, but we just got it added recently. By the time you’re seeing this the debice should be working properly.
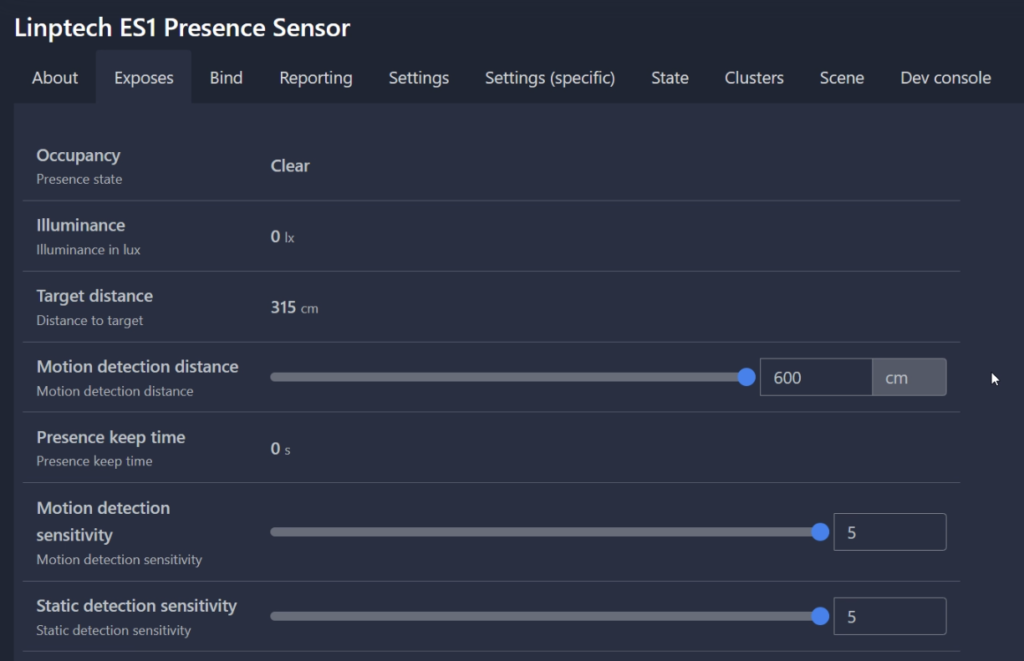
In Home Assistant you’ll get sensors for Occupancy (which is presence), Illuminance, Target Distance, and Presence Keep Time.
Presence Keep time is how long presence has been detected for.
You also get adjustments for Motion detection distance, Motion Detection Sensitivity, Static Detection Sensitivity, and Fading Time.
Motion Detection and Static Detection refer to smaller and larger amounts of movements being detected.
Fading Time is like a cooldown – how long until it checks again for presence.

Features
So like I said, I think this one is a really good looking sensor. The one issue I have with it is that the LED on the front flashes when presence detected, and there doesn’t appear to be any way to turn it off. Target distance was pretty accurate, although the frequency of reporting wasn’t too great.
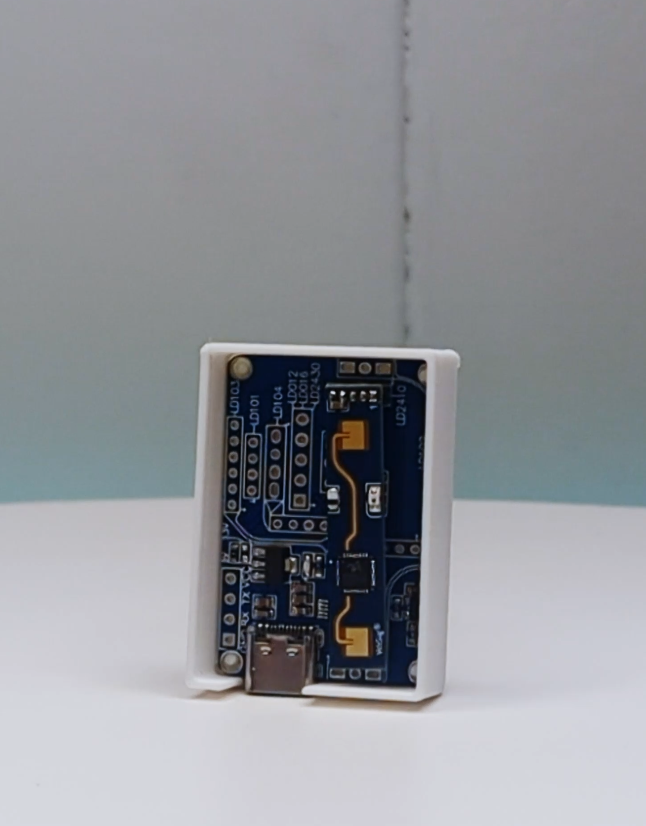
Hi-Link LD2410
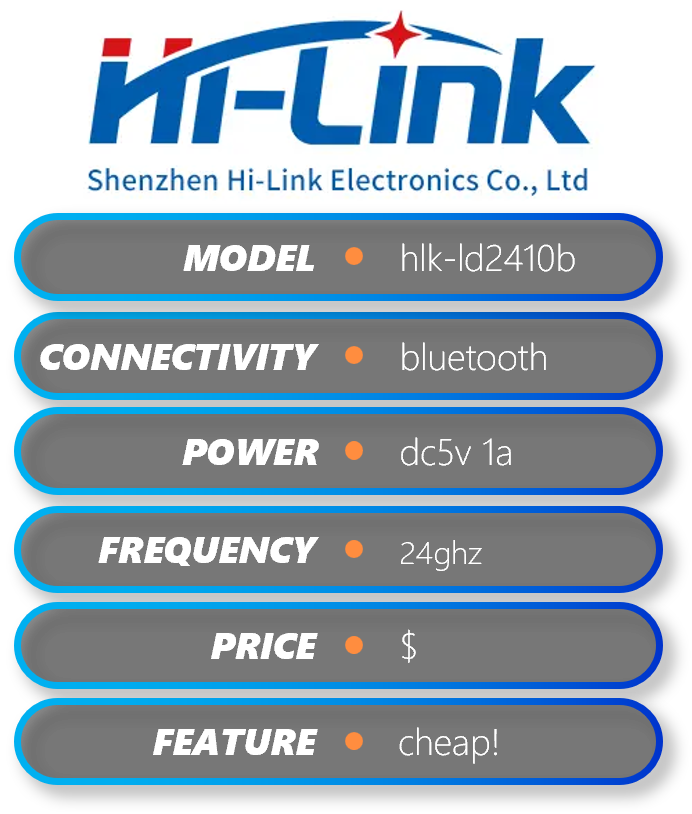
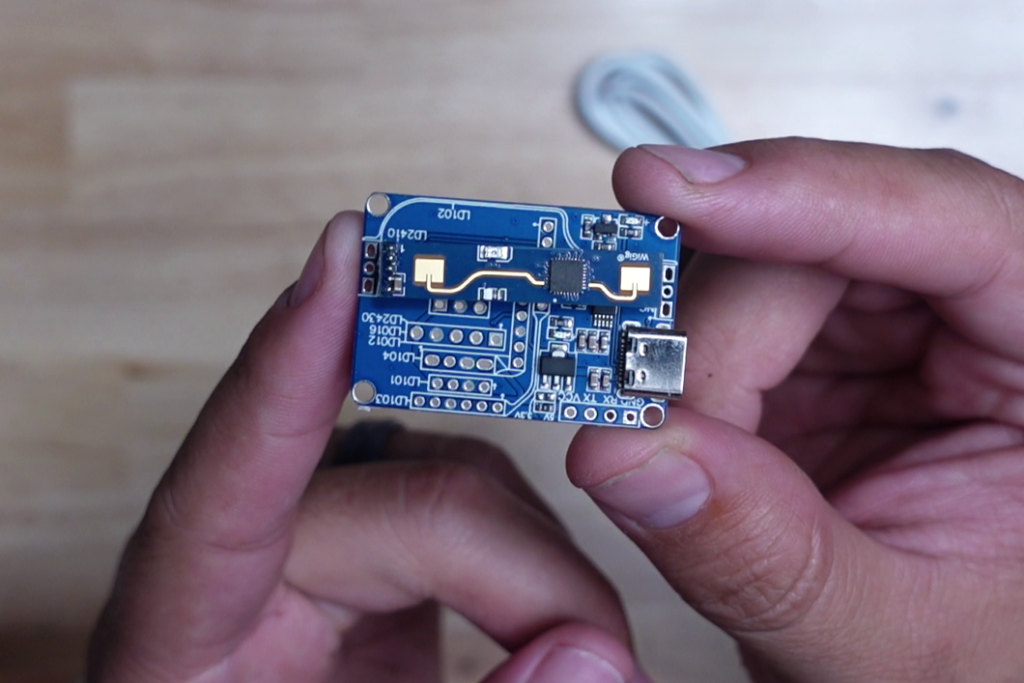


The next one we’re gonna look at is one of the most unique devices in this comparison, and it’s the HiLink LD2410. First, it’s the cheapest of all the devices I’ve shown here, and second, it works via Bluetooth. You can see it’s just a PCB with the mmwave sensor attached, and it has no case or housing – we’ll do something about the housing in a bit. It comes with a USB-C cable of decent length for power. It has red and green status LEDs on the board, and you can see that the mmwave sensor is a little loos on the board, so you need to be careful.
Pairing
When you plug in the USB cable, a red light and a green light come on. There’s no actual pairing at this point, but now it should show up in Home Assistant as an automatically discovered device, and you can go ahead and add it to Home Assistant. If you are placing this device far away from your blutooth radio, you may want to consider setting up Bluetooth proxy.
In Home Assistant you get a TON of entities. There are sensors for Detection Distance, Motion, Moving Target Distance, Moving Target Energy, Occupancy, Static Target Distance, and Static Target Energy.
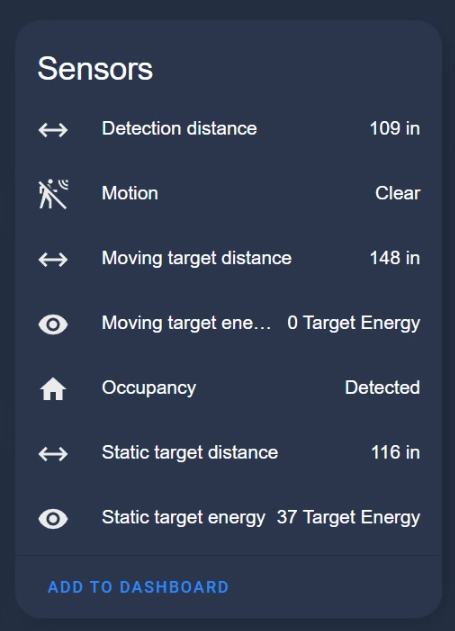
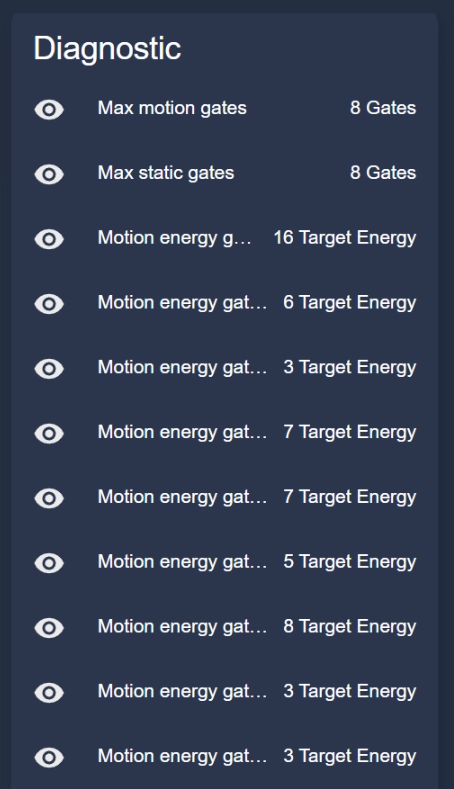
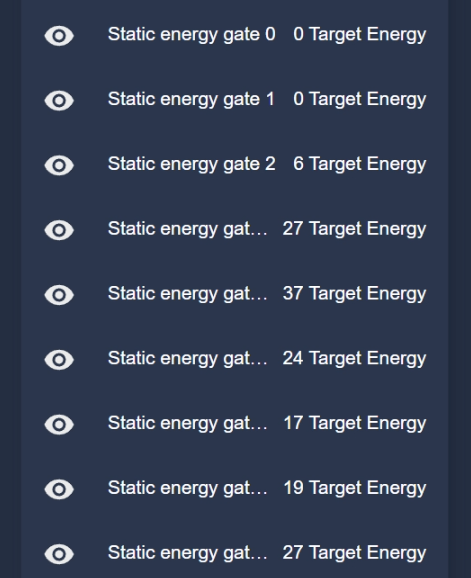
You also get a bunch of Motion energies at different gates. The sensing range is broken up into “gates” and it tells you the energy of the motion at each of those gates. These entities are all disabled by default but you can enable them. To tune this sensor, you need to use the HiLink app. Once installed, you can tune each of the gates so that you don’t get false triggers. You connect to the device, turn on engineering mode, and then adjust the gate sensitivity. For each gate, the closer the value to 100, the less sensitive the gate. The best way to tune it is to set them all to 100 and then bring them down until only human presence is detected and you have no false triggers.
Features
I found this sensor to be extremely sensitive before tuning, and even then I did get some false triggers, so there’s probably more work to do. If you want a housing for this sensor, I’ve whipped up a design for one and here’s a link to it on Thingiverse.
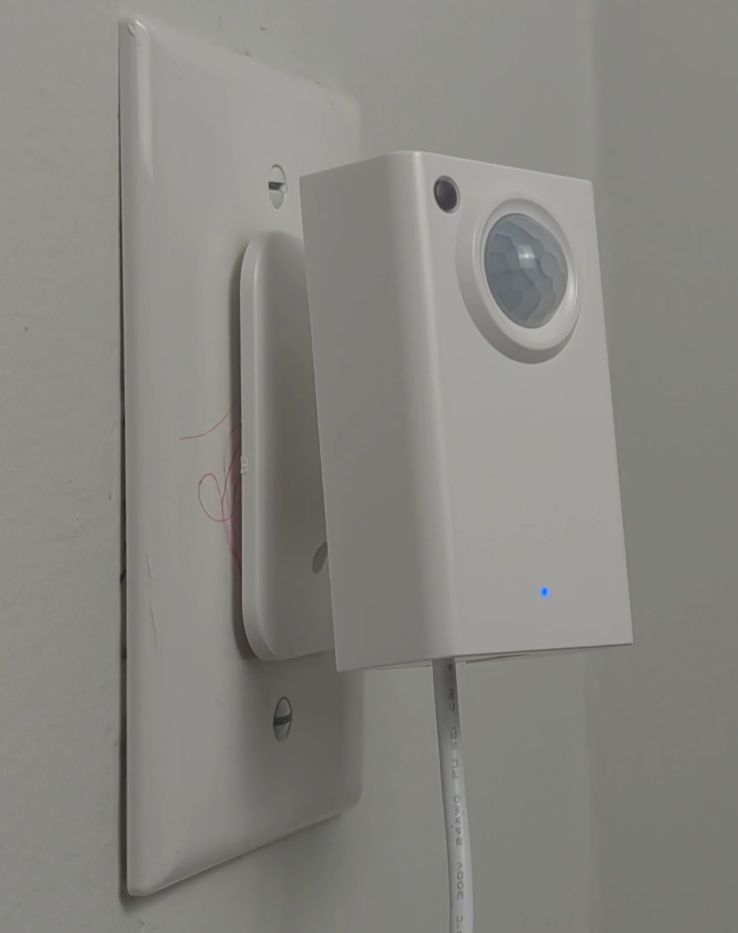
Athom PS01
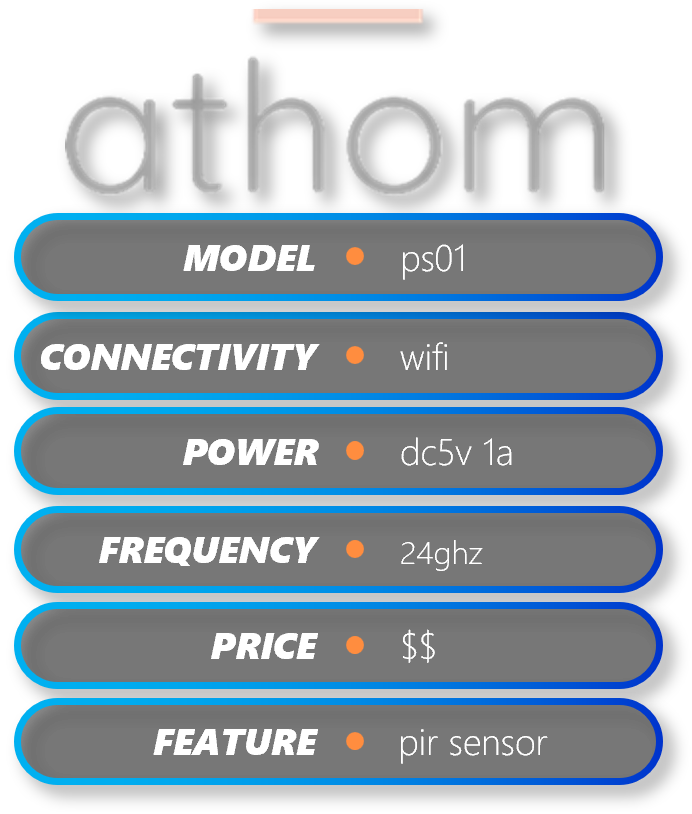

Next we have the Athom PS01. It’s a really clean looking device, and right away you can see that it has a traditional PIR motion sensor in it as well as a mmwave sensor.
On the front it has a window in the upper left corner for illuminance sensing, is has the main Fresnel lens in the center for the PIR sensor, and on the bottom it has a hole for an LED to show through.
On the back it has the USB-C port for power, and a slot on the back and bottom for the provided mount. The mount can be attached to the device pretty easily, either on the bottom for mounting to a horizontal surface, or on the back for mounting to a vertical surface. The mount can be attached to the wall either with the adhesive or the screws provided.
It also comes with right-angled USB-C cable for power, and it’s own adapter which is really nice! On the side there’s a hole for a reset pin.
Pairing
Like I mentioned, this is a WiFi device, and it’s running ESPHome. The first thing you’ll need to do is plug in the power. The LED will start blinking blue, and that means it’s time to add it to your WiFi network. It’s easiest to do it on your phone, just search available WiFi networks for one that has a name with “athom-presence-sensor” in it. Tap the network to connect to it, and it’ll bring you to a sign-in page with a list of nearby WiFi networks. Choose your home wifi network and enter the password. When finished, press Save. Go to Home Assistant, tap Settings, Devices and Services, and and you’ll see the Athom sensor is automatically discovered by Home Assistant. Click Configure, click Submit, set and Area if you want, and then click Finish.
In Home Assistant you get your Illuminance, mmWave, PIR, and Occupancy sensors. From what I understand, the PIR and mmWave are used together to set the state of the occupancy sensor. For configuration options you also get Blockade Time, Detection Delay, Fading Time, Farthest Detection, Maintain Sensitivity, and Trigger Sensitivity. All of these are similar to what we have had with previous sensors. There’s a hidden toggle for turning the LED on and off which is cool, but it doesn’t seem to keep the LED off – the LED’s state changes as soon as presence is detected. There are also some Diagnostic entities that have some network information.
Features
I really like this device, but I do wish it had target distance as an entity since that can be pretty useful in automations.
mmWave and PIR sensors are best used together to detect true occupancy, because PIR sensors are great for quick detection at a distance, and mmwave sensors have great precision and can detect small movements. However, this isn’t the only one that has both in a single device.
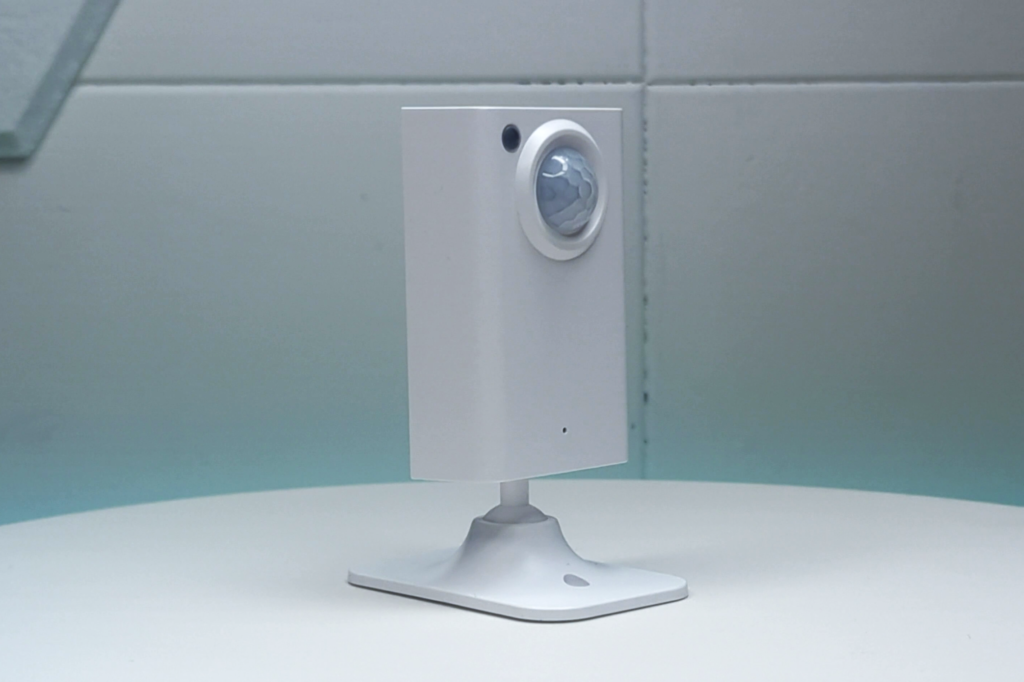
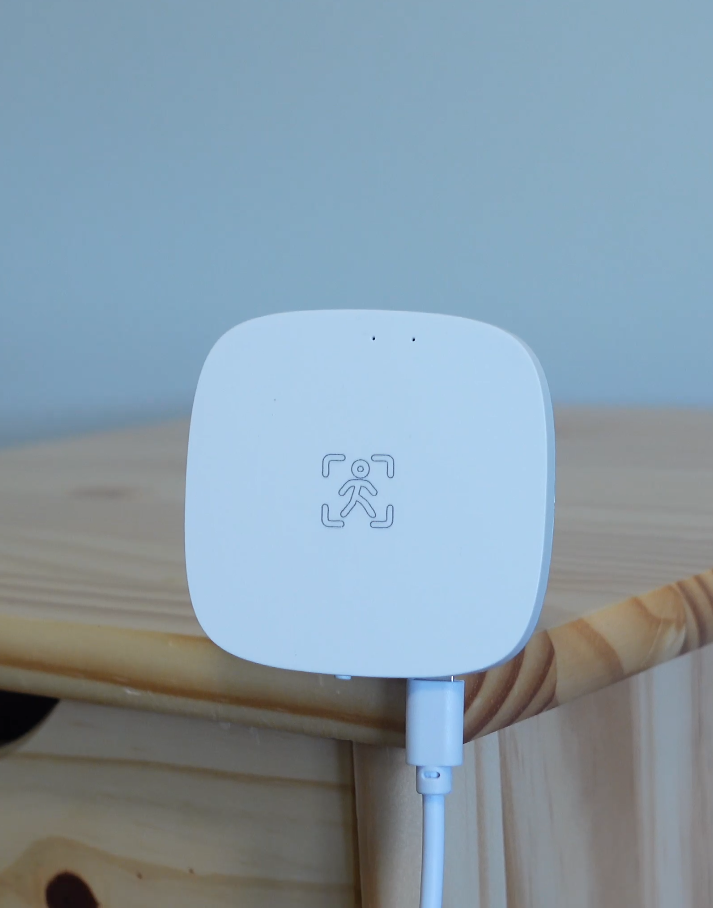
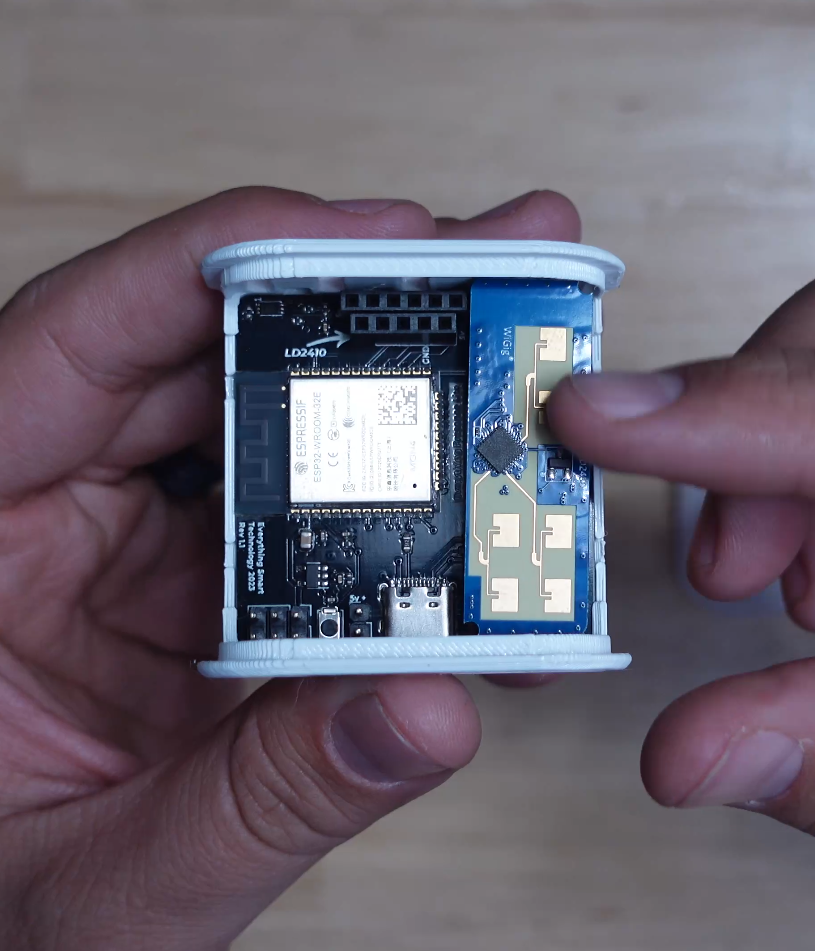
Everything Presence One
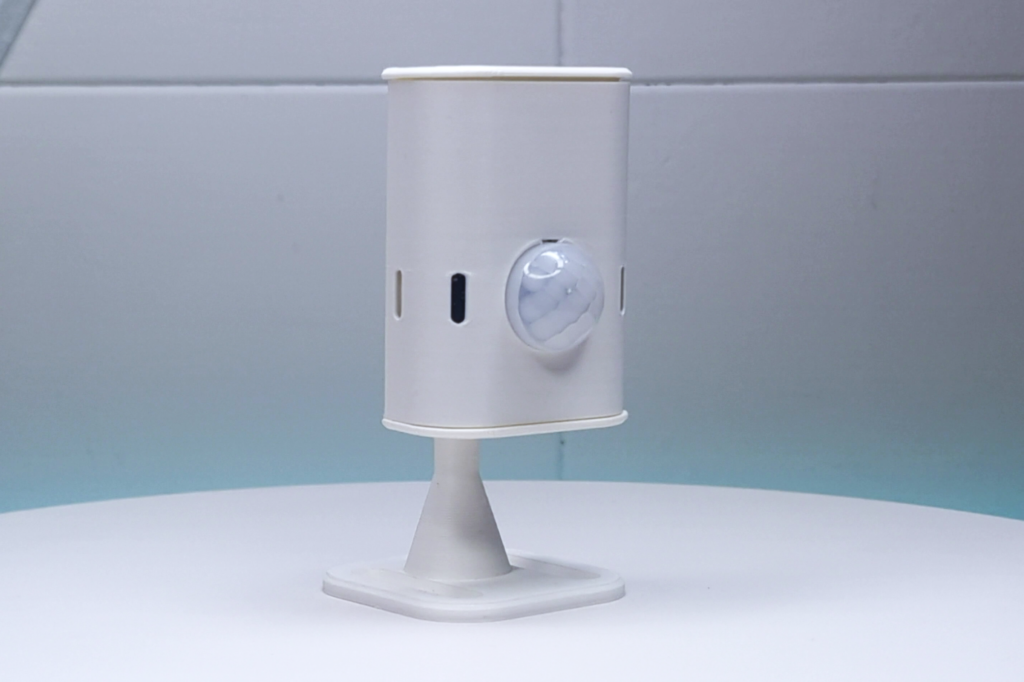

The next device similarly has both in one unit. The Everything Presence One is the presence sensor that, for me, started it all. Everything Smart Technology was kind enough to send one to me to check out.
First of all, this device doesn’t come pre-assembled, so you get to assemble it yourself! Don’t worry, it’s super easy.
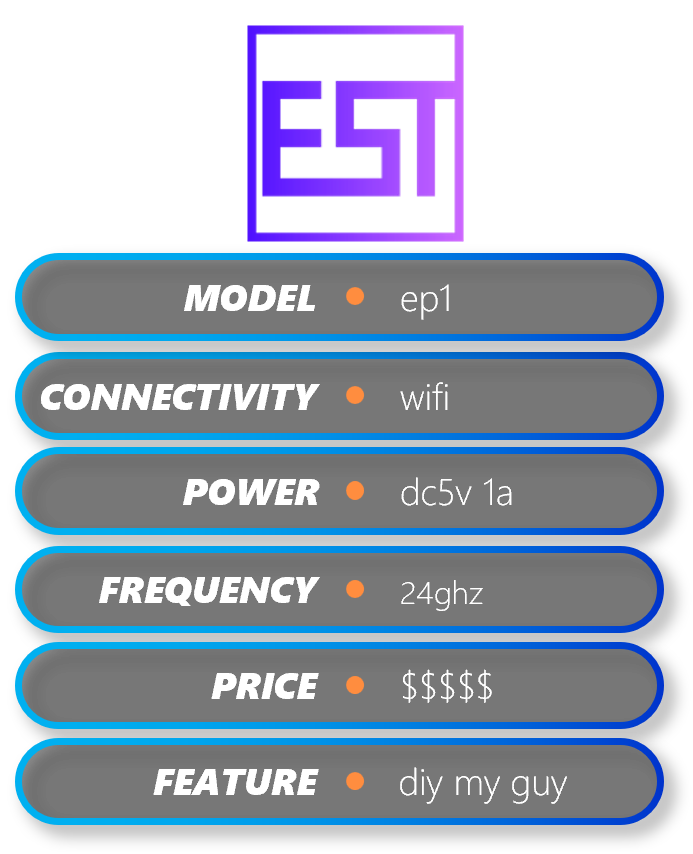
First, you have the main EP1 board, which is nicely labeled to show you where the components belong. You can see there’s an ESP microcontroller on the board, ant there’s also a jumper for the board that lets you power it via a 5V header rather than the USB port. I won’t be using that.
Next, you have the PIR sensor, which can be fairly easily mounted to the board with the three pins, and finally, you have the 24gHz mmWave sensor, a DFRobot SEN0395 Module.
It comes with an optional 3D-printed case and mount, which can be 3D printed yourself because they’ve made the files free to download.
To assemble it you can actually scan the QR code on the box and follow the instructions on the EP1 website, but it’s pretty straightforward to assemble. You put the board into the case, and then you add the mmWave module and PIR sensor. Once the components are installed, you can add the cover and attach the stand.
Pairing
Adding this device is the exact same as the previous sensor, because it, too, runs on ESPHome. I won’t walk through it again to save time, but the entities in Home Assistant are far more impressive than the Athom.
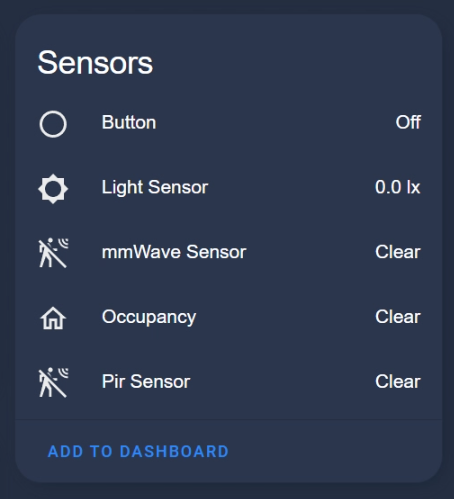
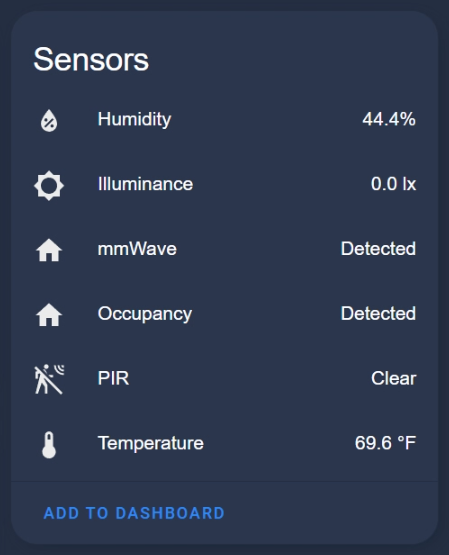
In Home Assistant you get a TON of sensors. You get Humidity, Illuminance, mmWave, Occupancy, PIR, and Temperature sensors. This thing is more of multisensor than most “multisensors” on the market!
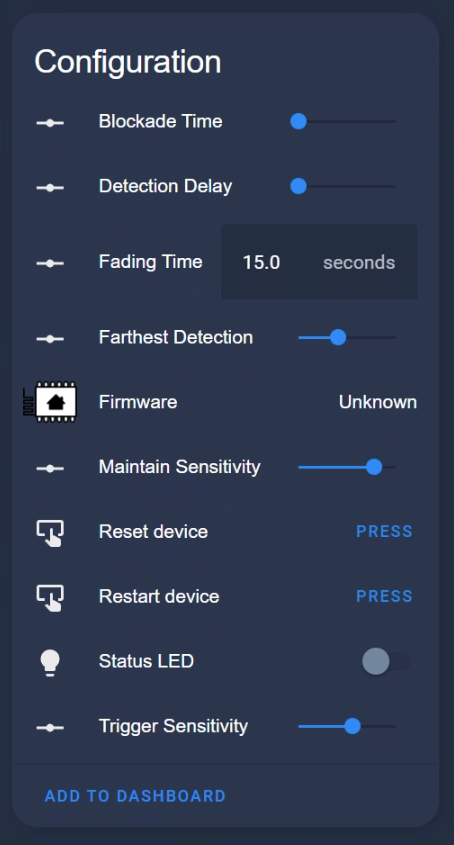
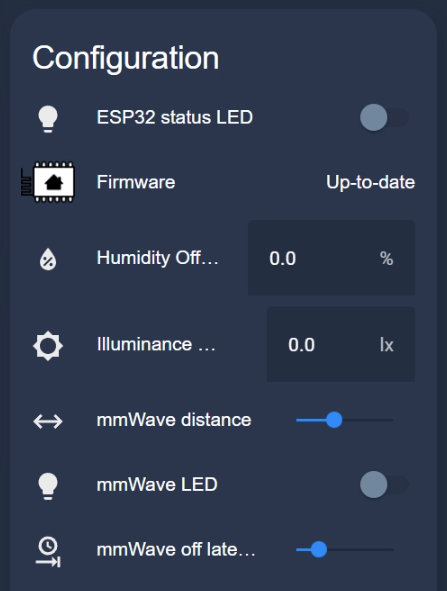
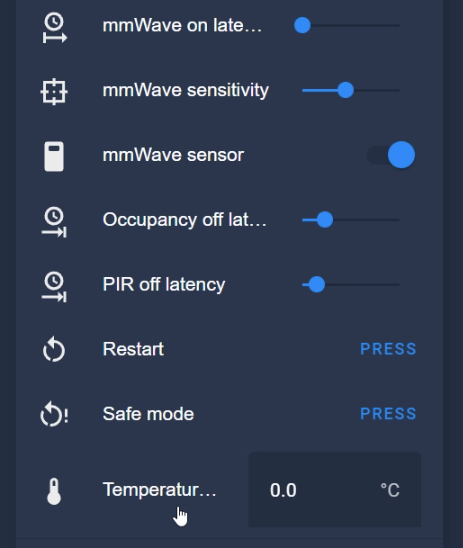
You also get a TON of different configuration entities, including ESP32 LED and mmwave LED toggles, a toggle to turn off the mmwave sensor, a firmware version entity, humidity, temperature, and illuminance offsets, mmwave distance and sensitivity adjustments, mmwave on and off latency adjustment, occupancy & PIR off latency adjustments, and finally, restart and safe mode buttons.
The most important setting to get right first is the “mmwave on latency”, which prevents false triggers. A good place to start is 0.5, but if you want more tips on tuning it, there’s a guide to tuning the device.
Features
Overall this device could be improved with a different style case in my opinion, but there are already a few out there that have been designed for it, so you can search around for those. Other than that, the price is a bit tough to swallow, but you have to account for all of the sensors in it, and the DIY nature of it that lets you change out sensors as you see fit.
Everything Presence Lite
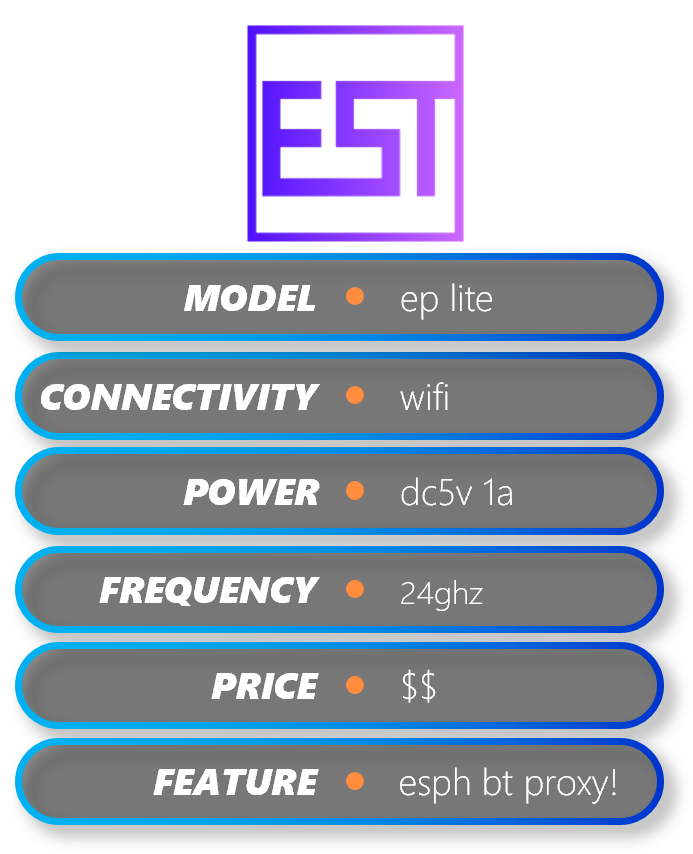
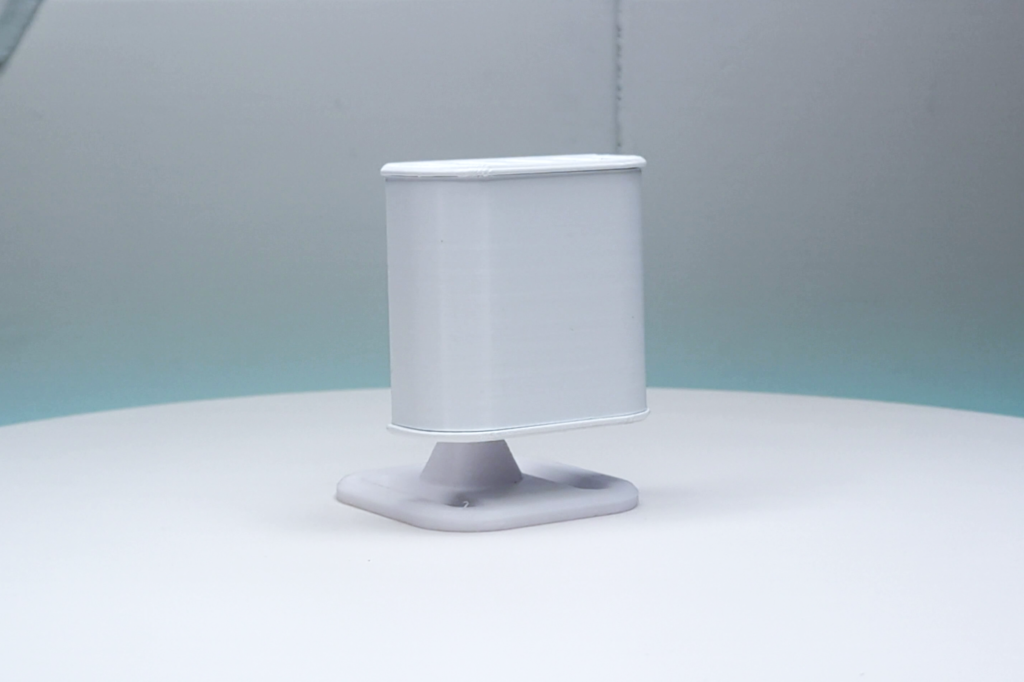

The next sensor is another newly released device that was sent to me by Everything Smart Technology. This one is called the Everything Presence Lite, the it’s called lite because it doesn’t have the PIR sensor that the EP1 has. This one also comes with a right-angle cable, unlike the EP1 which didn’t come with any. If you pop open the cover you can see the custom EPLite board with the mmwave sensor attached, a HiLink LD2450.
Pairing
This sensor is also powered by ESPHome, so adding it to Home Assistant is the exact same as the previous sensor.
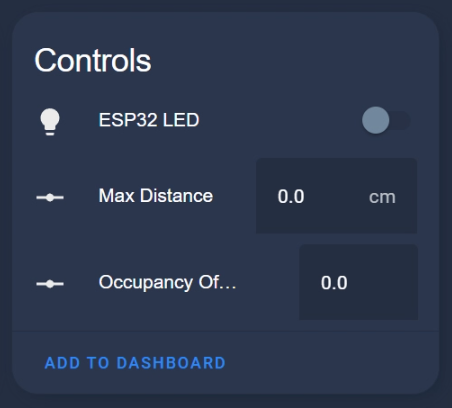
In Home Assistant you get controls for the ESP32 LED, setting Max Distance, and setting Occupancy Off Delay.
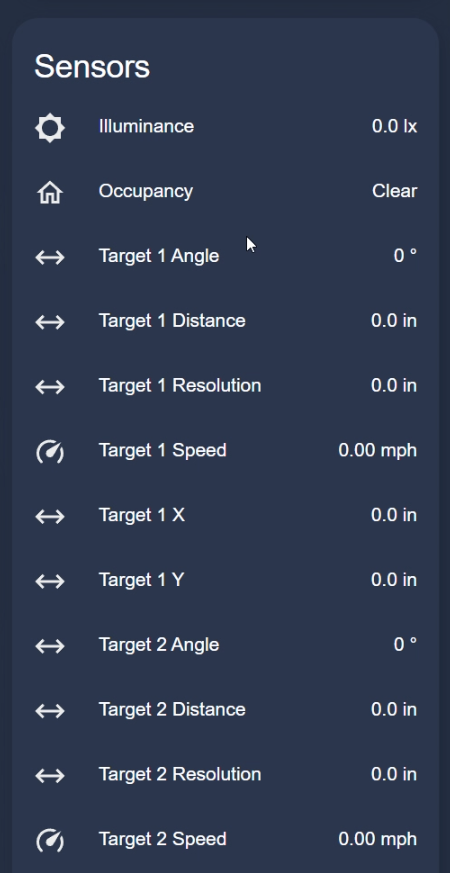
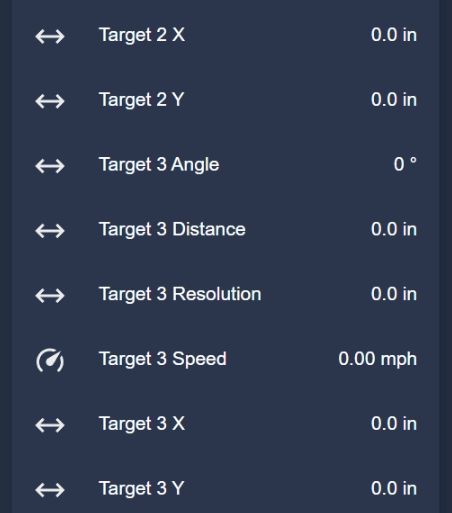
You also get sensors for Illuminance, Occupancy, and Target tracking for up to 3 targets! The target entities are the Target Angle, Distance, Resolution, Speed, and X and Y coordinates.
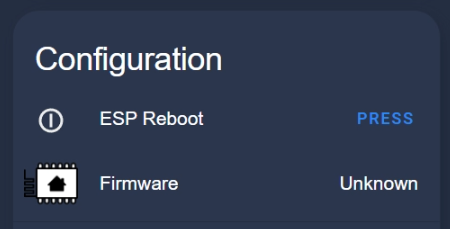
Lastly, you get ESP Reboot and Firmware entities as well.
Features
The price point for this device is perfect to me, and this thing is by far the most accurate sensor for target distance. You can swap out the mmwave sensor if you want to try something else, and it is confirmed working with 5 different sensors, but others may work as well. Another awesome feature this device has is that it works as a Bluetooth proxy for Home Assistant, extending the Bluetooth range for all of your Bluetooth connected devices. This feature supposed to be coming to the EP1 as well!
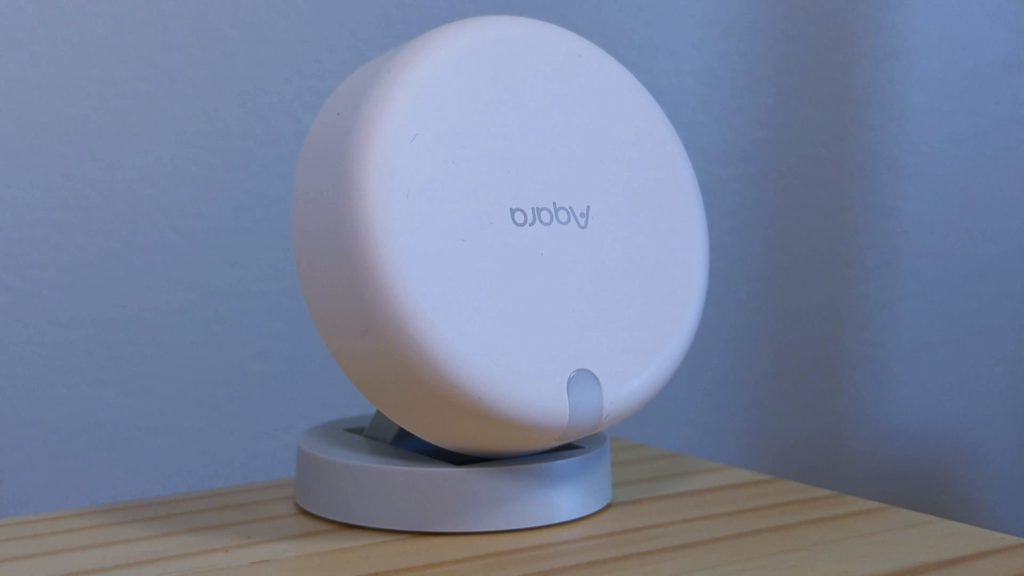
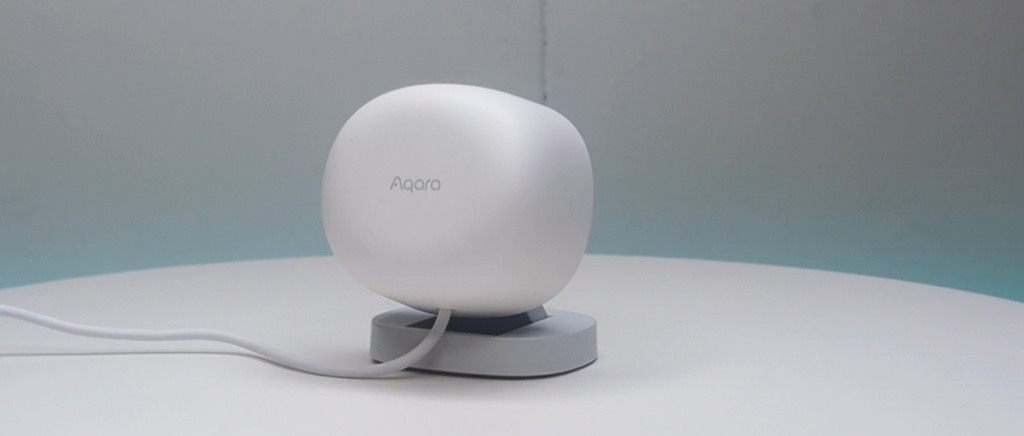
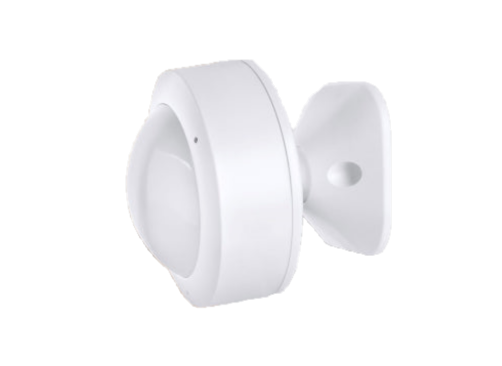
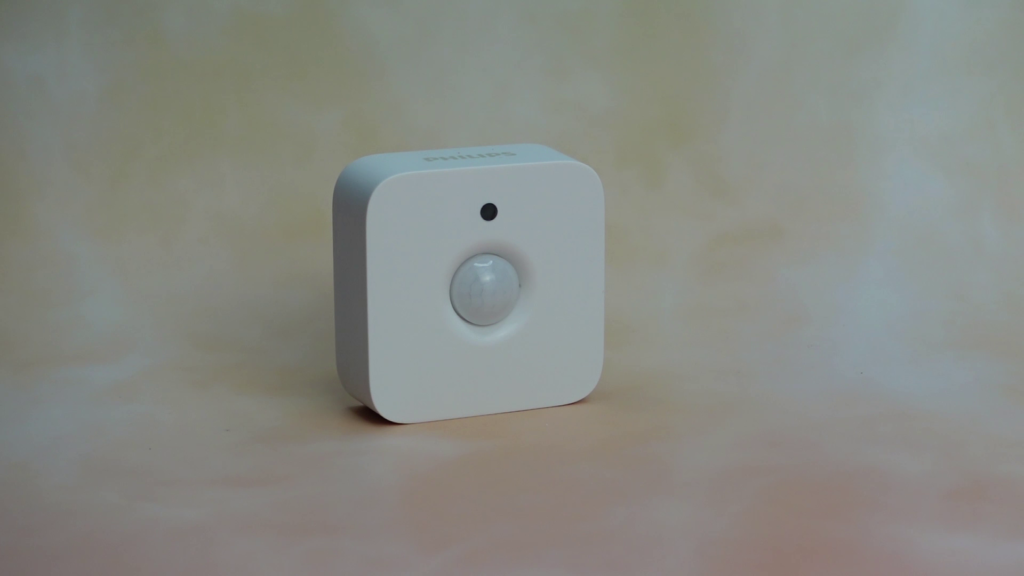
Aqara FP1
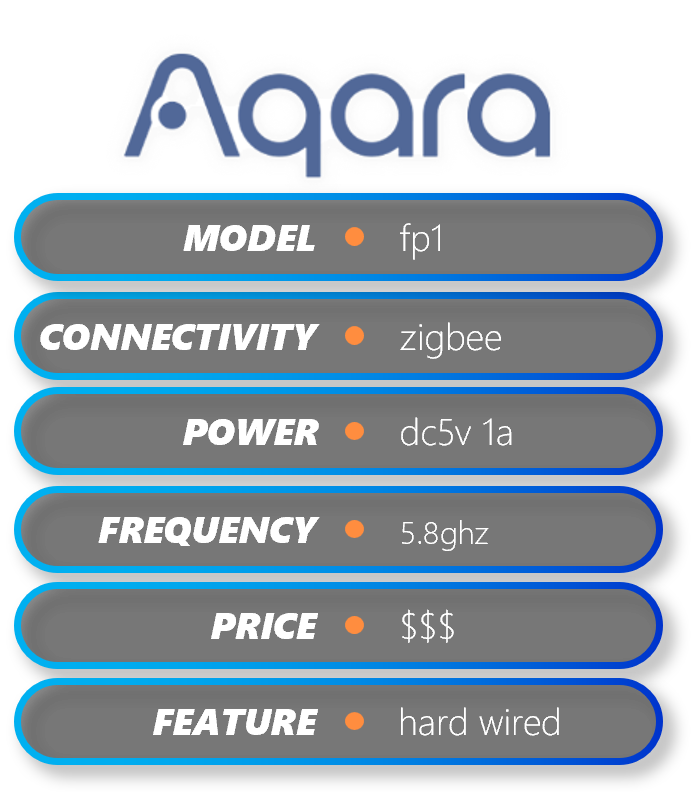
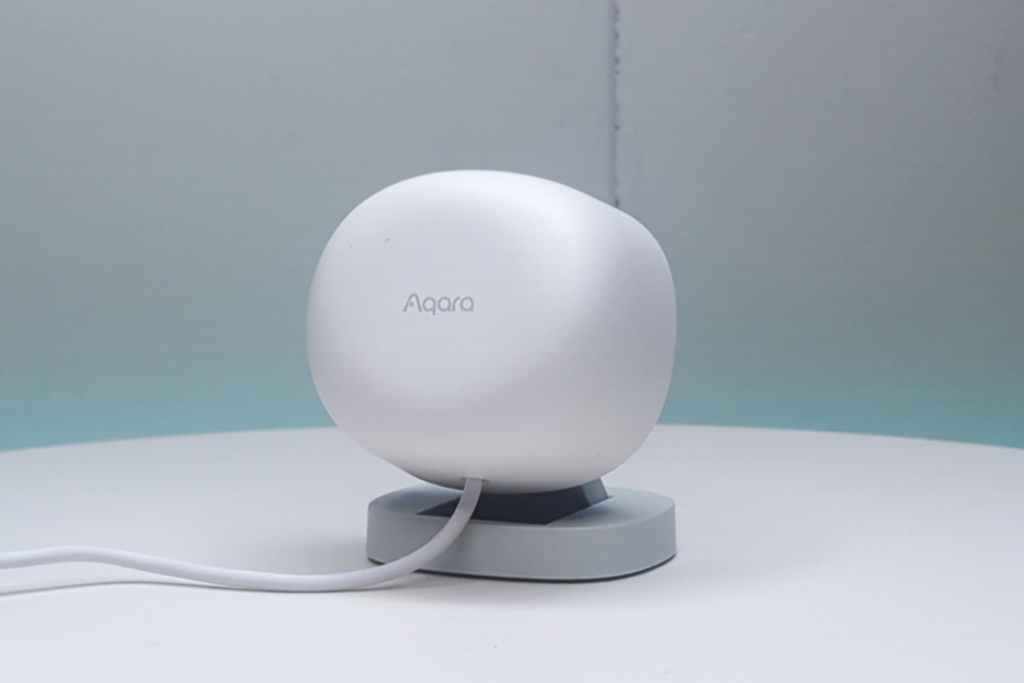

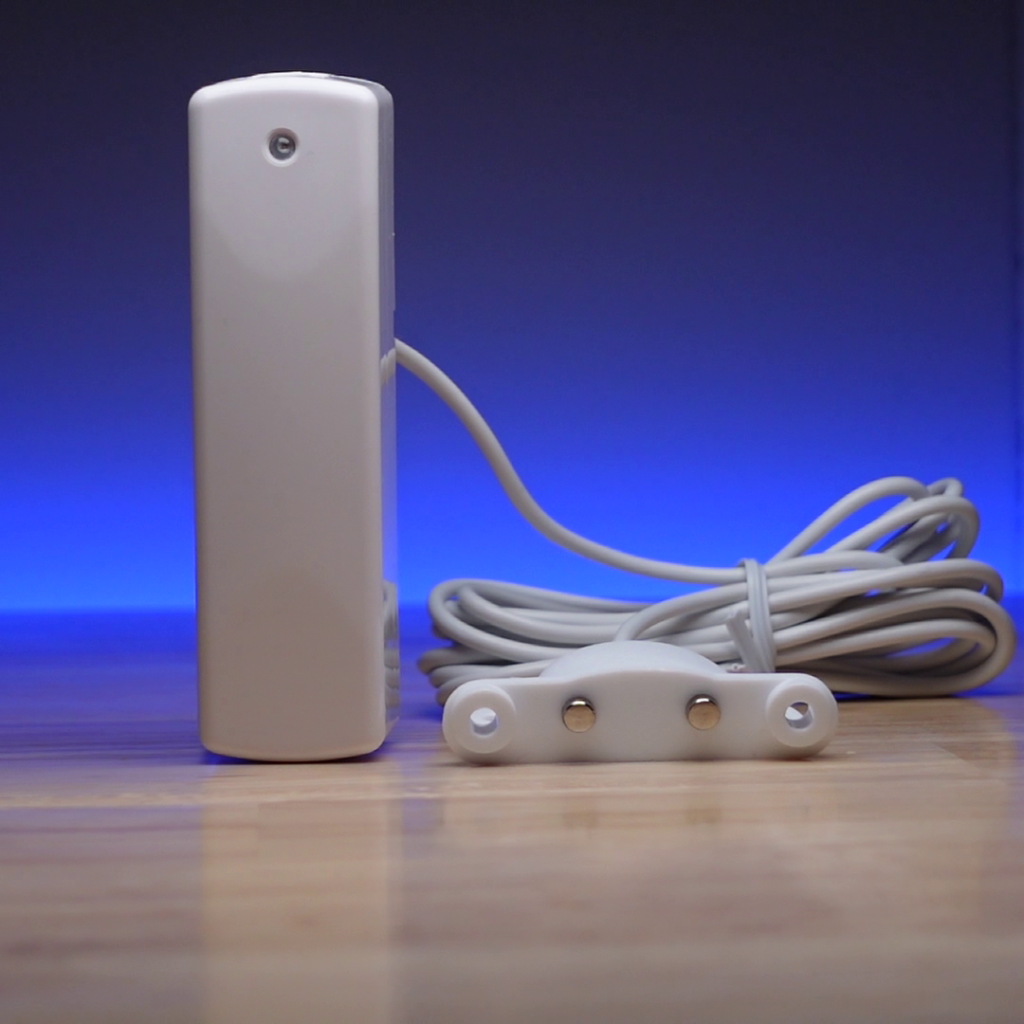
The next one is the Aqara FP1. You may have heard of the younger brother to this one, the Aqara FP2, and we’ll get to that one in a minute, but this one was Aqara’s original attempt at a presence sensor. Out of the box you get the sensor with a hard-wired cable, a US power adapter, an adhesive pad, and a metal plate for magnetic mounting of the sensor. It has the typical Aqara look, with the white body and grey accent. The grey stand is permanently attached to the device, and it articulates so you can adjust the angle and tilt of the sensor. In the center of the back it has a pairing button, and on the bottom of the stand there’s a QR code for use with the Aqara app.
Pairing
To pair the FP1, plug it in and then hold the pairing button down until you see the LED on the back flashing, indicating it’s in pairing mode.
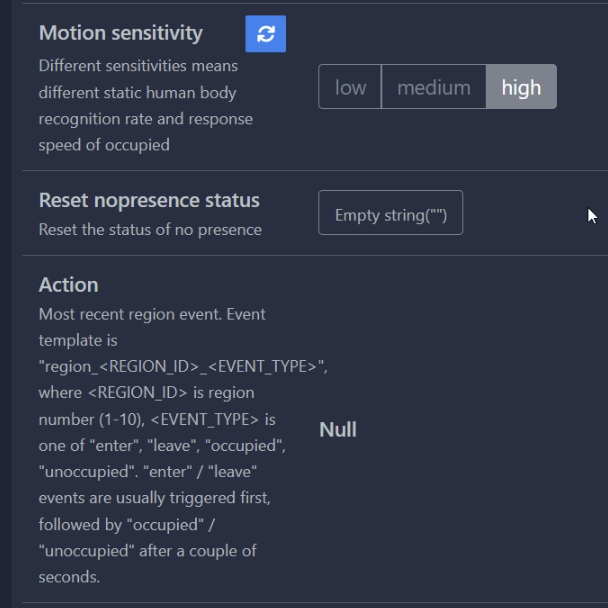
In Home Assistant, you get Presence, Device Temperature, Power Outage Count, and Presence Event entities.
You get config options for Monitoring mode, Motion Sensitivity, and Reset nopresence status, which I’m not sure does anything.
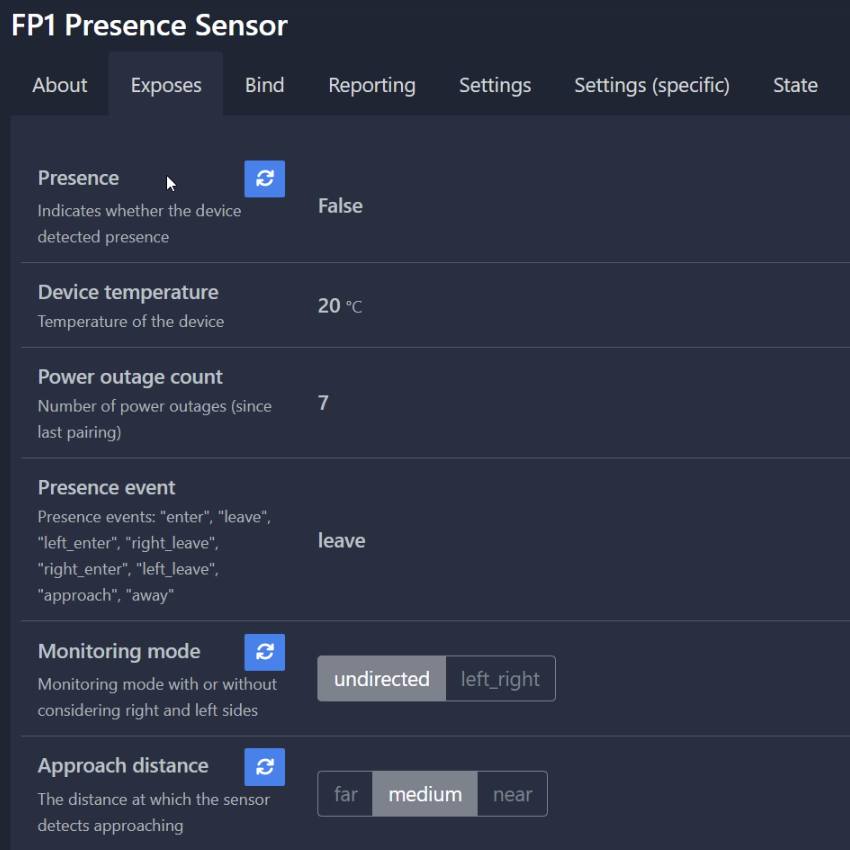
It also gives you the ability to add detection “Regions”, but it’s visually represented, so it might be difficult to understand what it’s doing. As I understand it, the field of detection is broken up into a 7×4 grid of zones. Then, for each region you want to specify, you can add the zones that you want to be part of that region
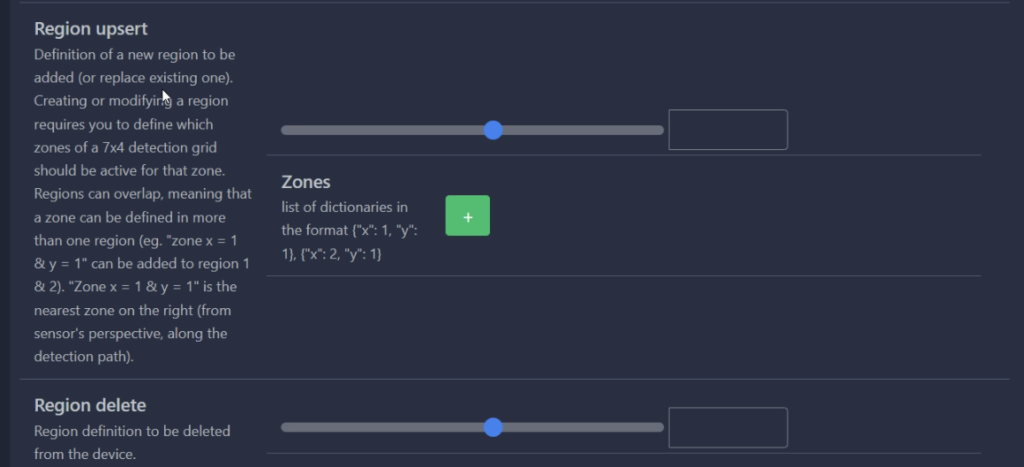
Unfortunately at the time of testing this device there was an issue with the UI, so I was not able to set any zones.
Features
Another issue I had beside setting zones was that the cooldown time was pretty long on this thing, and there is no way to adjust it. Also, the hard wired cable to me is a problem because you can’t use a longer one if you want to.
Aqara FP2
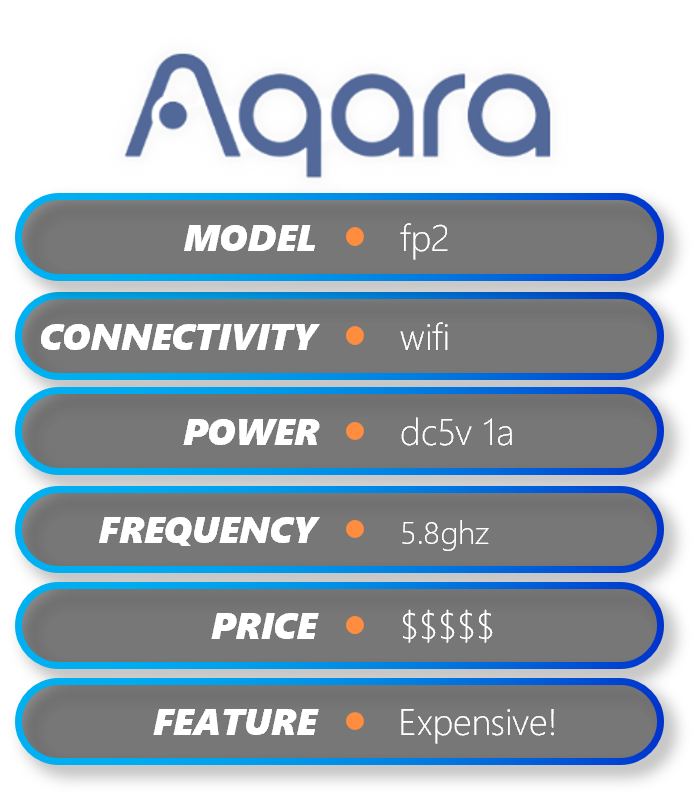


The next one is the younger brother to the FP1, and it’s the Aqara FP2.
Out of the box you have the sensor, the USB type C power cable, a metal pad for mounting the device, and also the adhesive pad. You can see that this device is more of a hockey puck shaped sensor than the other one, and this one has an LED indicator on the edge of the face of the device.
The integrated stand is a little bit different than the FP1 in that it doesn’t rotate, and only tilts. This causes a little issue when you want to stand up the sensor on a horizontal surface – the Aqara logo ends up upside down, which is strange and a bit annoying, but not a deal-breaker. You can also see that the stand has a Homekit Pairing code on it, and that’s because this device actually works over WiFi with Homekit, unlike the FP1 that works over Zigbee. The base of the stand also has a hole in it, and that’s so that you can screw mount it with the provided screw.
Pairing
The Aqara FP2 works with Home Assistant via the Apple Homekit integration. Before we add it to Home Assistant, we have to add it to the Aqara app. When you plug in the power cord, the pairing light will begin flashing rapidly. In the app, tap Add Accessory, and then choose the FP2 sensor. Walk through the setup steps, in the app to get it all set up. One of the cool things you can do in the app is set up detection zones, similar to how the FP1 zones are set up.
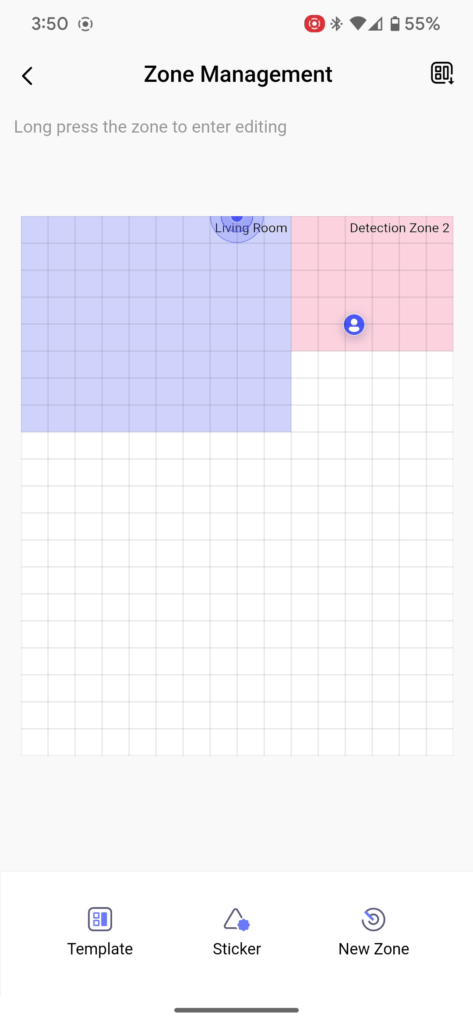
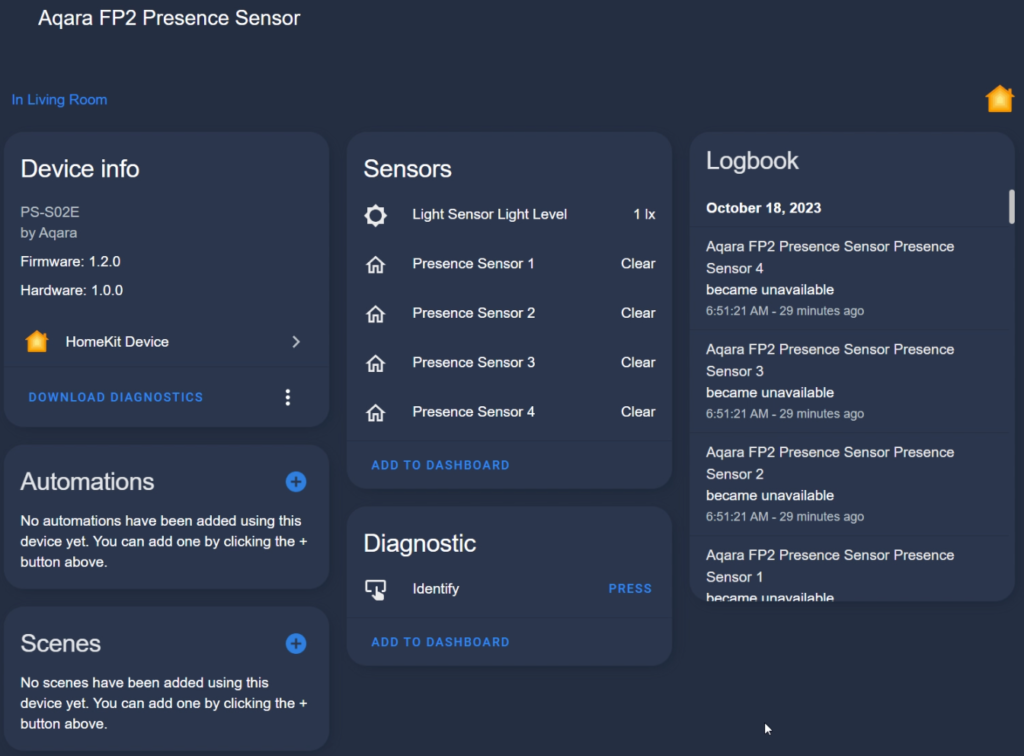
Once it’s set up, head over to Home Assistant, where you should see the device discovered via the HomeKit Controller integration. Click configure, and then enter the HomeKit pairing code when asked and click submit. Choose a room if you’d like, and then click Finish. In Home Assistant you get an illuminance sensor and multiple presence sensors. The first individual presence sensor represents the entire detection area, and the others are the respective zones that you set up in the app. As you set more up, you get more presence entities showing up in Home Assistant.
Features
I actually had a ghosting issue with this sensor where a “target” would stay detected even though all targets had exited the sensing field. There was a firmware update that helped with this I guess, but to me it was a pretty annoying issue.
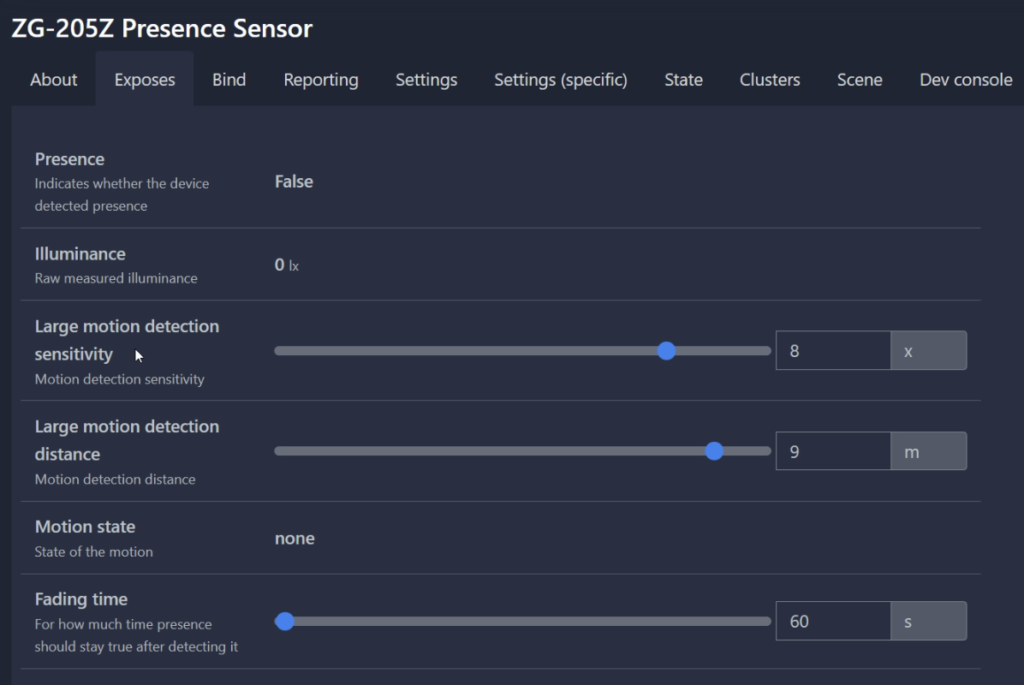
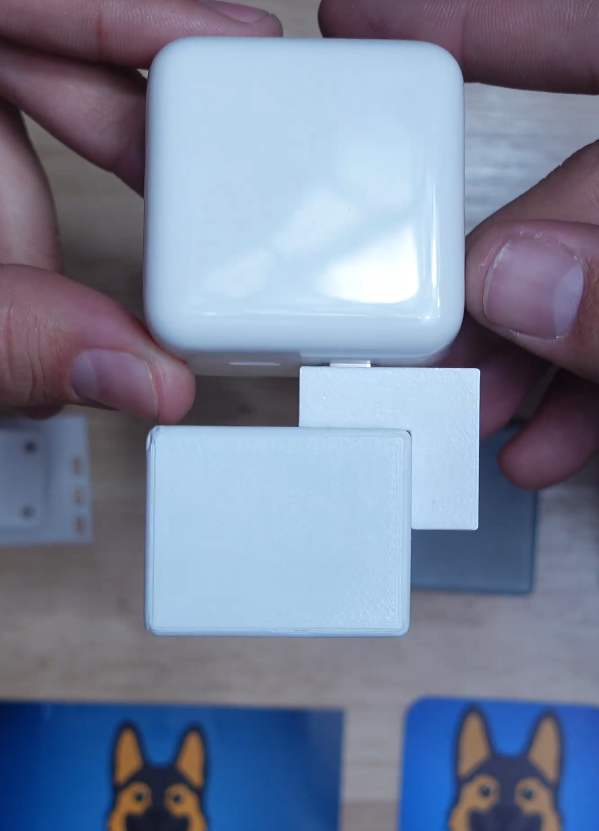
Tuya ZG-205Z
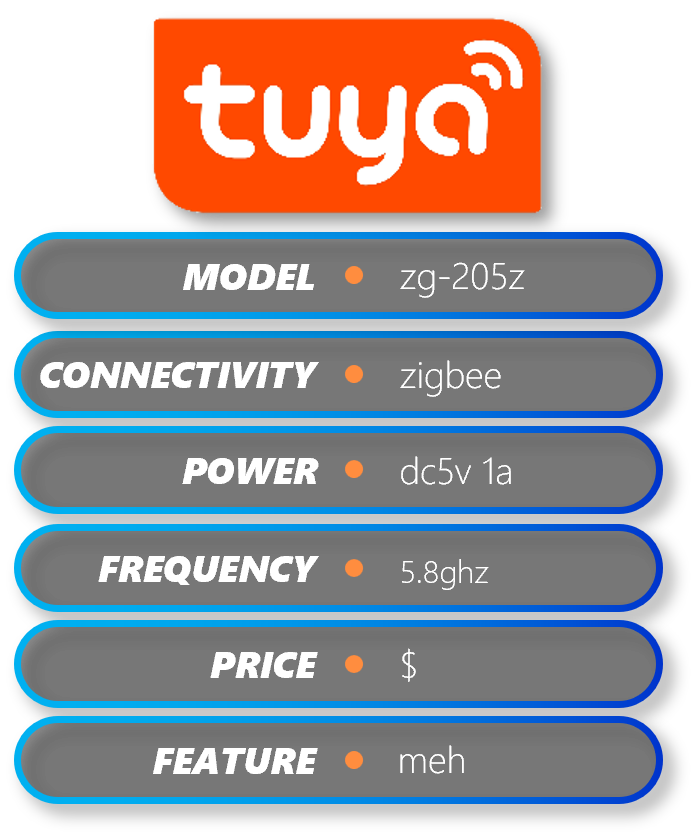

This next one is one that popped up on AliExpress, and it caught my attention because it said in the description that it works with Home Assistant.
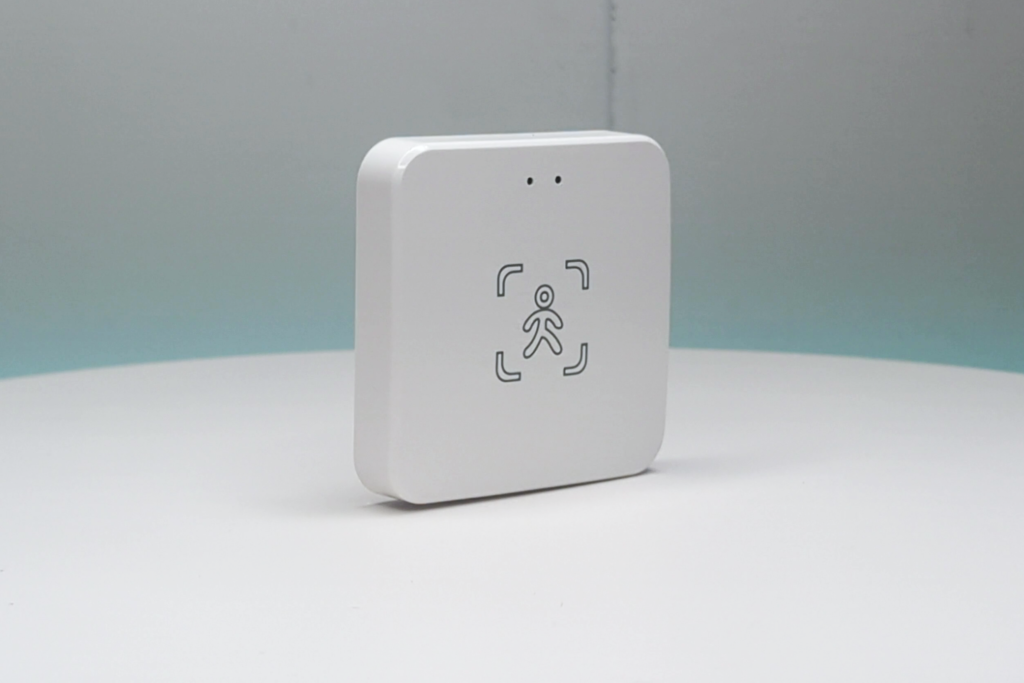
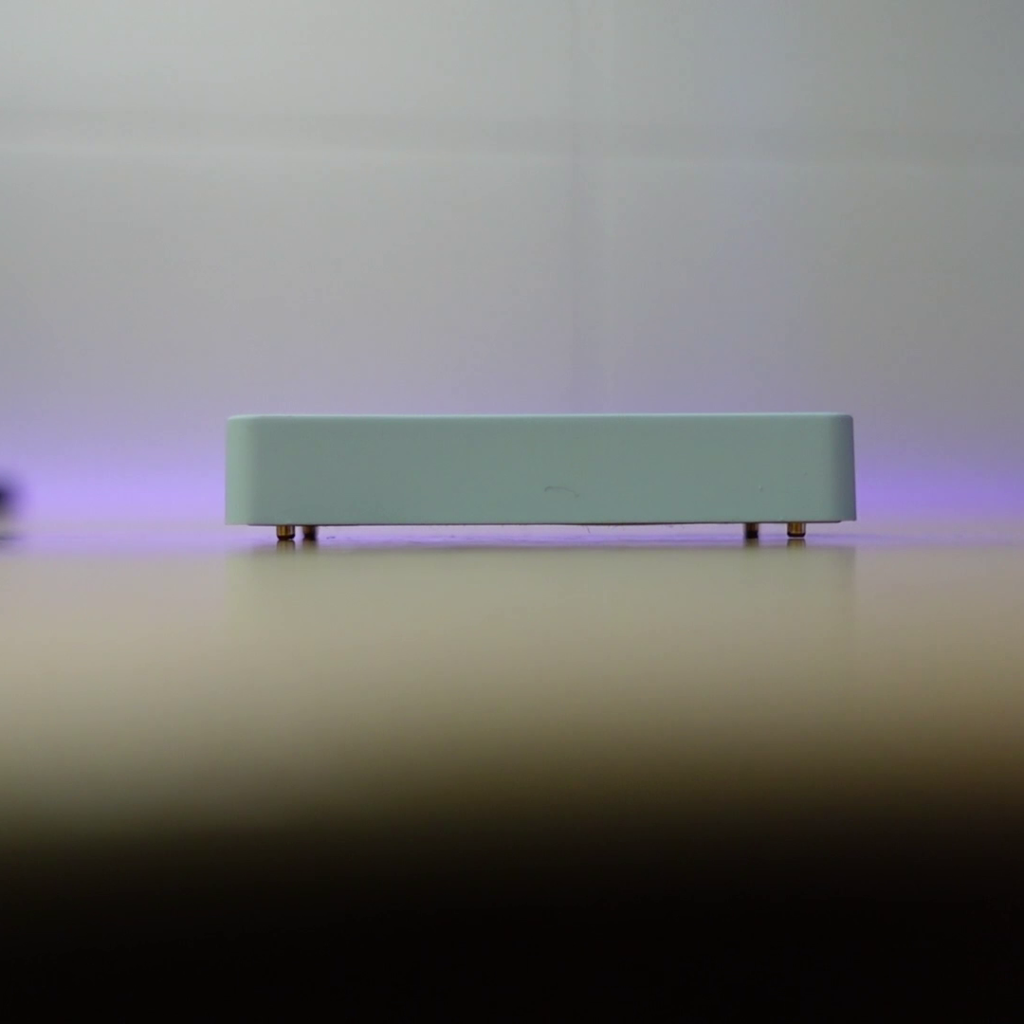
It’s pretty generic looking with a white square body and the human presence graphic on the front. It has two holes on the front as well, one for illuminance sensing and one for and LED. On the bottom edge you have the USB C port for power and you have the pairing button. On the back it has four rubber nubs, which kind of indicates that it should be placed no a horizontal surface, but that doesn’t really make sense for this sensor.
Pairing
As soon as you plug the power in, the LED on the front will start flashing, letting you know that it’s in pairing mode. If it doesn’t go into pairing mode, hold the button on the bottom until it does. In Home Assistant you get Presence, Illuminance and Motion State sensors, and you get adjustments for Large, Medium, and Small motion detection sensitivities and distances, and you also get a toggle for the LED indicator.

Features
I really don’t have much else to say about this sensor, so let’s move on.
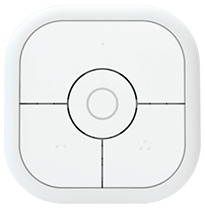
Screek Human Sensor 2A
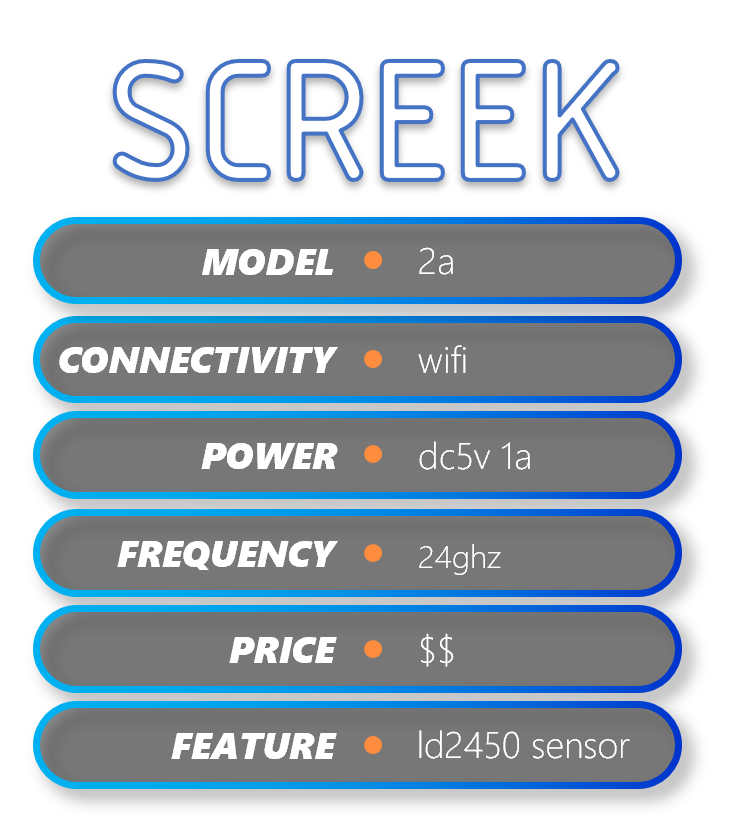
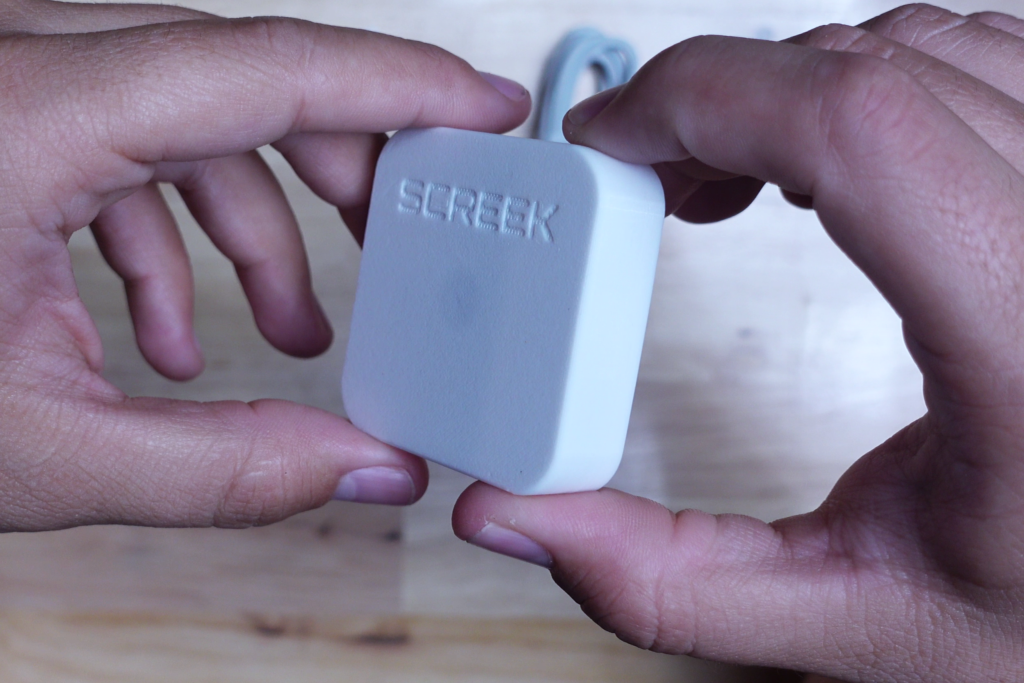
Next we’ll look at another sensor that runs ESPHome, the Screek 2A presence sensor. Out of the box you get the sensor, adhesive pads, and a USB C cable. The sensor body definitely feels 3D printed, maybe with a resin printer, but feels high quality. You can see that the case must be thinner in the middle, because you can just barely see the sensor behind the case, and that’s probably for illuminance measurement if I had to guess. The back of the case has two holes, but I’m not really sure what they’re for.
There’s also a sticker on the back that points you to their website that has more info about the sensor including setup instructions.
Pairing
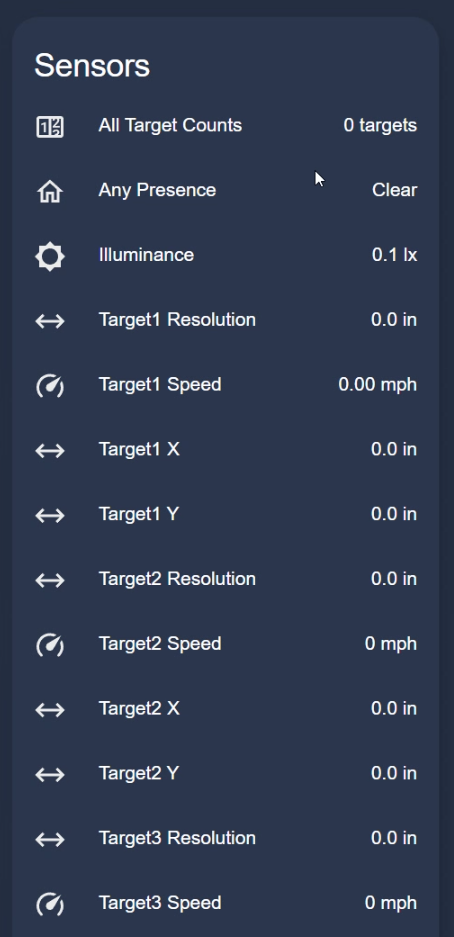
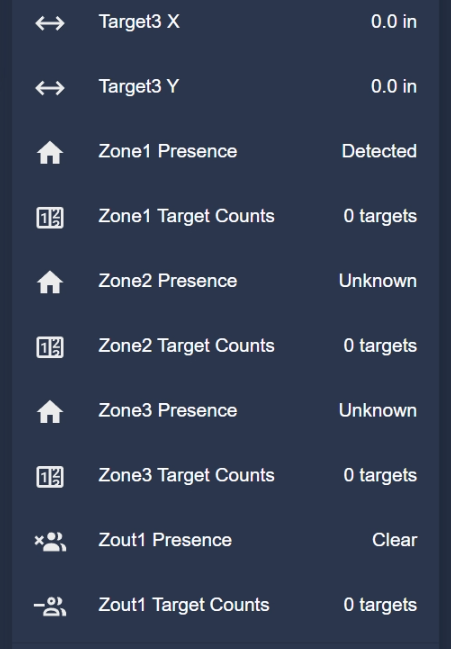
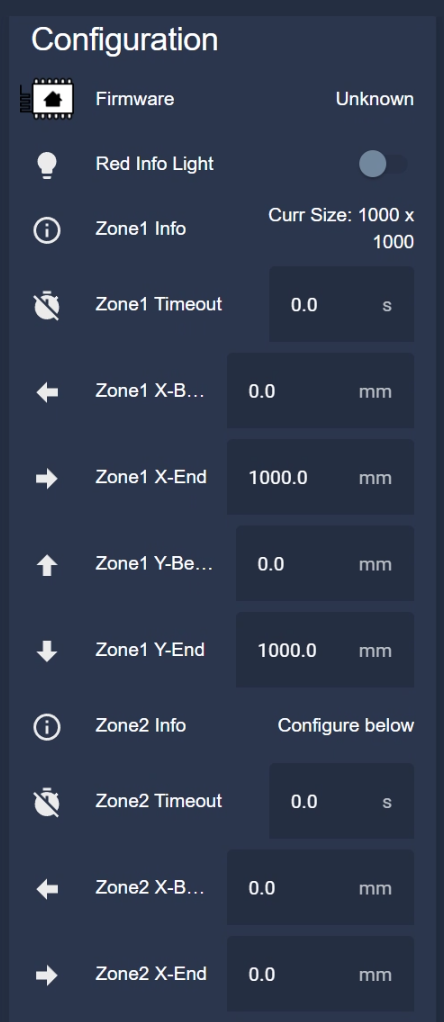
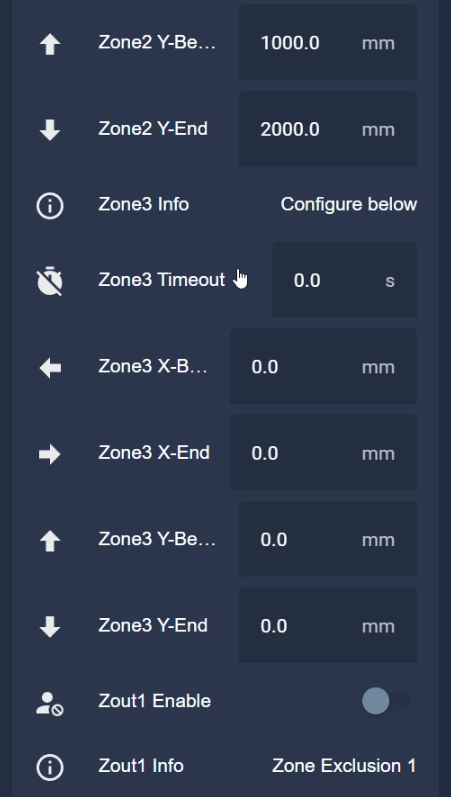
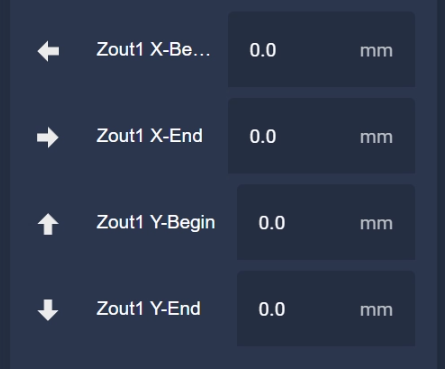
Since this sensor runs on ESPHome, you follow the same process as we did with the Athom, EP1, and EPLite. Connect the power and wait for the red light to blink, and then use your phone to connect to the access point that it broadcasts. Once you’re connected, enter your network info and save it, and then head over to Home Assistant where this device should be discovered automatically. You get entities for Target Count, Presence in Any Zone, illuminance, Target Resolution, Speed, and X and Y for each of 3 possible targets to track. You also get Presence and Target Count entities for each Zone that you specify. In the configuration section, you get the ability to set the zones by distance from the sensor, you get a toggle for the status light, and a few more entities regarding the microcontroller.
Features
There are so many options here it’s hard to get a handle on, but there is documentation on the Screek website, so I’ll leave a link to it in the description. This sensor is actually rocking a HiLink LD2450 under the hood, the same sensor as the EPLite, but I did notice that target distance is not reported nearly as often, and it’s not as accurate.
The next two sensors we’ll look at are fairly new, so I’ve had a lot less time to play with them, but I’ll still try to give you and overview of their functionality.
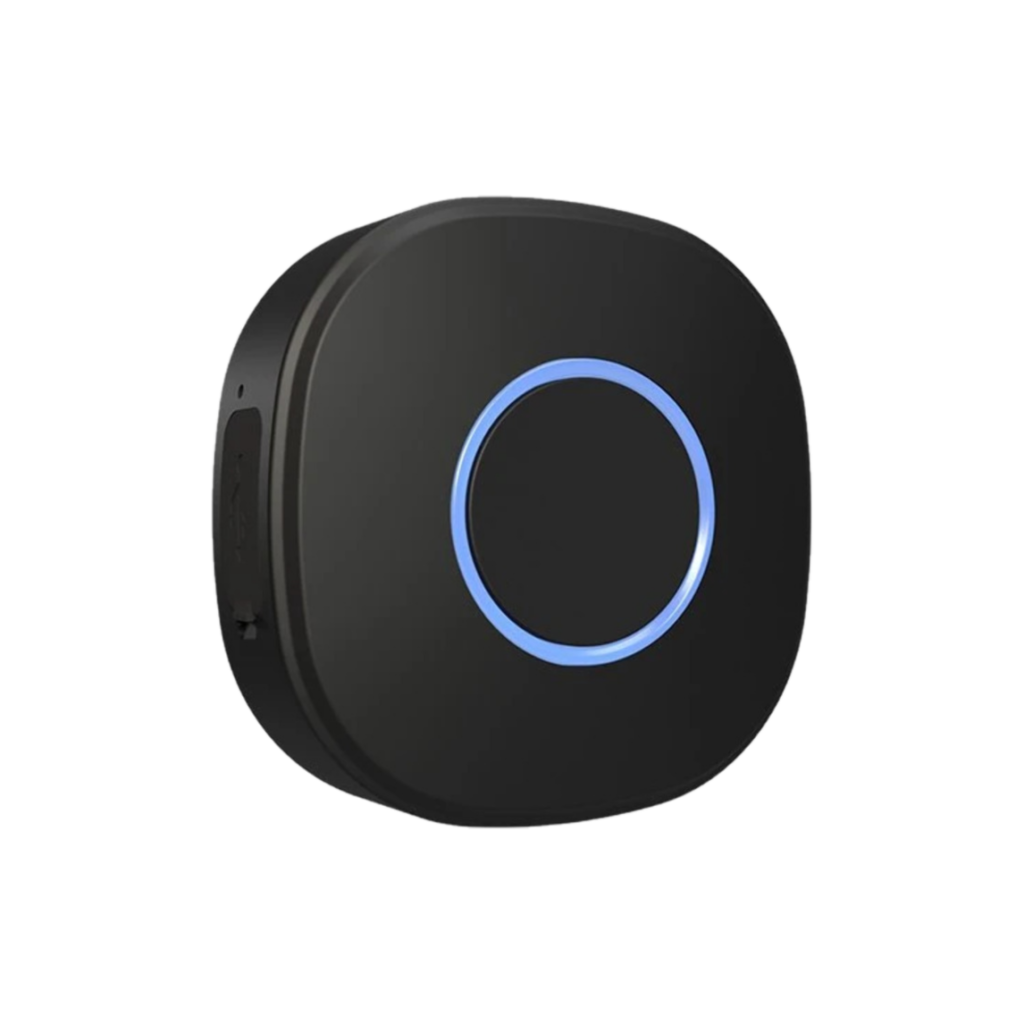
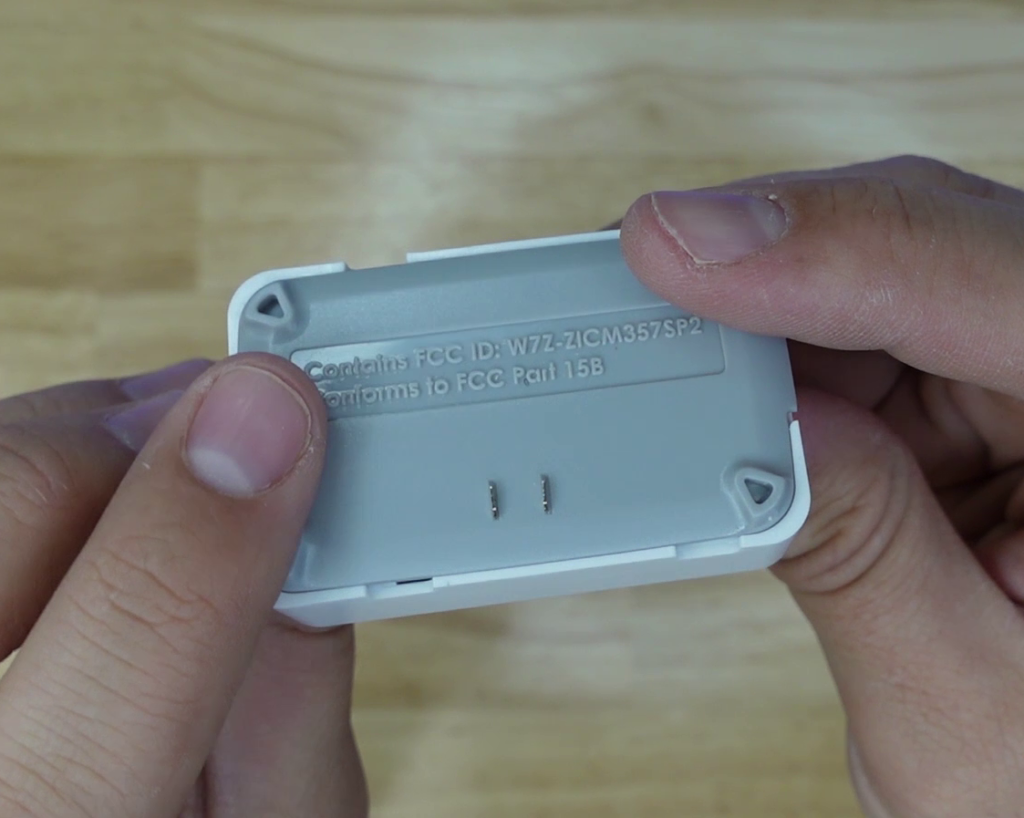
Sonoff SNZB-06P
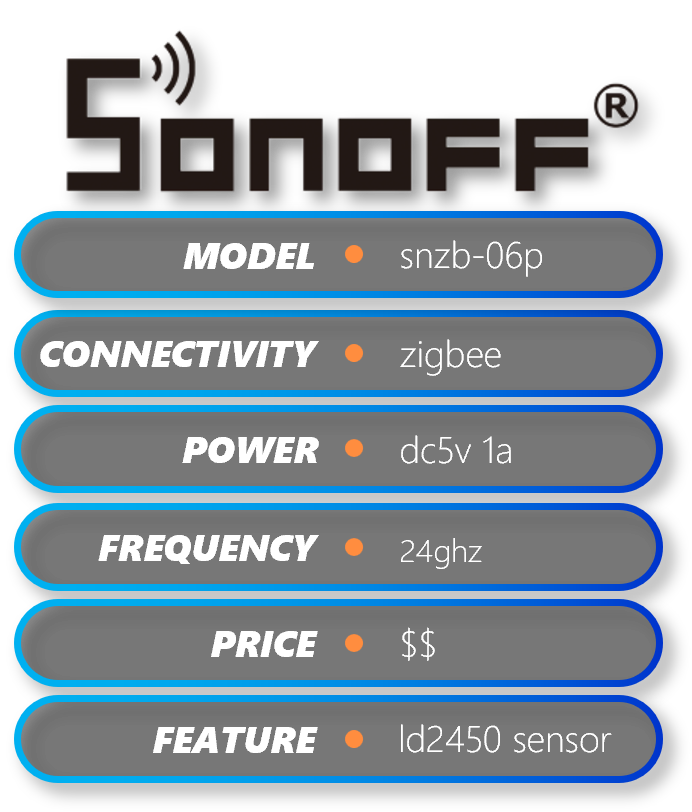


The Sonoff zigbee presence sensor is a much-anticipated sensor only just recently released. I reached out to them, and they were happy to send one to me to play with.
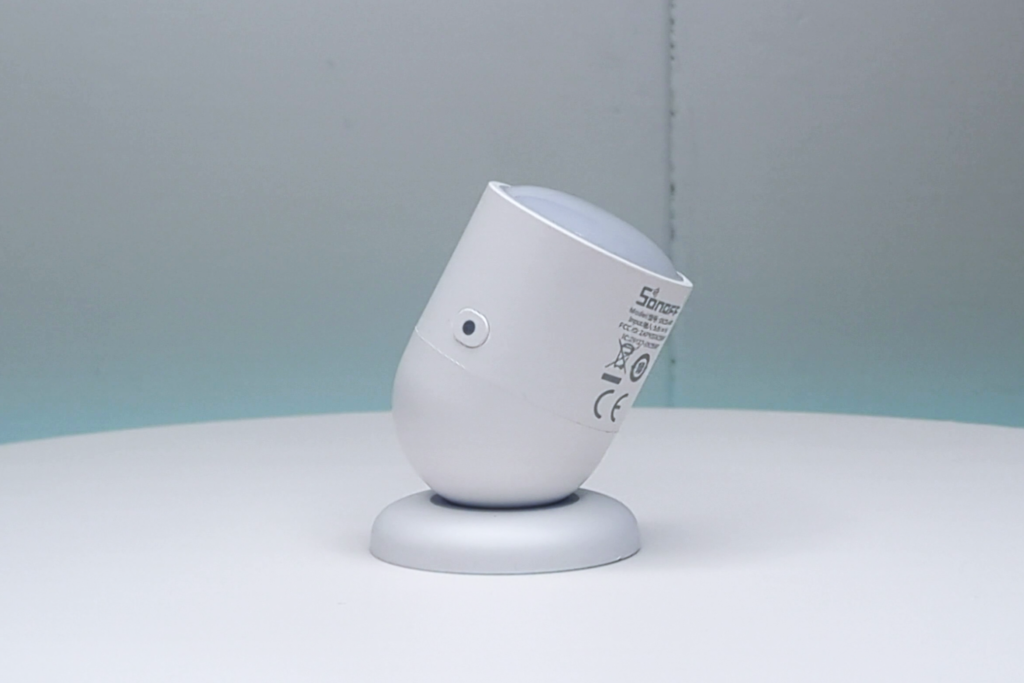
Out of the box you get the sensor, a magnetic base, some screws and adhesive, and a power cable. The sensor itself looks an awful lot like a motion sensor actually, with the frosted lens on the front. We know radar sensors don’t need lenses, so I’m not sure what’s up with it! The sensor also has a pairing button on the top and a USB-C port on the bottom.
The magnetic base looks pretty cool though, as it not only holds the sensor but allow sit to articulate. I ran into an issue with this though, and that is that the friction between the sensor and the base is so small that the weight of the cable can pull on the sensor and move it. A stronger magnet would probably fix this.
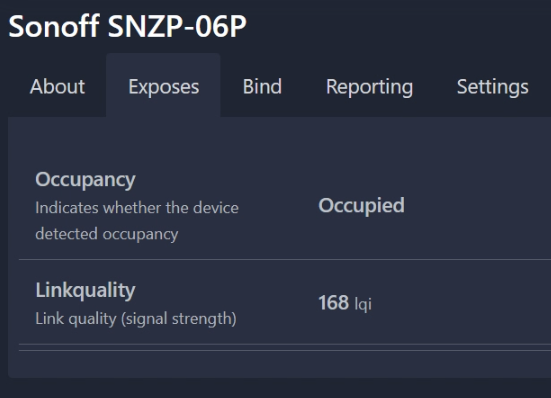
Pairing
To add this sensor to Home Assistant, all you have to do is plug it in and it’ll go into pairing mode. In Home Assistant you get really only one important entity, and that’s Occupancy. Honestly this was a bit of a let-down, and I expected some control over settings, at least sensitivity. From what I can see on the website, you can adjust the sensitivity in the eWelink app, so hopefully this functionality will come to Z2M at some point in the future.
Features
Overall I think this sensor looks pretty good, but like I mentioned before, I think they could have done a better job with the base. The price is excellent on this one, but the jury is still out on this one because there are no adjustments on the sensor in Home Assistant. Hopefully some of the adjustments we see in the app can be added, because if not it would be a no go for me on this one.
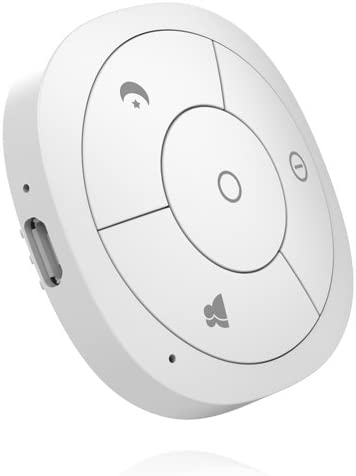
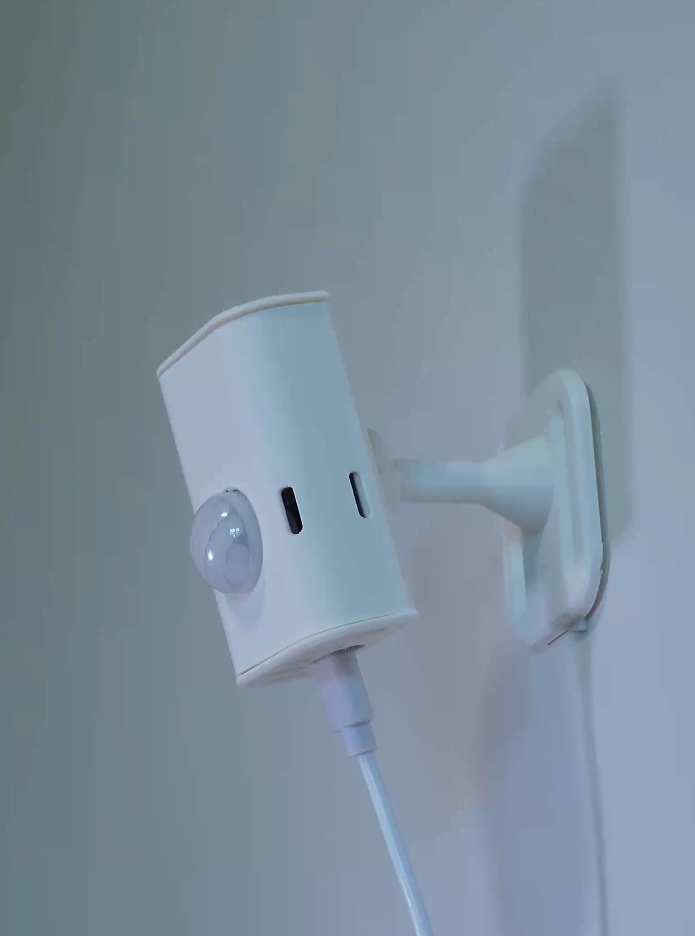
Apollo MSR-1
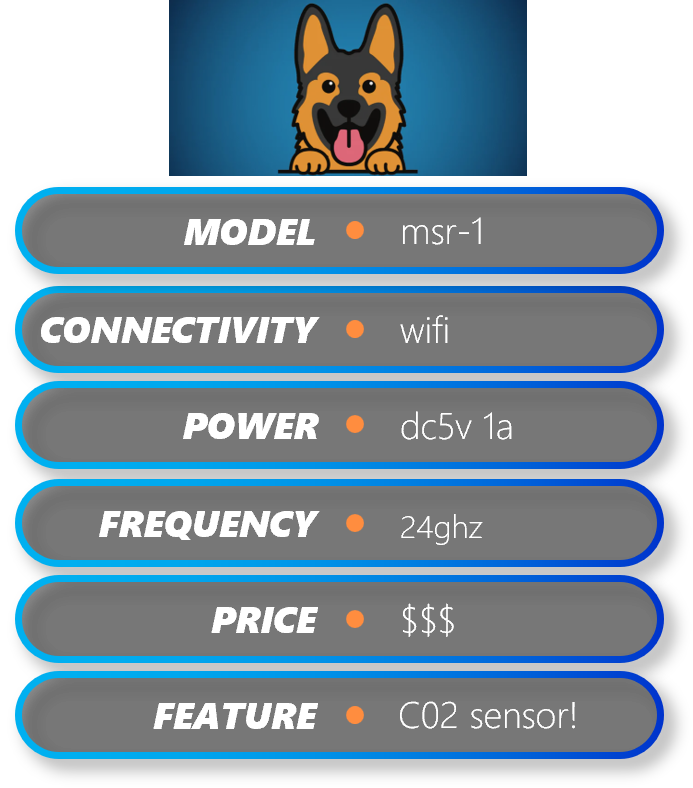

I was pretty much done testing all of these devices, but then I got an email from Apollo Automation. They have just released a presence sensor, and they wanted me to check it out. This one is the MSR-1, and it has some interesting features.
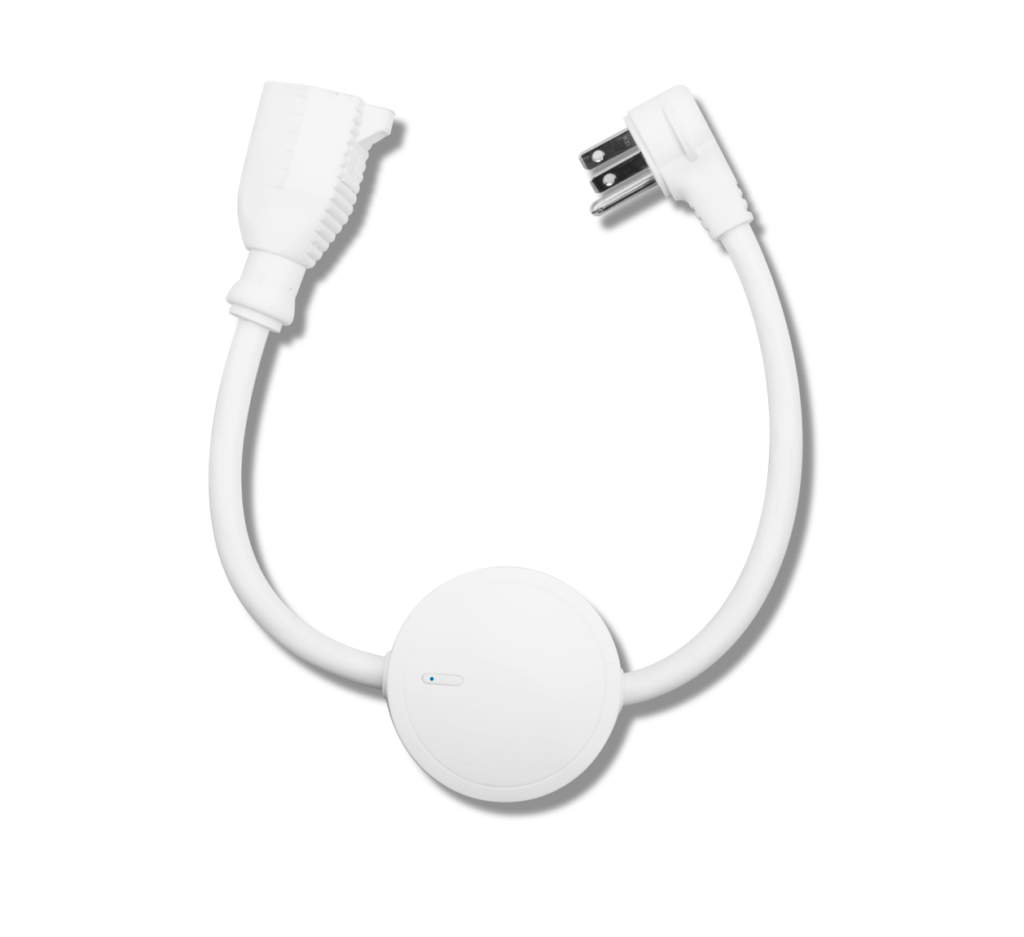
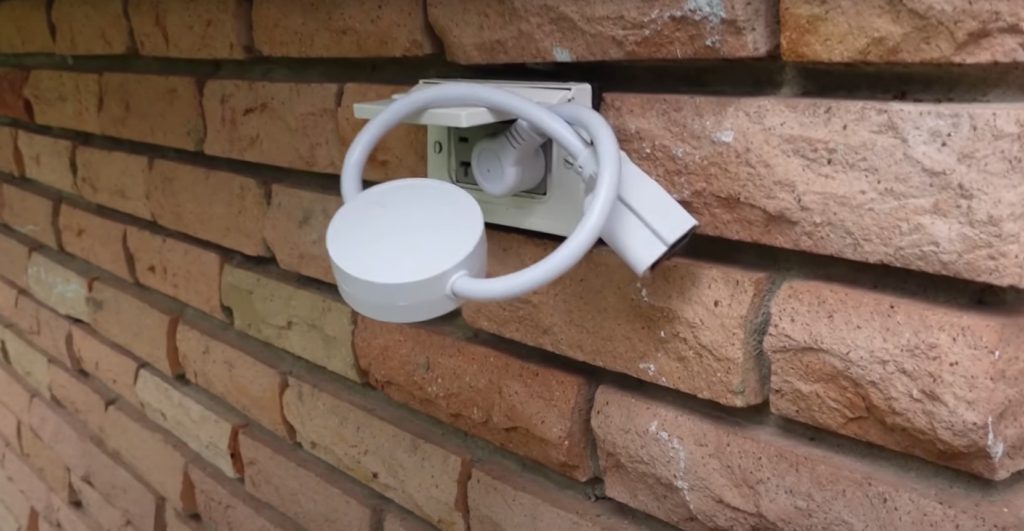
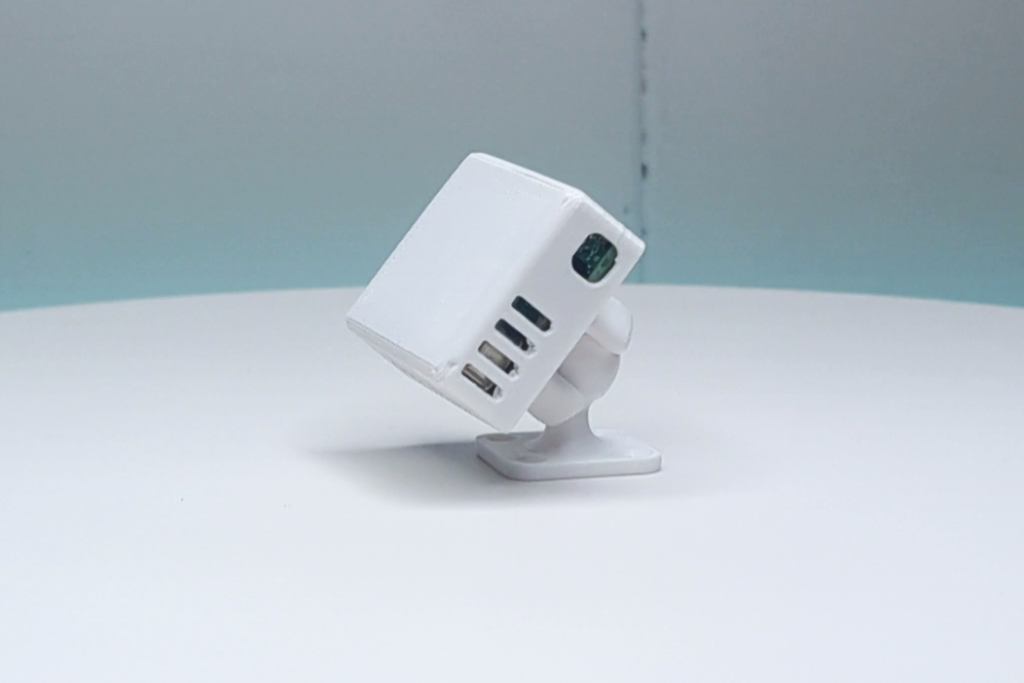
It comes with 3 different 3D-printed cases of different colors, and a couple different mounting options, with an articulating stand with screw holes or adhesive to mount it. It also has another mount that’s pretty cool, it’s a wall adapter, with a custom USB cable. It allows you to use the power brick like a wall mount, attaching the sensor to the brick.
You can remove the back by sliding it off, and if you pop the case off you can see that it’s a custom board with the LD2410B attached to it. This custom board also has temperature and humidity sensors, a lux sensor, a CO2 sensor, and even a piezo buzzer that can play tunes – super cool! It also has an RGB led on it, which is something you really don’t see on these sensors.
If you want to, you can slide the articulating mount onto the back for mounting it on the wall in the future.
Pairing
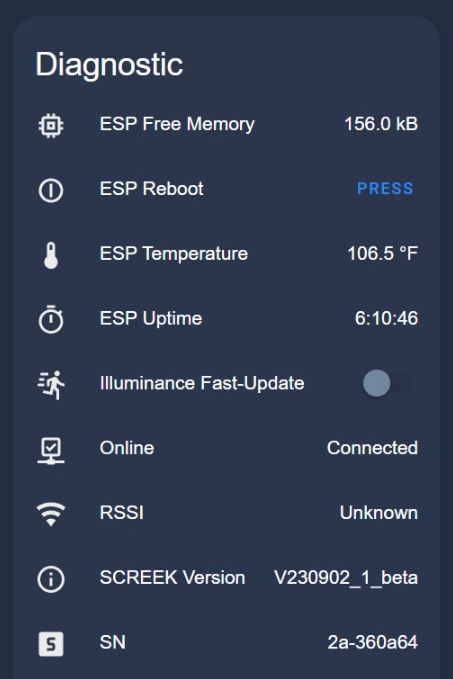
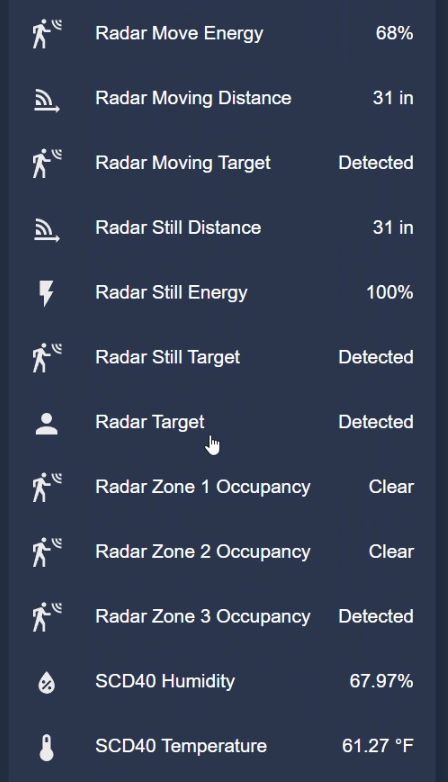
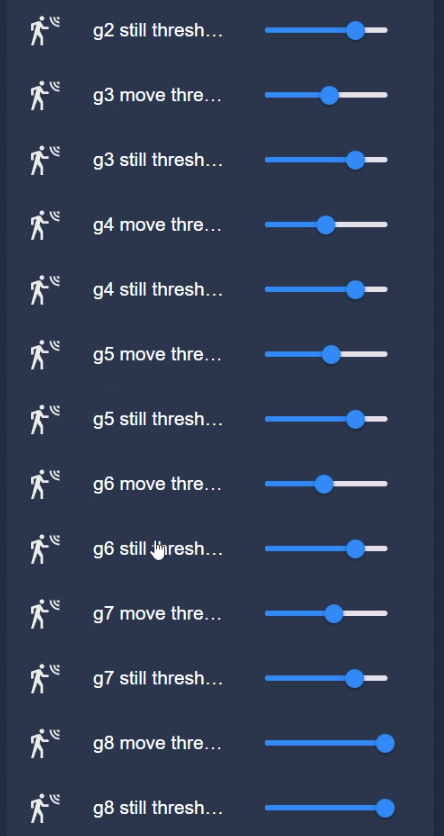
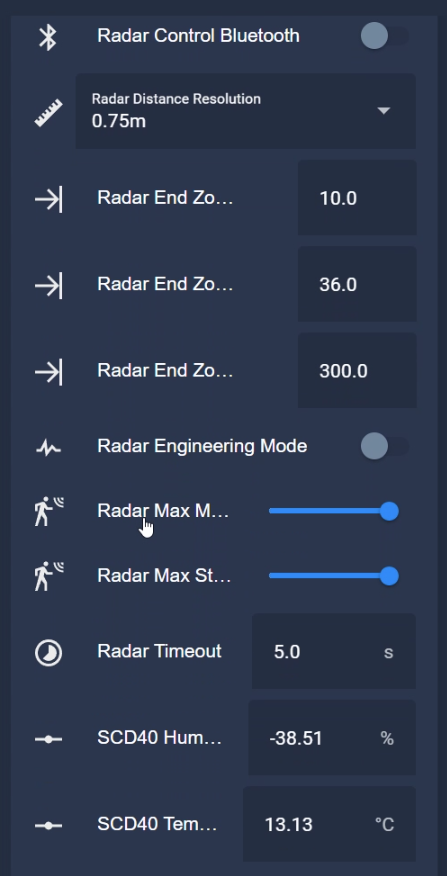
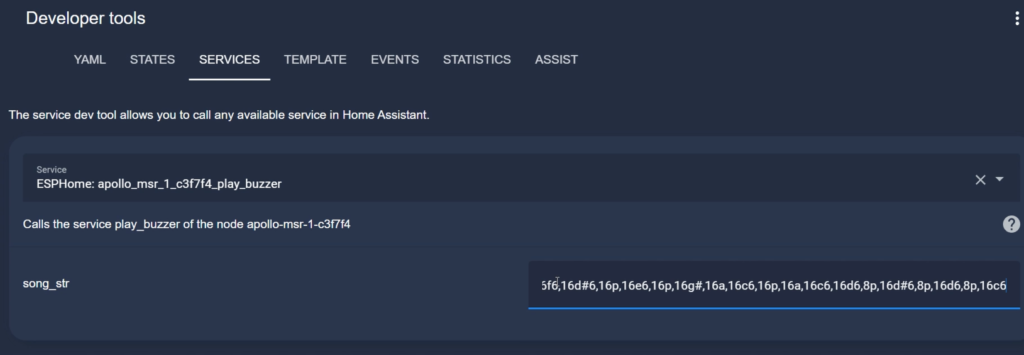
This device is powered by ESPHome, so it’s straightforward to get set up. Plug it in to power, and then wait about a minute for it to get ready, and then connect to the AP it broadcasts with your phone or PC. Put in your network info and hit save, and then the MSR-1 should automatically be discovered in Home Assistant. In Home Assistant you get so many sensors it’s a bit overwhelming. You get humidity, air pressure, temperature, lux and CO2 sensors, and you also get calibration and offset adjustments for these. On top of that you obviously have your presence sensor, still and moving target sensors, target distance sensor, and three zone sensors. In configuration you can set your zones, but you also get eight gate threshold settings. These gate controls are used with the gate still and move energy sensors while in engineering mode to tweak the entire sensing field of the device, dialing it in exactly the way you want. There’s a ton more to this sensor, but that would take a separate dedicated review I think.


Features
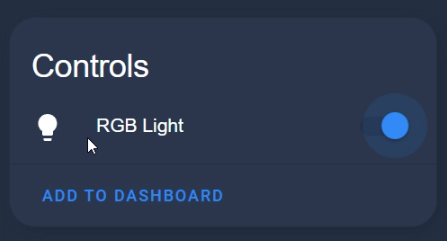
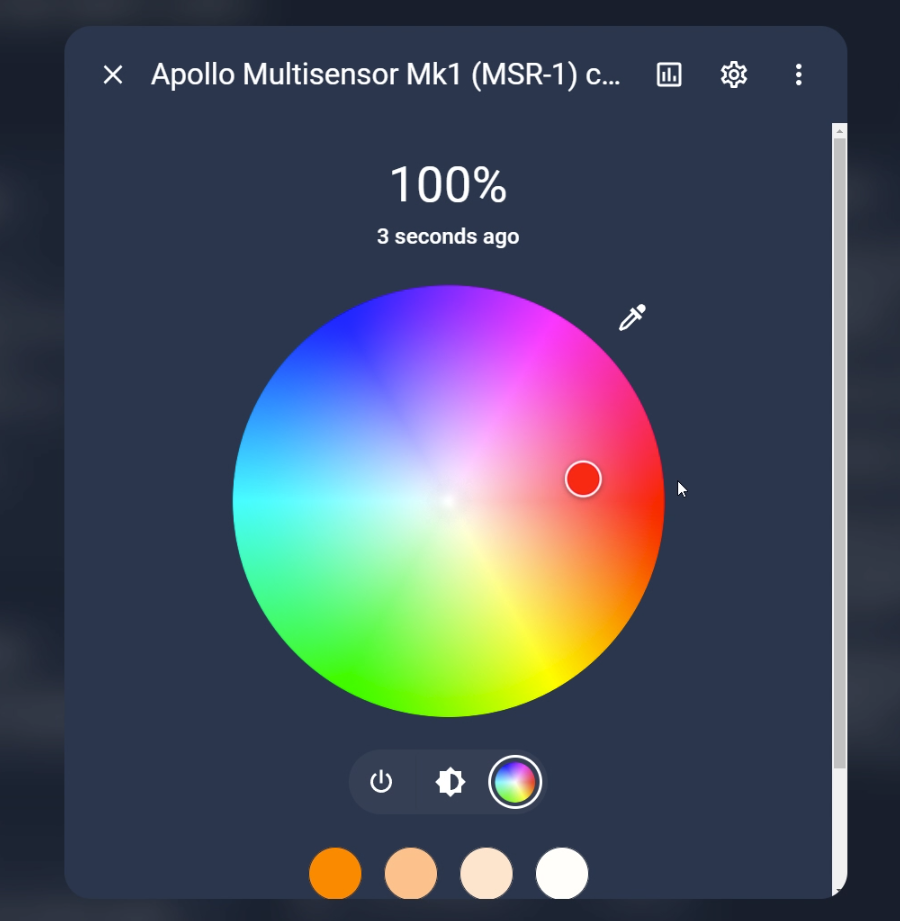
One cool thing about this sensor that I mentioned before is that RGB LED on the custom board, which can be controlled in Home Assistant. This allows you to use the LED as an indicator in whatever way you’d like.
What I also really like about this sensor is that ESPHome handles setting up the 2410 so we don’t have to use the Hi-Link app. As you saw with the 2410, it’s a bit annoying to tune because you have to use the app and it requires bluetooth, so having all of the entities right in Home Assistant and the ability to turn on engineering mode and go to town is pretty great. The Apollo team has some pretty decent documentation, so you can check out the website for instructions.
The threshold works such that 0 is the most sensitive, and 100 is the least sensitive. It corresponds to the values you see under “Move Energy” and “Still Energy” for each gate, you can get more accurate data using the HLKRadarTool app if you need to.
Another cool feature this device has a is a piezo buzzer that can be controlled by Home Assistant via a service to play custom tunes.
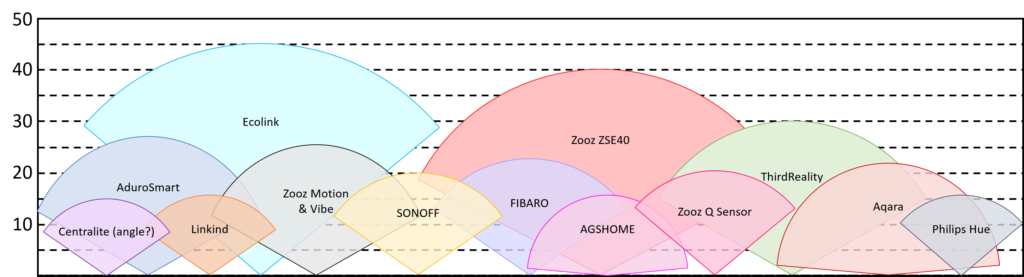
Testing
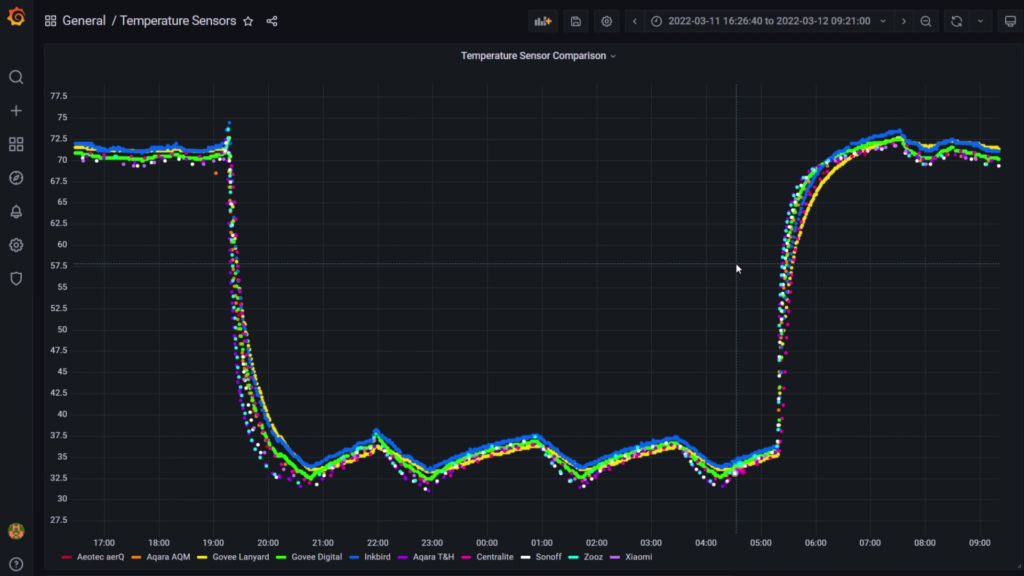
Ok, so let me show you the results of some testing I did. First, I tuned each sensor to pick up human presence our open basement, and then I performed the following tests of response time and cooldown times in Home Assistant, and for each that had a target distance entity, I tested them to see if they were accurate.
Response Time
For the response time testing, I found that they were all withing a second of each other, but the Athom and EPLite sensors seemed to be the quickest at a distance. The one that took the longest to respond was the Aqara FP1, which acted as if it had a sensing angle of 45 degrees.
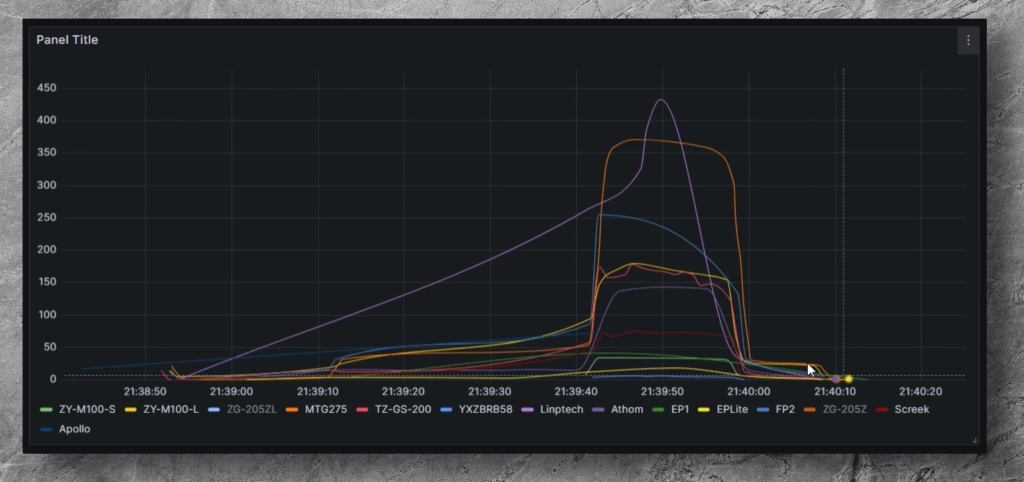
Cooldown
When you look at standard cooldown time, this is where you start to see a big difference.
Most of them had decent cooldowns with exception of the few of the Tuya sensors that had cooldowns that were a bit long in my opinion. The ZG-205ZL and YXZB had cooldowns of 3 minutes and 2 minutes respectively, and this was with the Fading Time set to 30 seconds for the 205ZL, while the YXZB fading time was set to 100. Adjusting these seemed to reduce the cooldown time, that worked out. The other sensor with a massive cooldown time was the Aqara FP2, coming in at 4 minutes. I’m not sure if this was standard cooldown, but it took forever to clear up. I took a look at the target map in the app, and it still was detecting a target, even though none was there. After some of my testing I noticed a firmware update that was supposed to fix Ghosting, and it seemed to reduce the cooldown time.
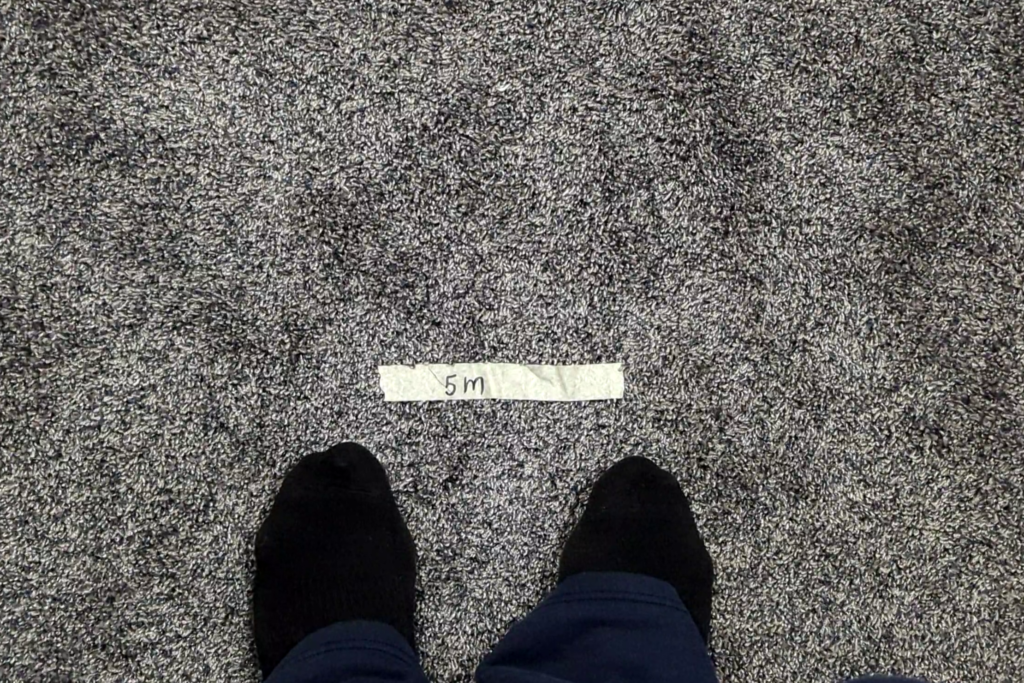
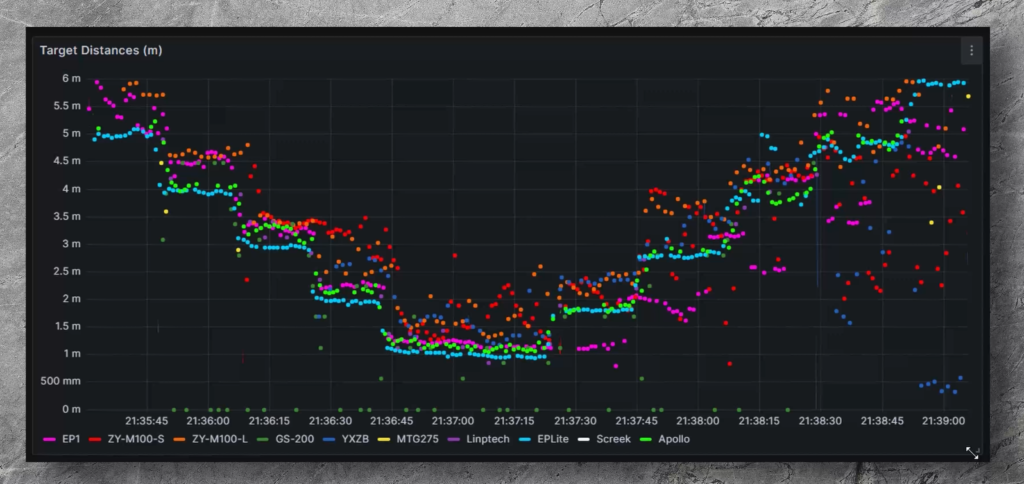
Target Distance/Distance Accuracy
Next, I did a rough test of target distance, laying out a tape measure and marking out a series of positions at 1, 2, 3, 4, and 5 meters away from the sensors. This test only looked at the ones with Target distance entities, and so some of the sensors I really wanted to try this with couldn’t be included.
For the EP1, I used the beta firmware to test the target distance. The most accurate by a mile was the Everything Presence Lite, and this was followed closely the Everything Presence One, the Apollo MSR-1, and the ZY-M100-L. The Linptech was pretty accurate too, but had a sample rate that was pretty low.
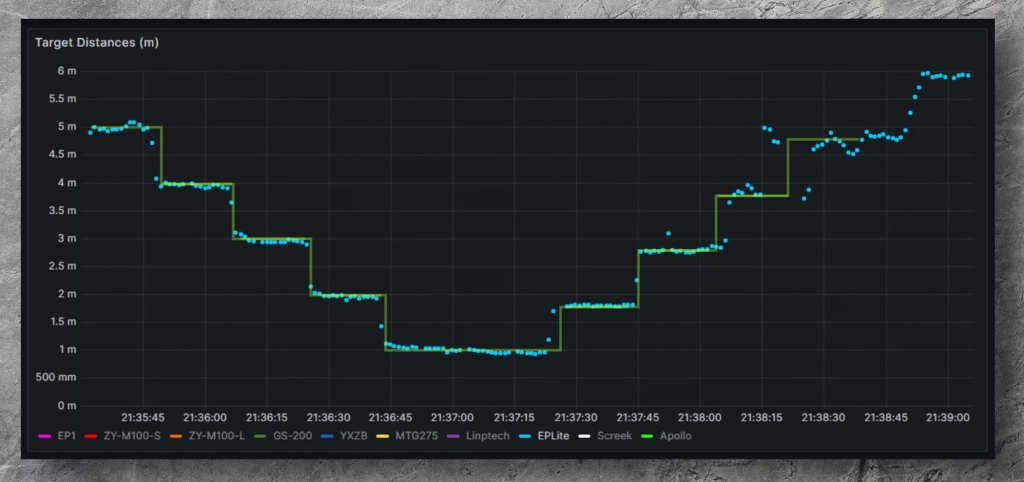
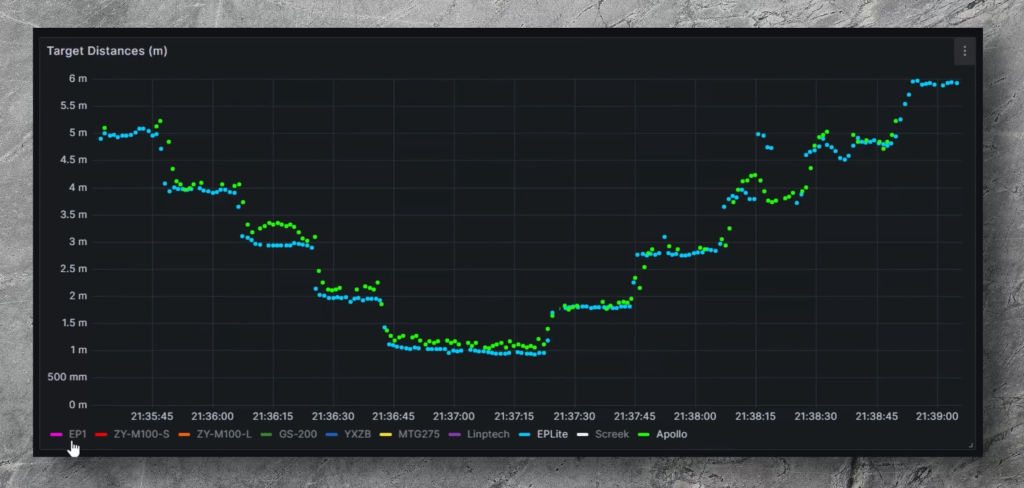
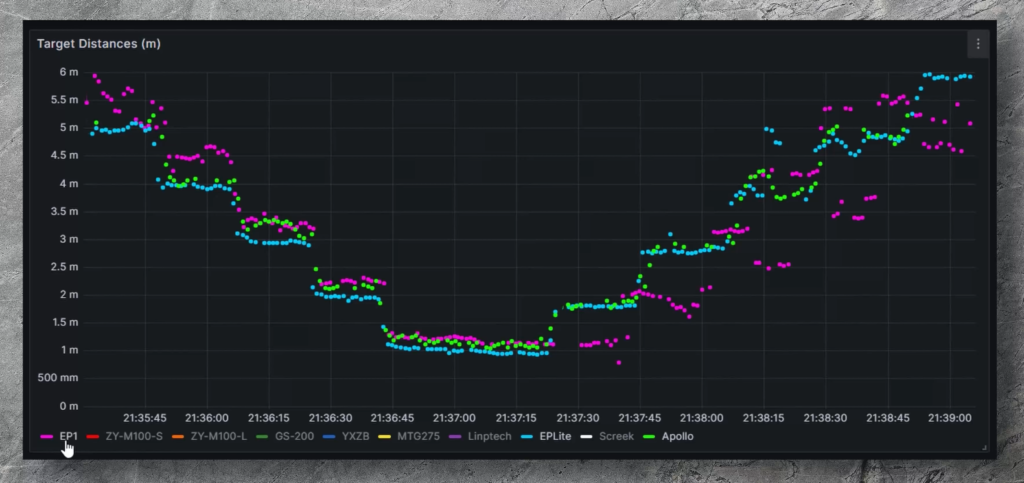
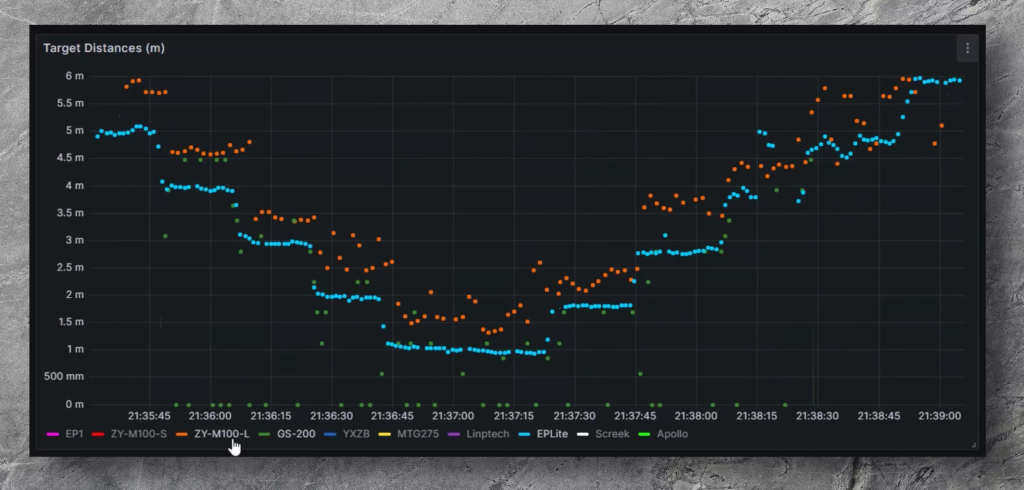
The rest were not really that accurate, and some jumped all over the place or had too low sample rates. I also noticed that all the sensors except the Apollo and the EPLite had less accurate distance measurements as I moved away. Not really sure why, but even the EP1 seemed to experience this.
Small Pet Detection
One other request I had was that I test how these sensors would perform with detecting small pets. Since humans live in this house and not animals, I tried to use my son’s remote controlled Jurassic Park jeep to simulate a small pet moving around. Most of these sensors didn’t even react to the jeep ripping around on the floor of the basement.

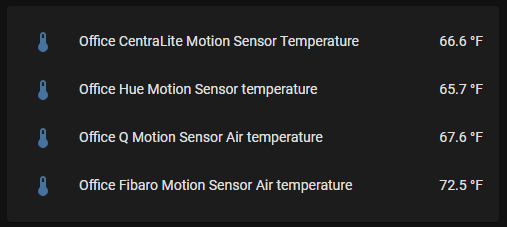
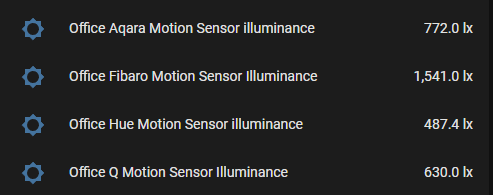
Illuminance
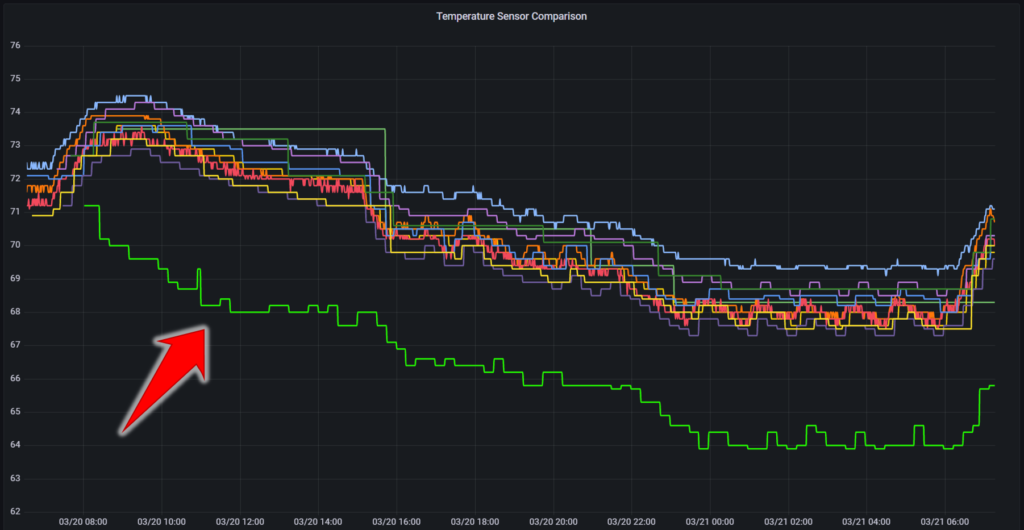
I also compared the illuminance on all of these sensors, and pretty much it’s all over the place. I had all lights off, then turned on the ceiling light, and then shined a light directly, but as you can see the results are kind of a mess. The key to using illuminance sensors is to stick with one and learn the highs and lows, and then set thresholds for automations.
Ok, now let’s talk about my favorites and least favorites. Just a reminder, I’ve left links in the description for all of the sensors I’ve covered in this article.
Favorites
Cheapest
If you’re just looking for a super cheap sensor, I think it’s worth giving the HiLink HLK-LD2410 a try. You can 3D print a case if you want and try to dial it in. If you want a cheap sensor, but not Bluetooth, I’d try the ZY-M100-S as it’s pretty feature rich for the price.
Best for Price
The best for the price in my opinion is a tie: The first winner is the Athom PS01 since it has both PIR and mmwave sensors, and still comes in under $40. The second winner is the EPLite, as it also has a temperature sensor, and is under 40. If you would prefer a Zigbee device, the best for the price to me is the Linptech sensor.
Most Sensors/Features
If you’re look for the one that has the most features and sensors, it’s really close one between the EP1 and the Apollo. While the EP1 has a PIR sensor, it’s quite a bit more expensive and it doesn’t have a CO2 sensor. The Apollo lacks the PIR sensor, but has the CO2 sensor, the piezo buzzer, and the customizable RGB light. Between the two, it just depends on what you want to use them for. Take either one, and then add up the cost of all of those sensors if you bought them as individual devices, and see how much that would cost you.
Most Accurate
If you’re looking for a sensor that has the most accurate target distance, obviously you want to go with the EPLite. The Lite has an excellent price for what you get. A close second would be the ZY-M100-L.
Least favorites
Ok, so here are the ones I would NOT recommend. First, the no-name Giant Black Box. This sensor has no tuning capability and flat out stinks.
The second I wouldn’t get, at least not yet, is the GS-200, as it really floods the zigbee network with messages and has accuracy issues. It may work better once fully supported in Z2M.

Lastly, I’d steer clear of the Aqara FP1 as it’s really got nothing on its predecessor, and really doesn’t offer anything worth its price.
Thank You!
Anyway, I hope you enjoyed this review, as I’ve put a ton of time into it. I know I’ve only scratched the surface with some of these sensors, but I hope this comparison gives you some idea of which one you should get.
Anyway, thanks for reading! See ya.


![[NOTES] Requires Aqara Zigbee 3.0 hub (Not compatible with other Zigbee hubs). Requires a secured 2.4 GHz Wi-Fi for Hub M2/M1S/E1/M1S Gen2 and Camera Hub G2H Pro/G2H, and 2.4/5 GHz Wi-Fi for Camera Hub G3.(Wired connection via Ethernet RJ45 for Hub M...](https://m.media-amazon.com/images/I/31dT2GcN1nL._SL160_.jpg)
![[NOTES] Requires Aqara Zigbee 3.0 hub (Not compatible with other Zigbee hubs). Requires a secured 2.4 GHz Wi-Fi for Hub M2/M1S/E1/M1S Gen2 and Camera Hub G2H Pro/G2H, and 2.4/5 GHz Wi-Fi for Camera Hub G3.(Wired connection via Ethernet RJ45 for Hub M...](https://m.media-amazon.com/images/I/414ti4wLgbL._SL160_.jpg)