The Best Smart Bulbs in 2023

What’s up Smart Homers, my name’s Aaron. In this article I’m going to show you 14 different smart bulbs and tell you which ones are my favorites and which are my least favorites!
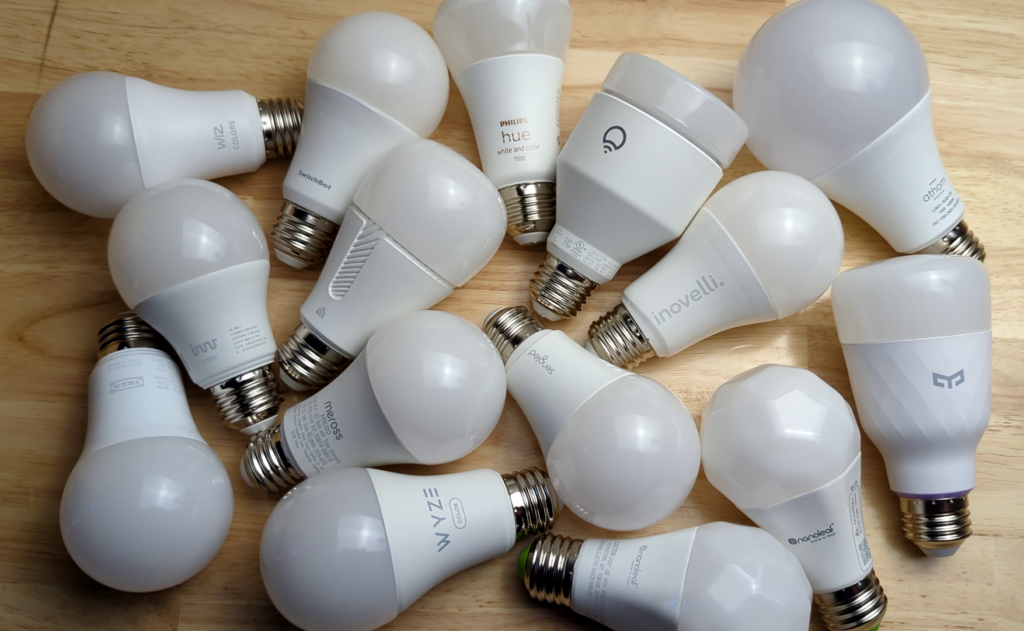
 I’d guess that most people start off on their smart home journey with smart lighting, and specifically smart bulbs. Smart bulbs are great because they don’t require any installation skill, and can be quickly and easily added to your smart home. A lot of times people start with cheap, cloud-based bulbs, but eventually they want to buy higher quality bulbs. The problem is, there are tons of smart bulbs out there, and it can be difficult to figure out which one you should purchase. That’s why I bought 14 different smart bulbs, and I’ve tested each to see how they work.
I’ll compare their prices and features, briefly showing snapshots of their native apps, but my main testing will be with my smart home platform of choice, Home Assistant. If you don’t use Home Assistant, that’s ok, I’ll still give you an idea of which other smart home systems they are compatible with.

Bulb Specifications

Bulb Model Protocol Lumens Eq Wattage Wattage CRI White Range Price Power On State Home Assistant SmartThings Hubitat Google Assistant Amazon Alexa Apple Home
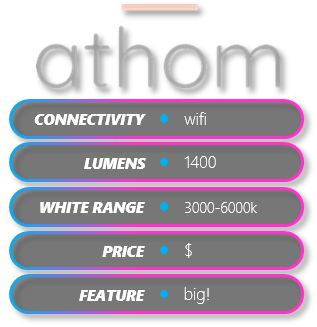
ATHOM LB01-15W-WLED-1 WiFi 1400 ? 15W 3000-6000K $ Yes local ish no no yes no
SwitchBot W101400 WiFi/BT 800 60W 10W ‎80 2700-6500K $$ Yes Local via BT yes yes yes yes yes
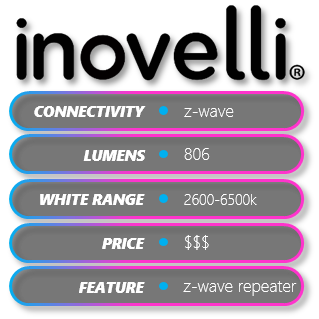
Inovelli LZW42-N Z-Wave 806 60W 9.5W 2700 – 6500k $$$ Yes local yes yes no no no
Wyze WLPA19C WiFi 1100 75W 12W 90+ 1800-6500k $ Yes cloud, cust int yes no yes yes no
YEELIGHT YLDP15YL WiFi 800 60W 8.5W 80+ 1700K-6500K $$ Yes local yes yes yes yes yes
WiZ 603449 WiFi 800 60W 8.8W 90 2200 – 6500K $ yes local yes yes yes yes no
Hue 563254 Zigbee 1100 75W 10.5 2000 – 6500K $$$$ Yes local yes yes-ish hue hub required hue hub required hue hub required
meross MSL120D WiFI 810 60W 9W 2700-6500K $ No Cloud cust int. yes no yes yes not this model
Nanoleaf NL45-0800WT120E26 WiFi, Thread, BT 806 60W 9W 2700 – 6500K $$ Yes Local, bt yes yes     yes, thread
Nanoleaf Matter NL67E100 Matter, Thread, BT 806 60W 9W 2700 – 6500K $$ Yes local, matter yes   yes   yes
LIFX LHLA19E26US WiFi 1100 75W 11.5W 80 1500-9000K $$$$ No local yes yes yes yes yes
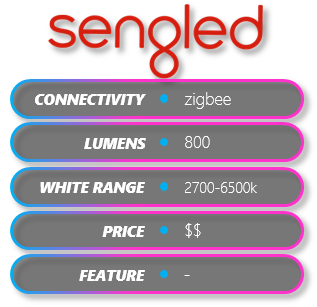
Sengled ‎E11-N1EAWA Zigbee 800 60W 9W 80 2700 – 6500K $$ Yes local yes yes yes, w/ hub yes, zb radio no
Kasa KL135P2 WiFi 1000 60W 10.5W 88+ 2500K-6500K $ Yes local yes yes yes yes no
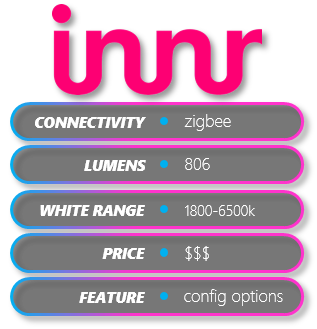
innr AE 280C-2 Zigbee ‎806 60W 9.5W 90+ 1800K – 6500K $$$ Yes local yes yes no yes, zb radio no
TRÅDFRI 604.391.68 Zigbee 800 60W 8.9W 90+ 1780 – 4000K $$ Yes local yes yes yes with ikea hub yes with ikea hub yes with ikea hub

Requirements

When choosing which bulbs to test, I set a maximum price of $40, as anything more than that is ridiculous in my opinion. Also, I tried to avoid bulbs that rely on cloud connectivity, because those bulbs can stop working if the company hosting the cloud goes bust. Finally, while many of the bulbs will work on WiFi, some use Z-Wave, Zigbee, or Thread, which are other wireless protocols. These require a special hub or radio set up to get them working. If you’re not sure what these protocols are and you’re not using Home Assistant, you might want to look for a different bulb.

Ok, first let’s look at the WiFi devices.

SwitchBot

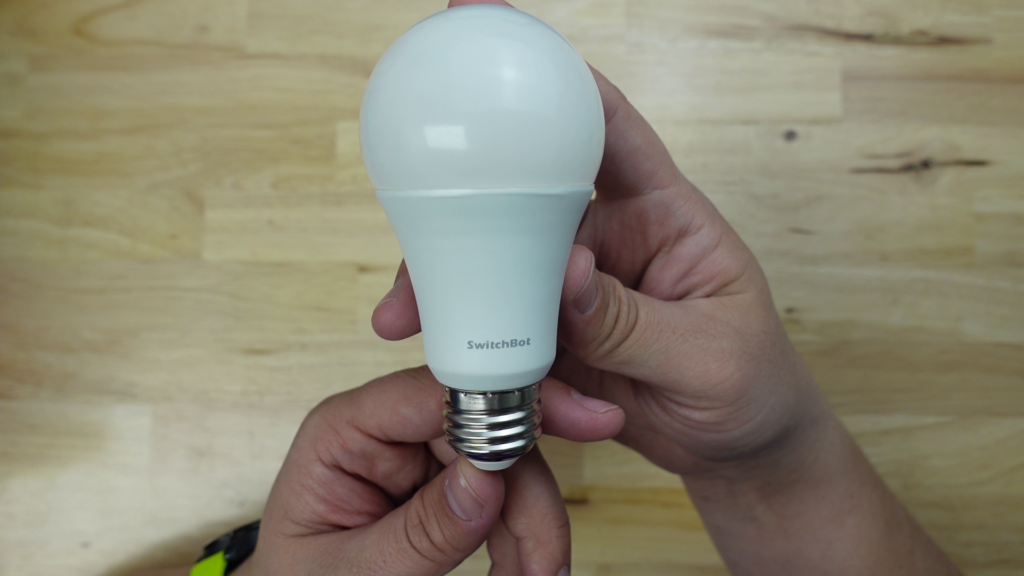
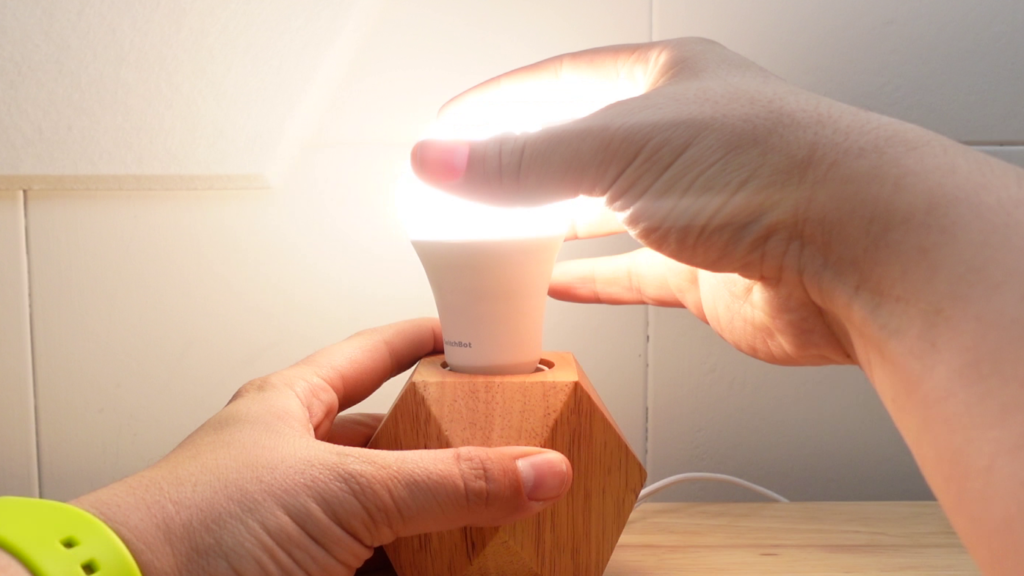
The first one is the SwitchBot Bulb. SwitchBot sent me this bulb for a YouTube video, and once I saw the amazing colors this thing produces, I knew I had to do a bulb comparison. When you open it up, you can see there’s nothing special looking about it – it does have the Switchbot logo on the base, but nothing that stands out and looks bad.
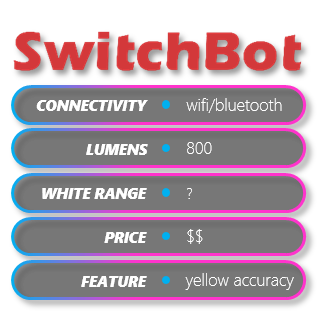
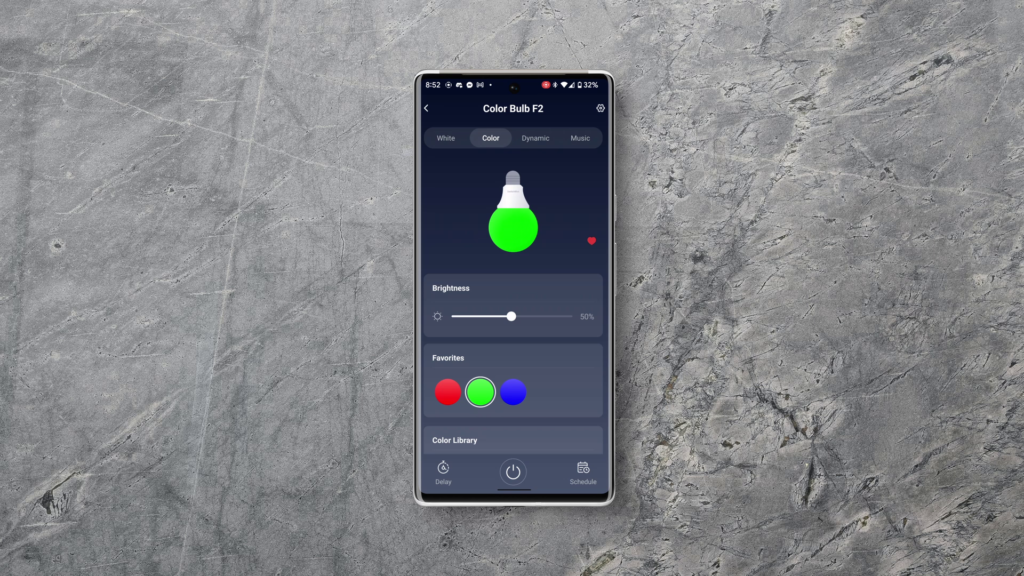
As soon as you install it and apply power, you’ll see it light up white. To control it with your smartphone, you’ll have to download the Switchbot App. Before I could use it in the app, I had to download a new firmware version for the bulb, but once I did there were no issues. The app has pretty basic controls, with White, Color, Dynamic, and Music modes. I’m not gonna get into all the details of the app, but I do like that it lets you set some presets  in the White mode, so you can tune the bulb to match your existing lights and then save that preset. There are also presets for color mode as well as a bunch of options for “basic colors”, which is sometimes nicer than using a color wheel. Dynamic mode has some options for looping colors, but it’s nothing earth-shattering. Where this bulb shines in my opinion is compatibility – it’s compatible with Home Assistant, SmartThings, Hubitat, Google Assisant, Amazon Assistant, AND Apple Home. This means that if you decide to switch platforms later on, these bulbs will still work for you. The brightness of this bulb is kind of mid range for all the ones I’m testing, so it’s nothing to worry about.
Home Assistant

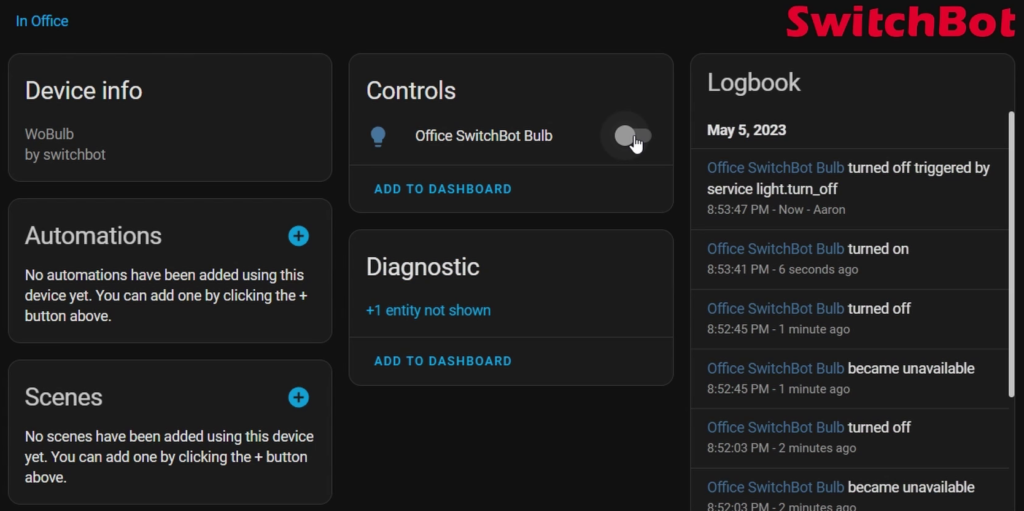
In order to add this bulb to Home Assistant, we actually won’t be using WiFi. Instead we’ll be using Bluetooth. This requires you to have Bluetooth set up on your device running Home Assistant, but that’s as simple as adding a Bluetooth dongle. Once you do that, the bulb is gonna automatically show up in Home Assistant. You’ll see it in the Devices and Services page, and you can click the “Configure” button. Choose an area for it and then you’ll see it show up under the SwitchBot integration. You only get the single light entity, but you can control it just as you’d expect. You do want to make sure  you have a decent Bluetooth range for these, so if you haven’t it might be work checking out Bluetooth proxy using ESPHome.
Overall

Overall I’d say this bulb is decent. If you can get it on a sale it would be worth picking up a couple. SwitchBot has lots of unique products, so it’s not a bad ecosystem to get into.
Wyze

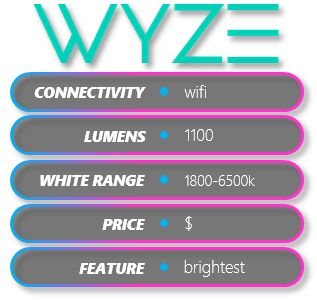
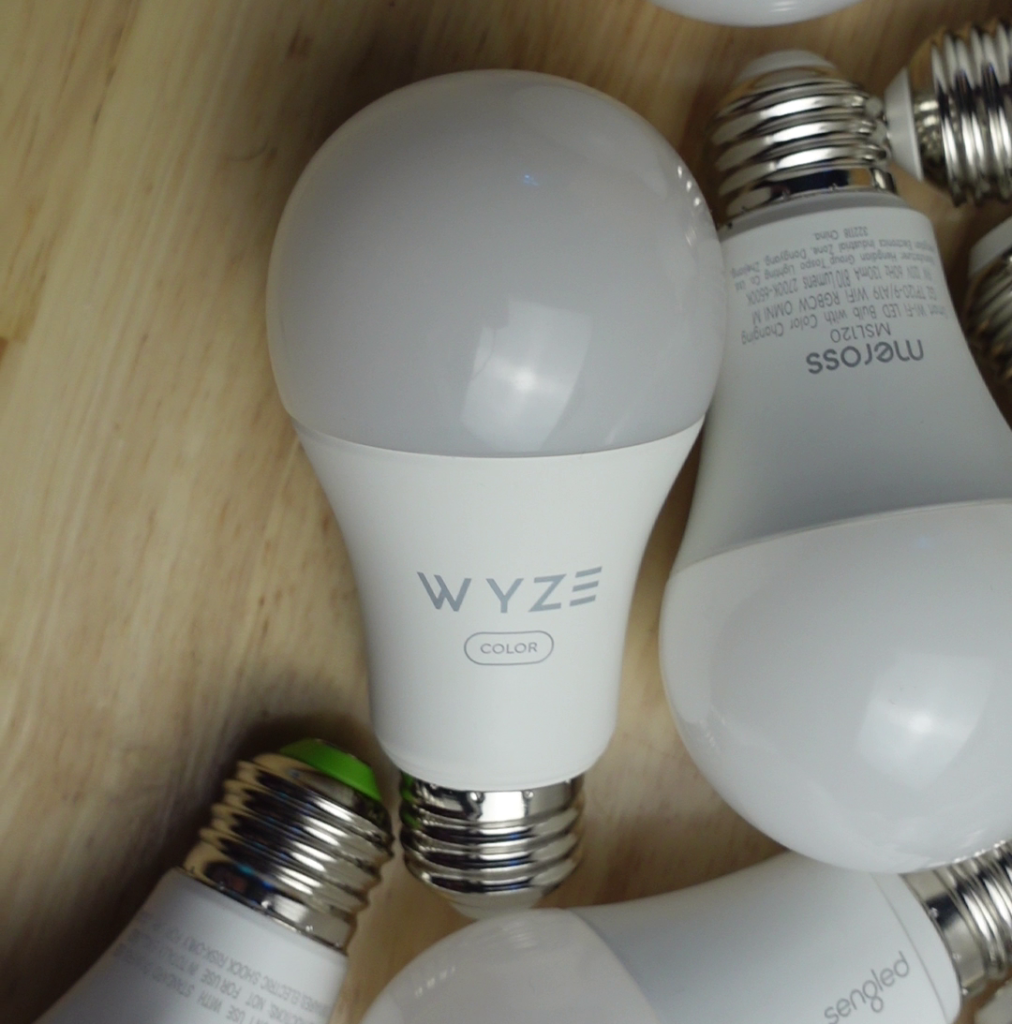
The next one I want to look at is the Wyze Color Bulb. If you haven’t heard of Wyze, they’re most well known for their affordable cameras, but they’ve branched out into other areas of the smart home world, including smart lighting and robotic vacuums. Right off I’ll say that this bulb is super bright. It’s actually the brightest, and you’re getting all of the 1100 lumens they advertise. It has a generic look like the SwitchBot, but it does have a bit more bold of a logo on the base than SwitchBot. It’s pretty hefty, which makes you feel like you’re holding something high quality.
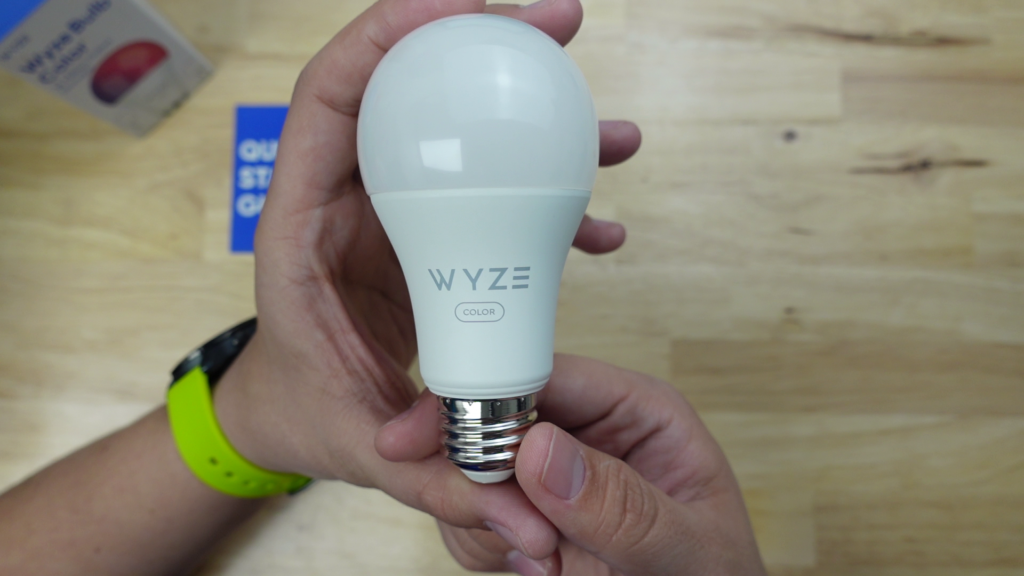
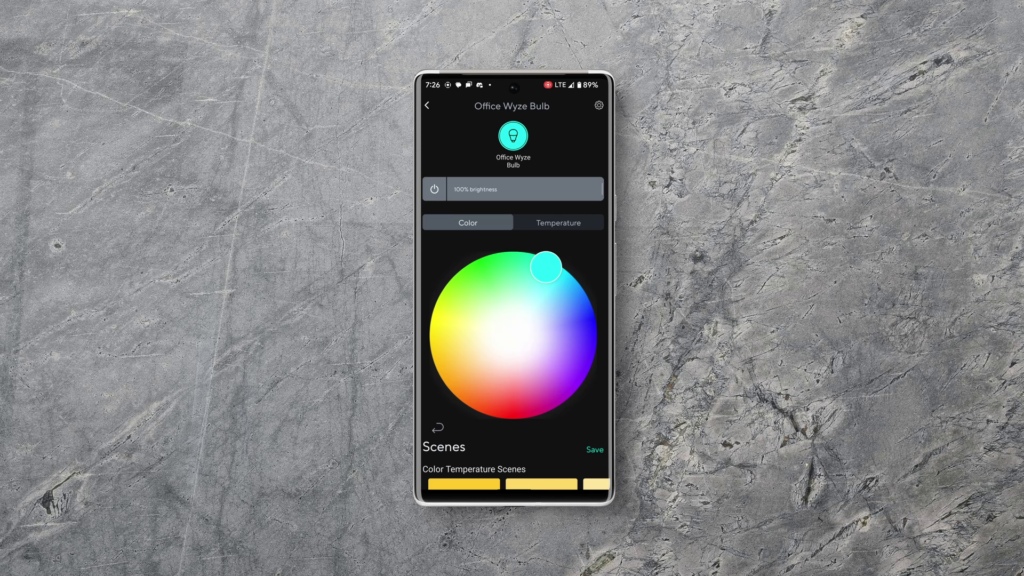
Once you connect it to power it’ll start pulsing letting you know it’s ready to connect. I already have the Wyze app since I have a bunch of their cameras, but if you don’t you’ll need it. As you’d expect, the app gives you a brightness slider, color wheel, and a white temperature wheel. It also has a bunch of preset Scenes that you can choose from, or you can save your own if they don’t match what you want. In the settings, there’s a Power Loss Recovery option, which allows you to tell the bulb what to do if there’s a power outage. When the power comes back on, the bulb can either turn on, or maintain the state that it was in before the outage.
As far as compatibility, this bulb is gonna work via WiFi with Home Assitant, SmartThings, Google Assistant, and Amazon Assistant. As far as i know, it does work with Hubitat or Apple Home.
Home Assistant

Adding this bulb to Home Assistant isn’t as easy as the SwitchBot, but it will be connected with WiFi rather than Bluetooth. For this one we’ll need a custom integration from the Home Assistnat Community Store, so you’ll need to install that if you don’t have it. Once installed, search for the Wyze integration in HACS and install it. Then restart Home Assistant, and then head to the Devices and Services page int he Settings menu. In the bottom right corner, tap “Add Integration”, and search for Wyze. You’ll need to enter your username and password for your Wyze account, and then click Submit. A window will show all of your Wyze devices that are supported by the integration – and as you can see, one of them is the bulb. Choose an area for your bulb if you want and click finish. Then, scroll down to the integration in the Devices and Services page and click Devices. You’ll see the bulb in the list, and you can click it to open the device page. Here you have a basic light entity with color controls, white temperature, and also some effects.
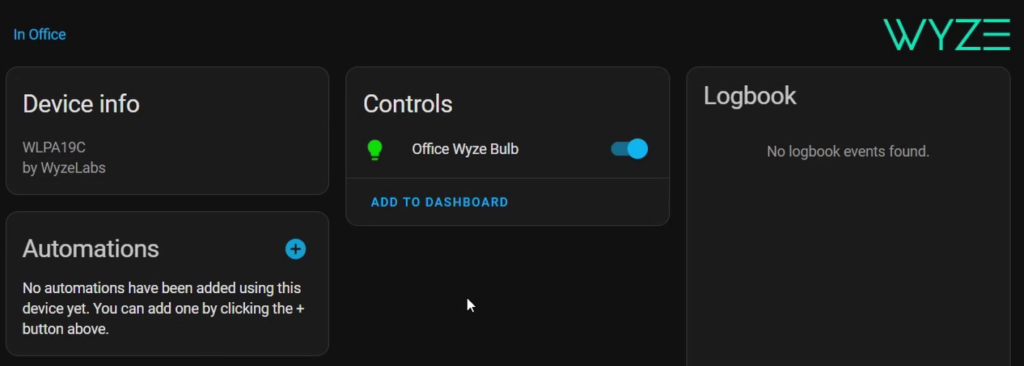
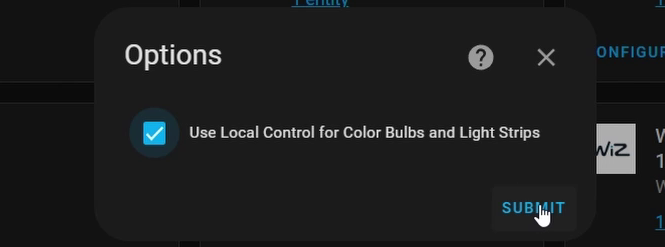
Unfortunately this integration does rely on the Wyze cloud, which a lot of people who use Home Assignat aren’t a fan of. However, if you go to the integrations page and click configure on the Wyze integration, you can check the “Use local control for light bulbs and light strips” option, and apparently you won’t need the cloud connection for this bulb! That’s kind of cool!
Overall

Overall, I really love how bright this bulb is, and the colors are pretty decent too. It definitely feels high quality, and it’s competitively priced for such a bright bulb. The one thing I’d like to see is a local API for all Wyze devices, and a native Home Assistant integration.

Yeelight

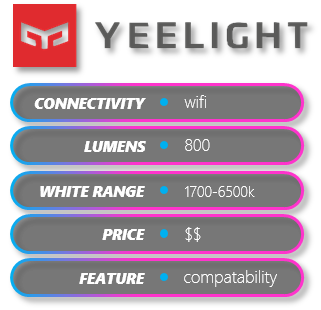
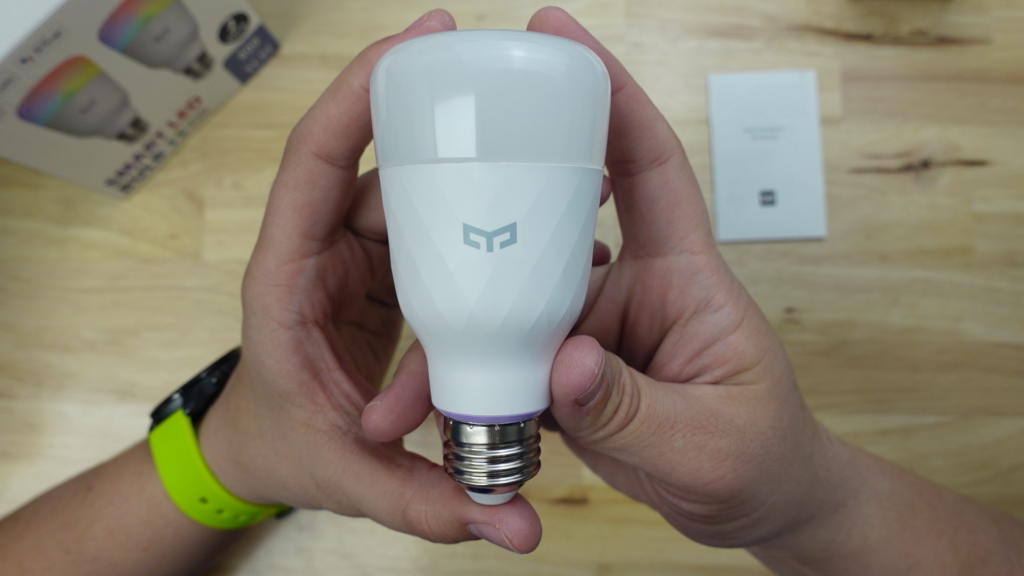
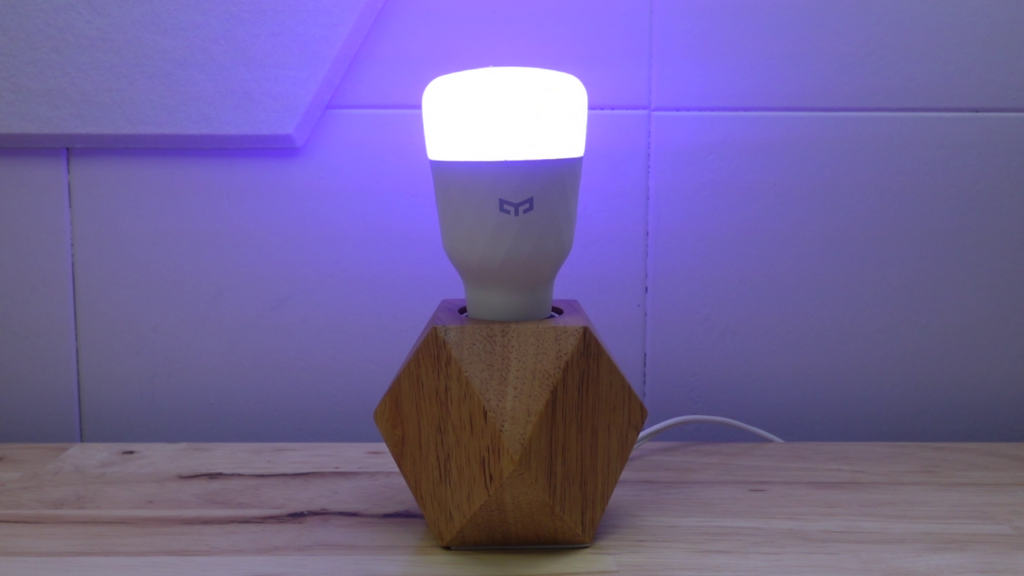
Ok, so the next WiFi bulb I wanna look at is one that I’ve been itching to review for a long time, and that’s the Yeelight Smart LED Bulb 1S. It’s an 800 lumen bulb with one of the most unique designs I’ve ever seen.  It has a tapered cylindrical shape, with a diamond-patterned design on the body and the Yeelight logo on it. The screw has purple accent plastic which is a nice touch. On the back side of the bulb it has the HomeKit pairing code for adding it to Apple Home.
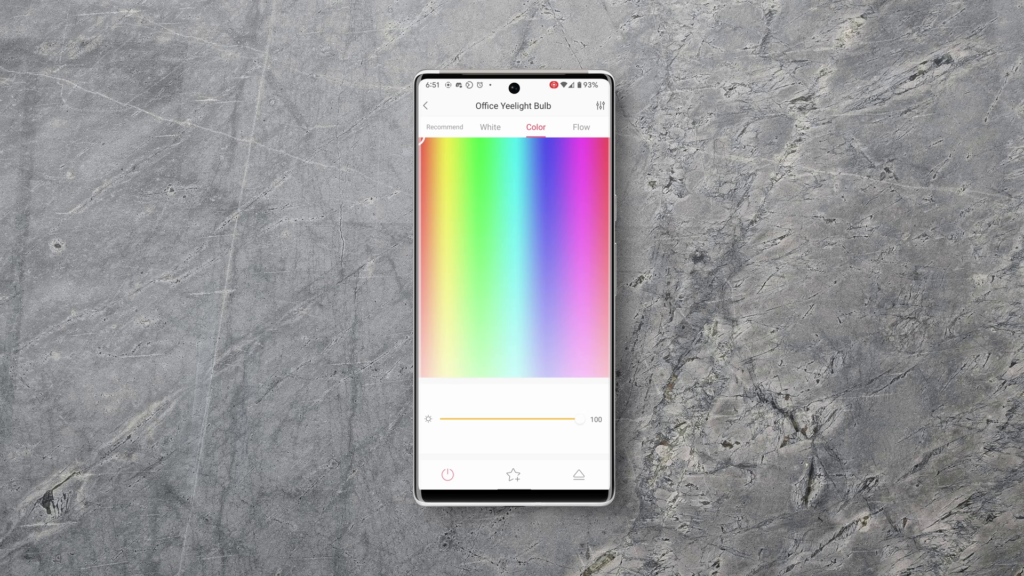
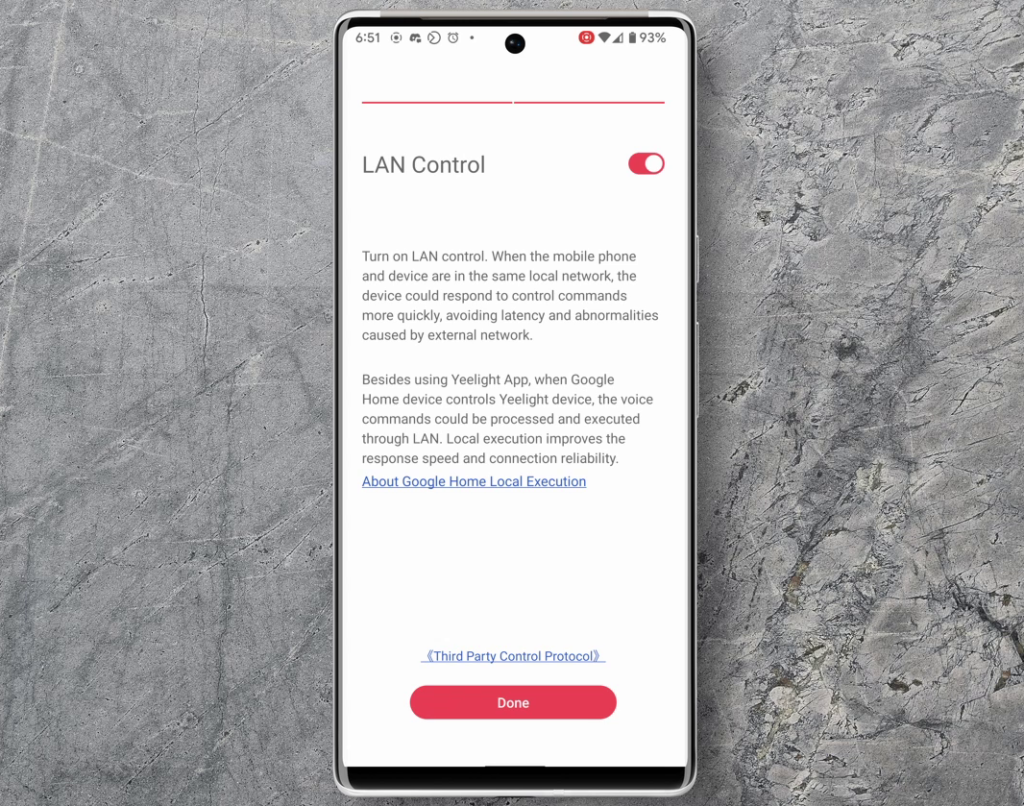
To get started with this bulb, you’ll need to download the Yeelight app. When you first add the bulb, it tells you about LAN control, which means that if your phone is on the same network as the bulb, the communication doesn’t involve the Yeelight cloud – pretty cool! This LAN control applies to Google Home as well!

The app have four tabs – Recommend, White, Color, and Flow. The Recommend tab has some built-in presets. The color tab shows a color pad rather than a wheel, but serves the function that you’d expect. The white tab allows you to tune the white temperature, and the flow tab allows you to customize the “Flow” effect.
Home Assistant

A year or so ago I was looking into these bulbs, but their integration with Home Assistant wasn’t working because of an issue with Yeelight. When I started prepping for this comparison, I saw that the issue had been fixed and the integration for Home Assistant was in working order, so I decided to give them a shot. The integration is native, meaning that they’re super easy to add.

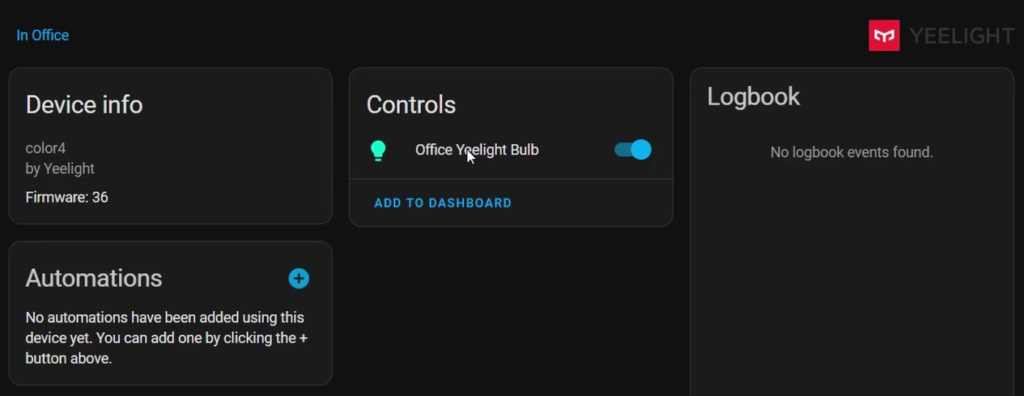
If you go to Settings, Devices and Services, you’ll see that the bulb is automatically discovered by Home Assistant, and you can click the configure button to set it up. Assign it a location if you want, and then you can find the integration on the Devices and Services page and and click Devices. If you click the color bulb, you’ll see that you get a basic light entity, with color and white temperature controls as well as a whole list of custom effects. If you look up the Yeelight integration, you’ll see that it’s IoT class is local push, meaning that there is no cloud involvement – awesome!

Overall

As far as design goes, I think this is one of the best looking of all the bulbs in this article, but what I wasn’t impressed with was the yellow color accuracy. I’ll show some of the results of my testing later on, but the “yellow” ends up being more of a pale yellowish white. As far as compatibility goes though, this thing works with all the major players – Home Assistant, SmartThings, Hubitat, Google Assistant, Amazon Assisant, and Apple Home.
Athom
The next one we’re gonna look at is a bit different, and that’s because it runs a software that you don’t see typically used for smart bulbs. This bulb by Athom runs WLED, which is a firmware that’s made for controlling LED strips. Athom is a company that sells a bunch of smart home products that are flashed with open source firmwares like WLED and Tasmota.

If you haven’t seen my WLED for beginners vidoes, they’re worth checking out if you want to get into LED strip lighting. In that video I use an Athom WLED controller, which is super easy for beginners.

The first thing you notice about this bulb is how big it is! It has an E26 base, but the body of this thing is a lot larger than an A19. They do offer a lower wattage bulb that is a bit smaller if that’s a problem. You can also see that it’s rated for 15W, which is a higher power rating than any of the other bulbs we’re looking at.
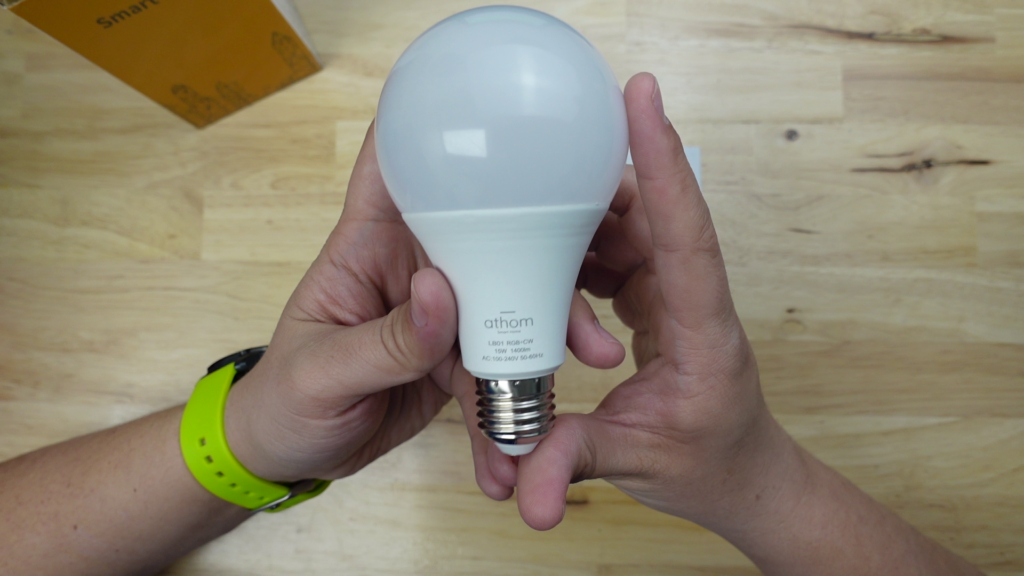
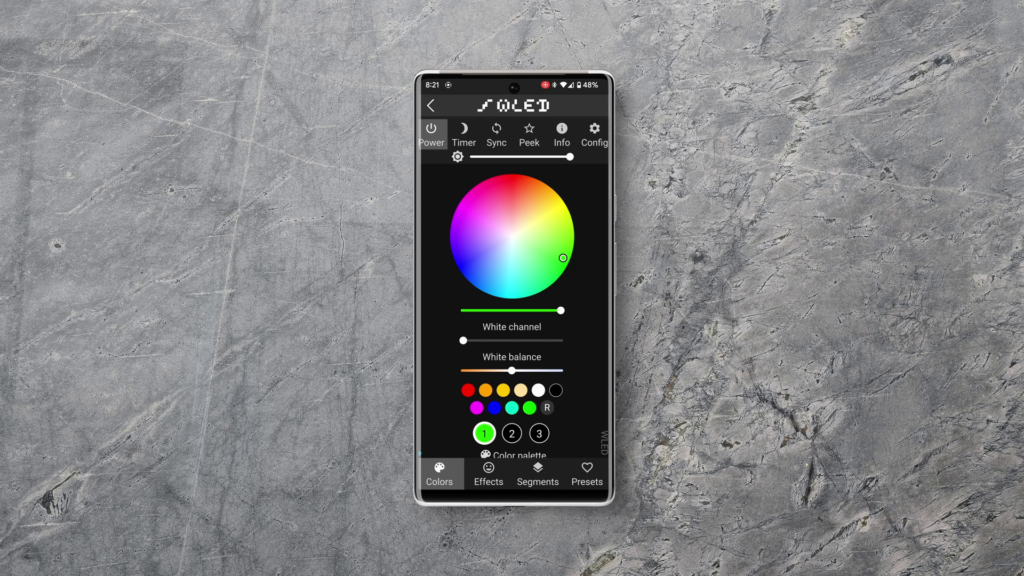
Setup in the app works like any WLED controller. Athom has a disclaimer that if you turn up the brightness of the colored LEDs as well as the white LED, you could damage the bulb. I actually tried it, but it didn’t seem to cause any problems, but leaving the bulb like that for a long time could damage it I suppose. You really ony want to operate the color channel or the white channel, not both at the same time.

There are a lot of other things you can do in the app regarding effects and stuff, but they’re mostly geared toward LED strips.

One thing you might want to do is to rename the bulb. To do this, tap the config button, then tap User Interface, and then change the “Server description” to something that makes sense. Tap save when you’re done.
Home Assistant

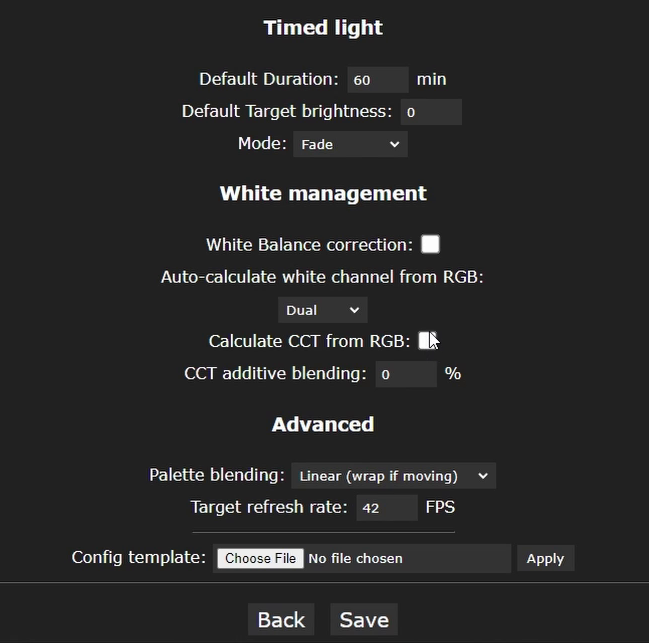
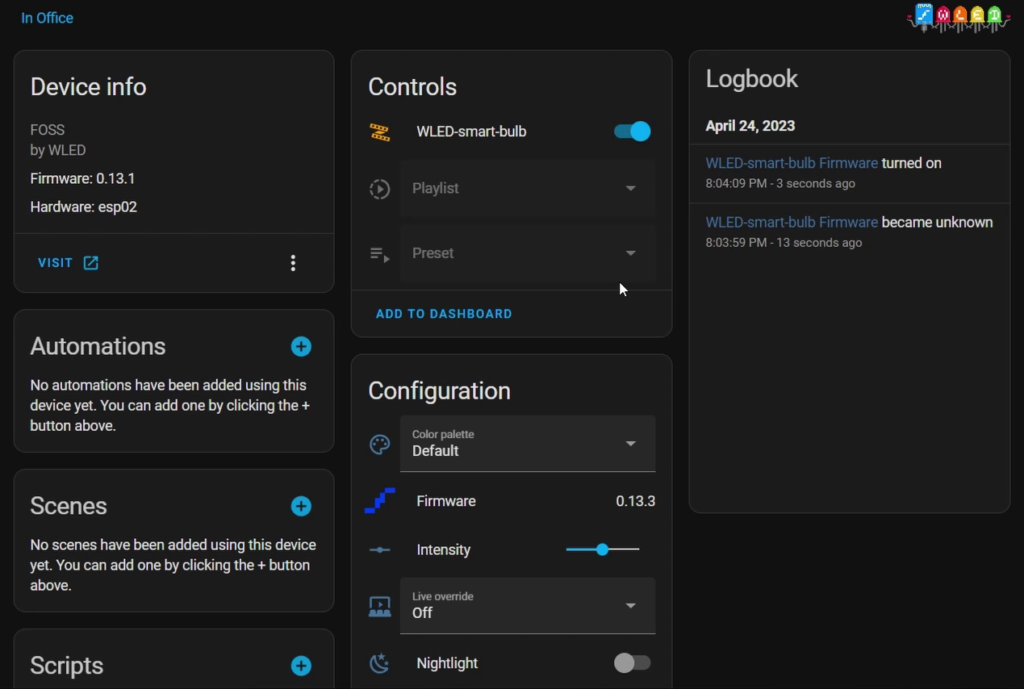
Adding this bulb to Home Assistnat is super easy since Home Assistant has a native WLED integration. While , when I first tried to add it, it didn’t show in Home Assistant, so I tried to add it manually using the bulb’s IP address. This gave me an error, stating that the WLED device uses CCT channels, and so was not supported by the integration. However, creators of WLED issued a fix in the WLED software that I want to show you. Either in the app or on your PC, open the controls for the bulb and click Configuration. Choose LED Preferences, and then scroll down until you see the “White Management” section. Check the “Calculate CCT Channel from RGB” option, and then click Save. If you restart Home Assistant, now you’ll see that the Bulb is auto-discovered, and you can go ahead and configure it! Click configure, click Submit, give the device an area if you want, and then click Finish. Now you’ll see your bulb in the WLED integration, so click it, and then click the device. On the device page you can see that it has a light entity, which has color and white controls, a bunch of configuration controls that you can mess with, and even a diagnostics with some information about the device.  Note it shows LED count because this software is really meant for LED strips.

One other thing that’s cool is that you can navigate to the WLED controls right from the device info section by clicking the Visit link.

Overall

This bulb is pretty cool, but one of the issues I have with it is related to compatibility. It does have local network compatibility with Home Assistant, but only works properly with Amazon Assistant. There is an Edge driver for SmartThings, but it seems flaky as the SmartThings device can become out of sync with the device itself. This limited compatibility may not be what you’re looking for, but if you’re using Home Assistant it’ll be just fine.
WiZ

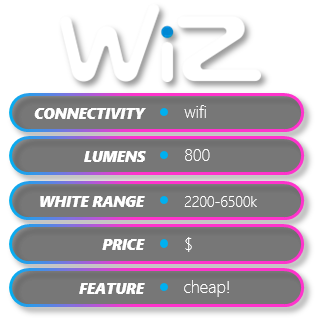
The next one is the WiZ Connected color bulb. It’s one of the cheapest options, and looking at it, the bulb looks very basic apart from the blue ring around the base of the screw. As far as compatibility goes, WiZ bulbs have a native local integration with Home Assistant, and can also be connected to SmartThings, Hubitat, Google Assistant, and Amazon Assistant.
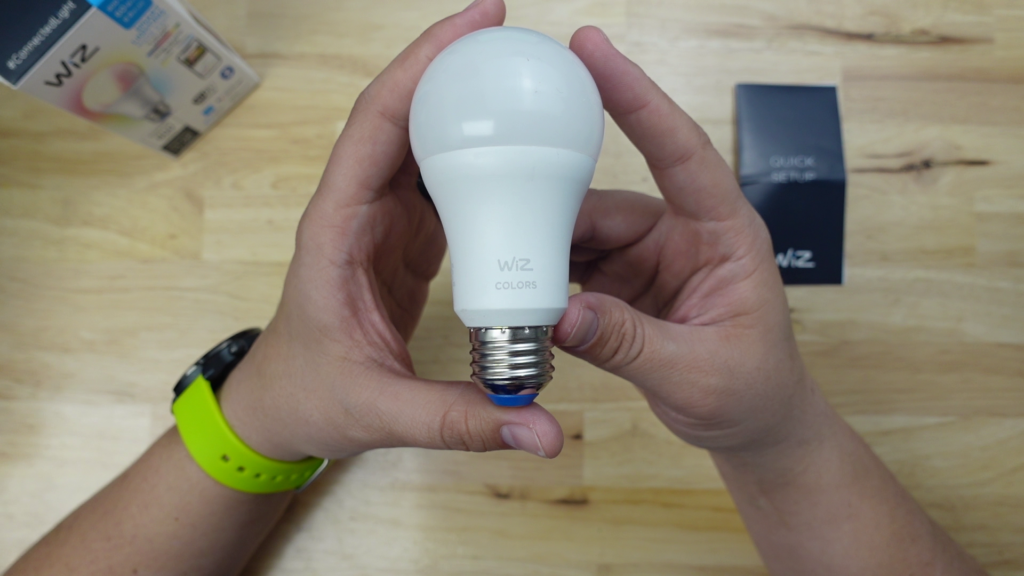
To get this thing set up, download the WiZ app. There are actually two apps, so I’ll show you both of them so you can see a little bit of the differences. To put the bulb into pairing mode you just have to turn it off and on three times quickly. It begins pulsing cool white, and you can add it in the app. The interface for the app is a bit weird to be honest, but it has sliders for light warmth and brightness, and if you tap the Mode button you can se a bunch of presets. If you select Custom Colors, you can then select a color from the color rectangle and tap add. They have other effects like this Pastel Colors preset, and there the slider bar for white warmth turns into an Effect Speed slider. One cool thing to note in the settings is that there is an Allow Local Communication toggle, which is cool, because it means that this bulb isn’t reliant on the WiZ cloud. In the Settings menu you’ll also see a notification that there’s a new app available, and it gives you the option to migrate to the new one. The new app looks a lot better, with a color wheel rather than the weird way of setting colors in the previous one. I won’t go into any more detail with it, but V2 is definitely better.

Home Assistant

Adding this thing to Home Assistant is a piece of cake because there’s a native integration for it. Home Assistant recongizes your WiZ device automatically and if you restart Home Assistant, and then go to devices and services from the settings menu, you’ll see it show up there. I didn’t feel like restarting Home Assistant, so I just clicked Add Integration from the bottom right, searched for “wiz”, clicked the WiZ integration,  and then clicked Submit. The device was discovered, and then I clicked finish after setting the area for it.

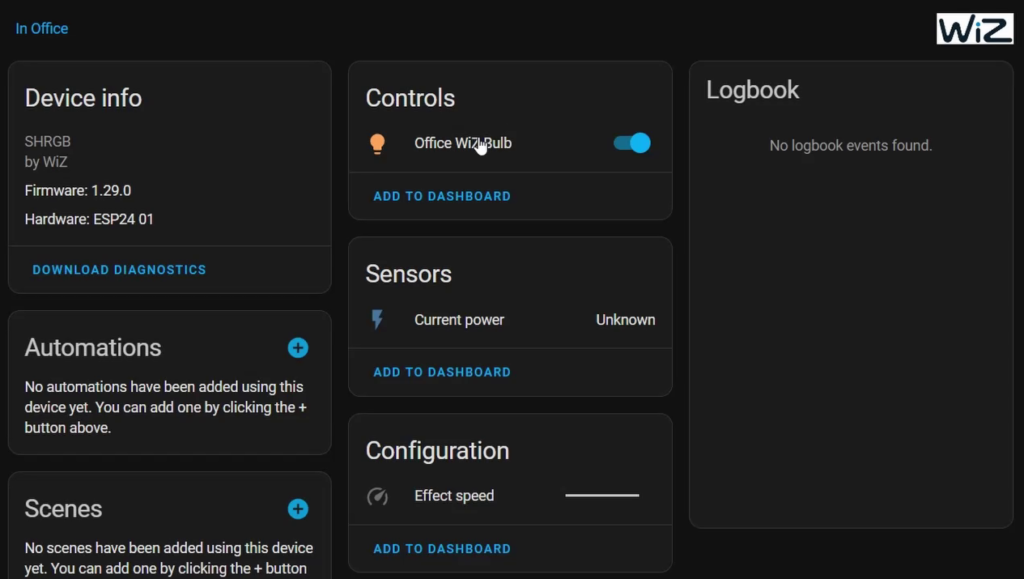
On the device page you can see that you have a light entity, a sensor for power consumption, and an effect speed slider. I’m not sure if the Power sensor is accurate, but it’s really not necessary for a bulb in my opinion. The light entity gives you options for various effects, a color wheel, and white warmth controls.

One thing to note with the WiZ integration is that it’s IoT class is Local Push, the best type of IoT class, since it doesn’t rely on cloud services and it doesn’t waste resources by polling.

Overall

Overall it’s a decent bulb, with impressive color accuracy when it comes to Red, Green, and Blue. The Yellow was very orangy, which is too bad, but otherwise the colors were great. As far as color brightness, generally it had a fairly average color brightness, with a suprisingly bright blue for it’s power rating.

Meross

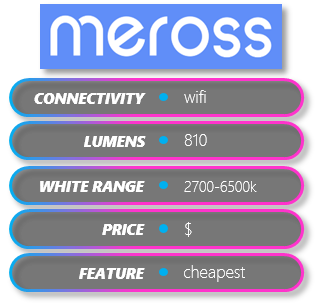
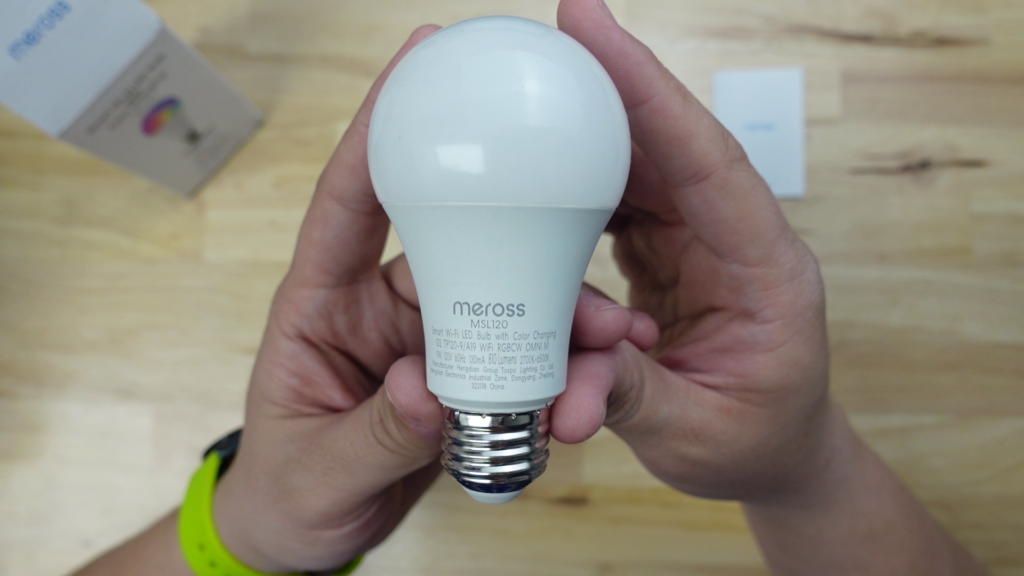
The next one wins the comparison for the cheapest of all the bulbs in this article – but let’s check out its features. This one is the Meross smart bulb. The first thing you notice about this bulb is how light it is! It literally feels like there’s nothing to it, but maybe that’s a good thing. It’s another very basic bulb with not much to it aesthetically.

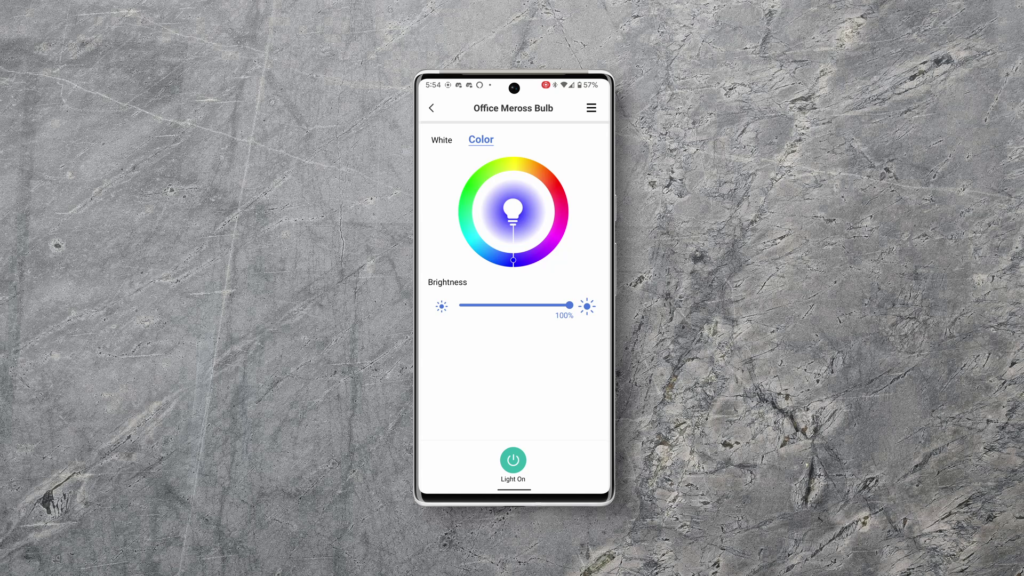
Download the Meross app, and then screw the bulb in and apply power. The bulb will flash between cool and warm white, and in the app you can tap the Plus icon in the corner and follow the steps to add it. I have to say that I really like the look of this app – they did something right with it, and it’s really easy on the eyes. In the device page  you can see Color and White tabs, and each have a wheel for the color selection and warmth selection respectively. There’s a brightness slider under the wheel, and a power button at the bottom of the page. Unfortunately with this bulb, if you had a power outage, when the power comes back on, so does the bulb.

This bulb works with Home Assistant, SmartThings, Google Assistant, and Amazon Assistant. Meross is known for making Apple Home compatible products, and they do have a different model that works with Apple Home if that’s the platform you use.

Home Assistant

To add this bulb to Home Assistant, we’re gonna need a custom integration, of which there are a few in the Home Assistant Community store. The one I would recommend is called Meross LAN as it’s the simplest to set up and it allows you to communicate with your Meross devices locally. Search for it in HACS, click Download, click Download again and wait for it to install. After it installs, go ahead and restart Home Assistant. Head back to the devices and services page and then click Add Integration, and then search for Meross. Click Meross LAN, and then click the discovered instance of Meross LAN. Since you don’t know the device key, you can hit Submit, and it will give you an error but tell you it can retreive the device key from the cloud. Click that option and then enter your Meross Account info from the app. This will be the only time it needs cloud access – when you add new devices. The device page shows a light entity with a color wheel and color warmth controls, and also a signal strength entity, but that’s pretty much it! Nice and simple.
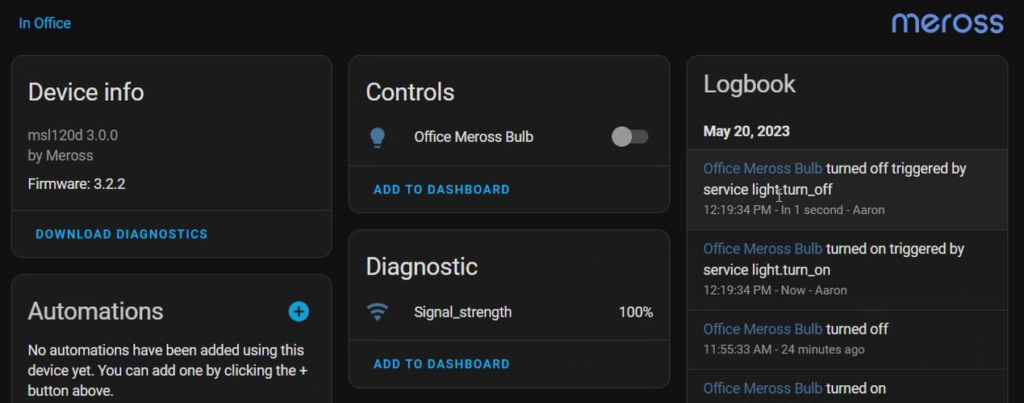
Overall

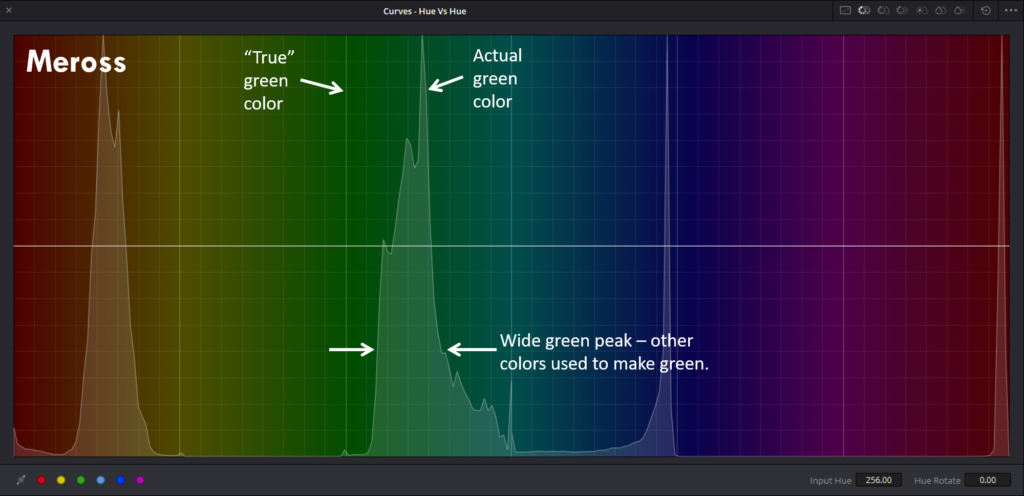
Like I said before, this bulb is the cheapest of them all, and I’d say it’s not bad for the price. The color accuracy was great for the red and blue colors, but the green way an extremely blue-ish green, not the vibrant green that you see in some of the others. The yellow was also a bit orangy, but where those colors lacked in accuracy, they excelled in brightness, making this bulb take first place for overall brightness, despite its 810 lumen rating.
LiFX

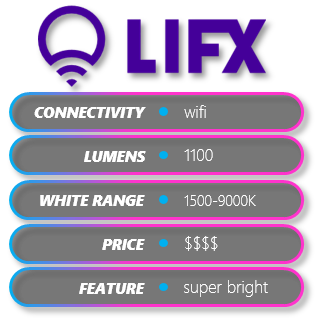
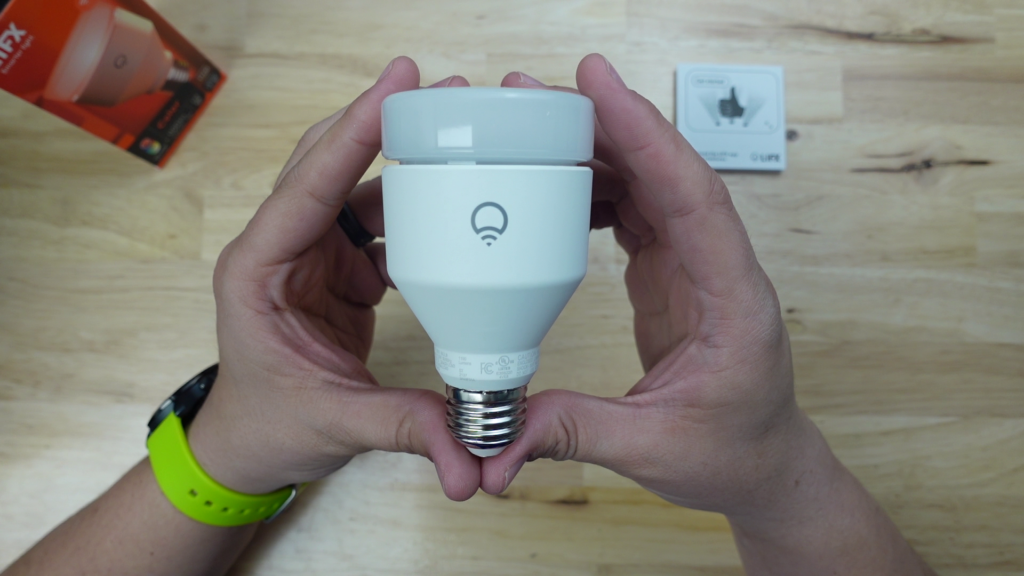
The next one is a bulb that has really grown on me, and that’s the LiFX Color bulb. It’s the most premium-feeling bulb of all the ones we’re looking at today,  and right up near the top for brightness. It has a made-to-be-seen design – a bulb that you don’t want to put a shade over. It feels like the diffuser could unscrew from the base but it doesn’t, and although that diffuser looks pretty small, this bulb has a 210 degree angle of lighting. The base of the bulb is blank except for the LiFX logo, and some information squished down near the screw. The instruction manual has a sticker with the Apple Home pairing code on it, so you should save that if you want to add the bulb to Apple Home. Along with Apple Home, this bulb works with Home Assistant locally, and it works with SmartThings, Hubitat, Google Assistant and Amazon Assistant. It’s super compatible!
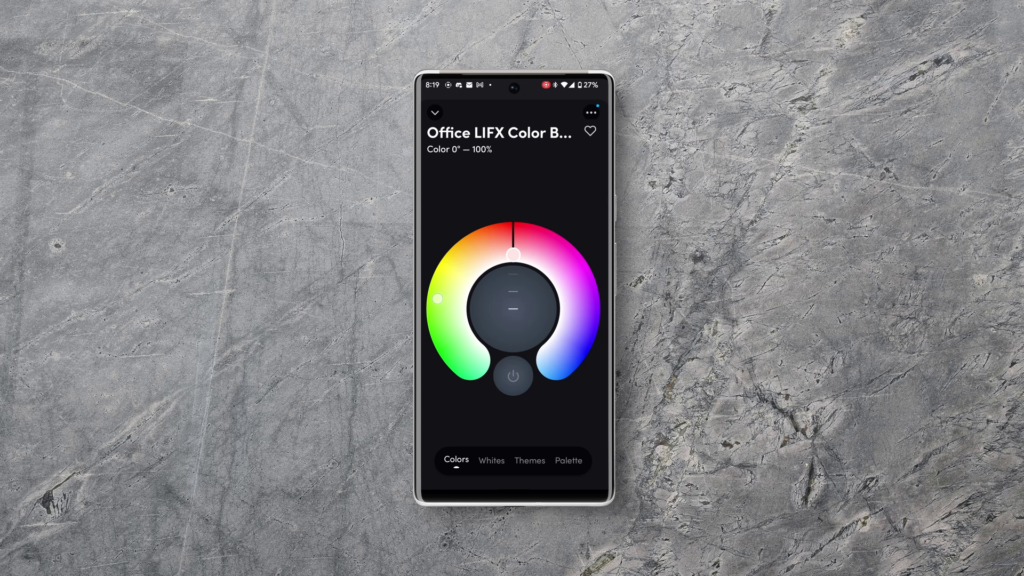
Adding it to the app proved a little more difficult than I thought, but I believe the issue was because the bulb requires a 2.4 Ghz network, and eventually I did get it connected and had no further issues. The app has an interesting design, and while I don’t like UI when it comes to creating rooms and groups, the controls for the bulb itself are pretty satisfying. You have the color wheel with  a brightness scroller in the middle and the power button at the bottom. Below that you have tabs for white control, themes, and palette, but in general the rest of the app is pretty standard. One thing is that there’s no option to control the power on stat of the bulb, so if you lose power, when power is restored the bulb comes on, even if it was off before.
Home Assistant

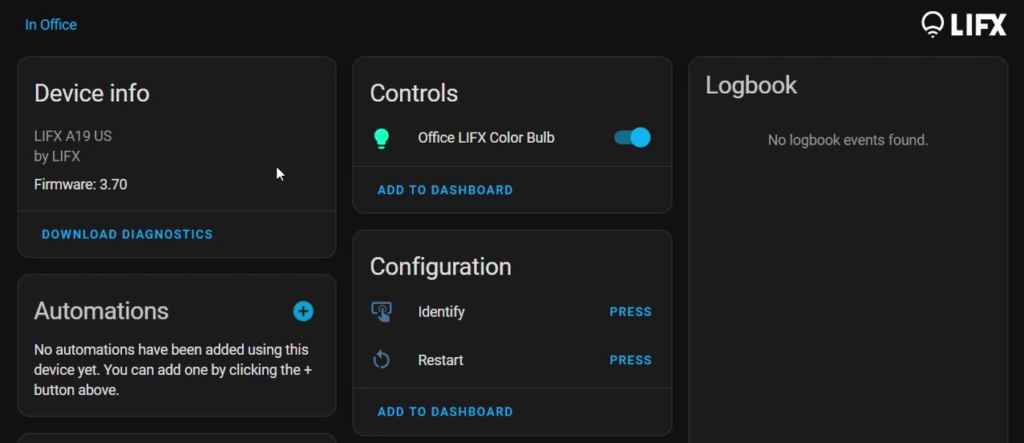
Since LiFX has a built-in Home Assistant integration, once you’ve set up the bulb in the app, it should be auto-discovered by Home Assistant. If you head to the devices and services page, you’ll see it is auto-discovered, so you can go ahead and click configure. Click submit, choose an area for your devices if you want, and then click finish. On the Device Page, you can see a light entity, an identify button, and a restart button. The light entity has a color wheel and white warmth control as well as some effects that can be applied. The Identify button makes the bulb flash so you can identify it if you have more than one. The restart button restarts the bulb if you have some need for that.
Overall

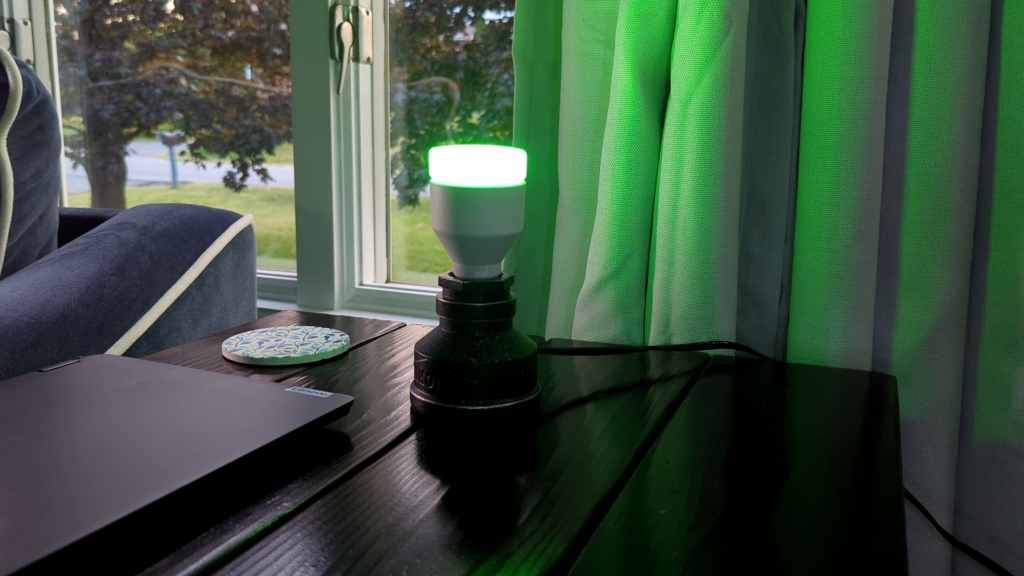
Overall this bulb really feels like a premium device, but its good to remember that it’s the single most expensive of all the bulbs in this article, followed by the Philips Hue bulb. Color wise, the accuracy was pretty decent, with the yellow being a little bit orangy, but making up for that with decent brightness overall.
TP-Link Kasa

The next one also has an interesting design, and it’s then 1000 lumen TP-Link Kasa bulb. I’ve never really explored Kasa’s smart home products before, but I’ve been wanting to since I made my smart plug comparison video/article. They make some great stuff that works locally with Home Assistant. The base of the bulb has a unique layered design, with a smooth top layer and rippled waves underneath. There’s a cutaway of the first layer almost all the way down to the screw, and below that is the Kasa logo. The diffuser has a flattened-sphere shape, and it looks like it can be separated from the base, but cant. I think they did a good job of making the bulb look unique, but not cheap. Speaking of price, these are one of the cheapest bulbs in this comparison, which I think is pretty sweet.
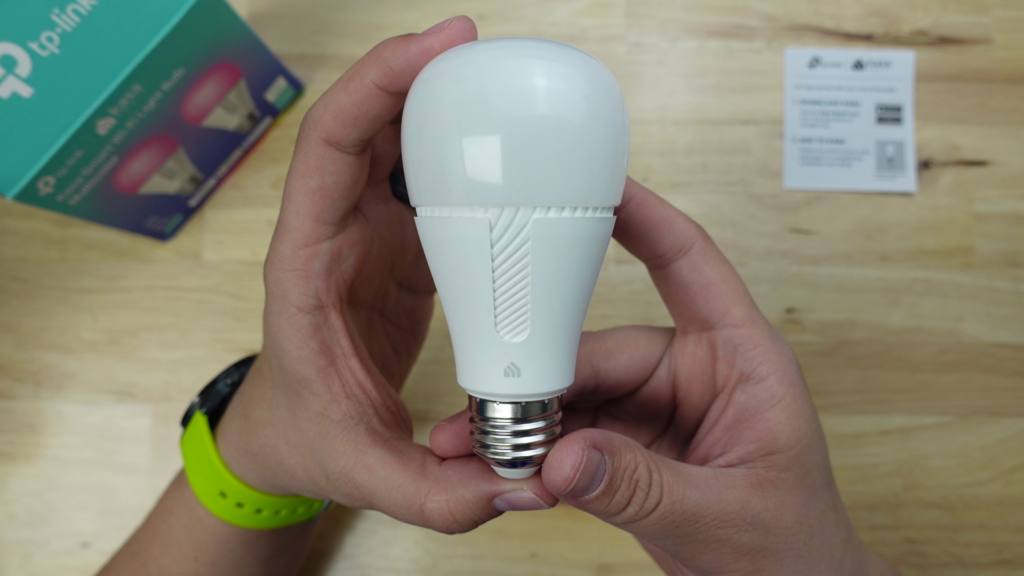
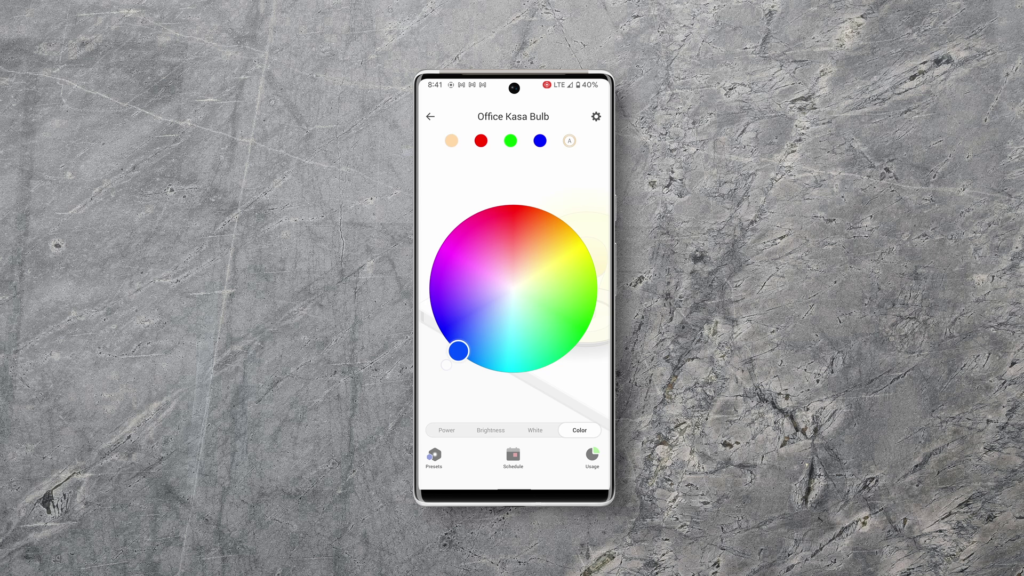
Adding this bulb to the app was extremely easy – just note the model number from the side of the bulb if you’re installing this in a hard-to-reach place. You may need to perform a software update on the device, but that should be it. Tap the device to go to the device page. On the top you’ll see four shortcut buttons, which are presets that you can set up. On the bottom of the device page you can see four tabs: Power Brightness, White, and Color. Brightness gives you a brightness wheel, White gives you a warmth circle, and Color gives you a color wheel as you’d expect. If you tap the Presets button in the bottom left corner, you can change the persistent presets, and there’s also a “Recents” tab. You can create a schedule for the light, and you can also track the Energy usage of the bulb, which is pretty cool.
As far as compatibility, this bulb works locally with Home Assistant, and it also works with SmartThings, Hubitat, Google Assistant, and Amazon Assistant.

Home Assistant

Home Assistant has a really nice integration for Kasa devices, and if you look at the page for it in the Home Assistant documentation, you can see that it’s IoT class is Local Polling, and not only that, but it scores a platinum on their quality scale.

Your bulb should be auto-discovered, but if it isn’t for some reason, just click Add Integration, search for the Kasa integration, click TP Link, and then click TP-Link Kasa Smart. Click the Submit button and it should find your bulb, and then you can click Submit again. Give the bulb an area if you want and then click Finish.

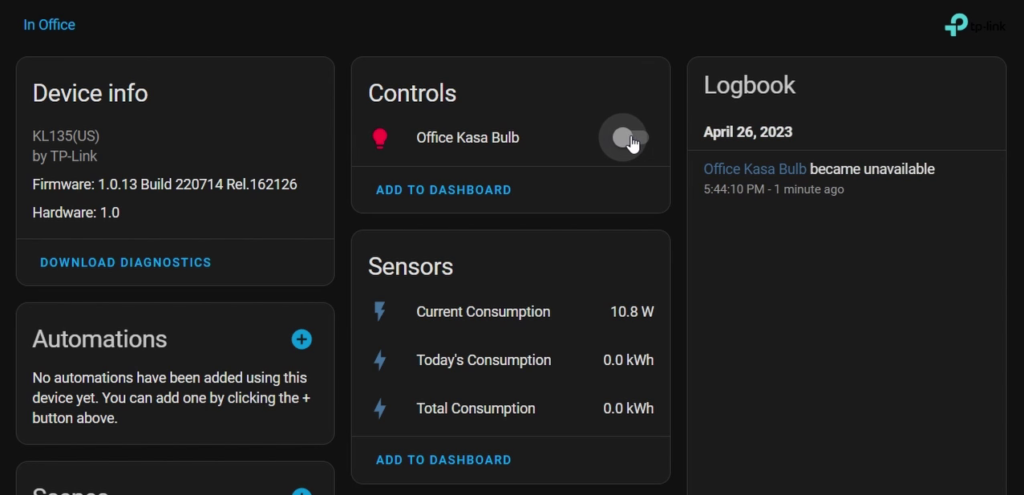
On the device page you’ll see a light entity and some power consumption entities. The light entity gives you a color wheel and white warmth ajustments as expected, and I haven’t checked the power consumption entities to see how accurate they are.
Overall

I really like how cheap these bulbs are for ones that work locally with Home Assisatnt without any struggle. The color accuracy was decent, with brightness just under that of the LiFX bulb. 
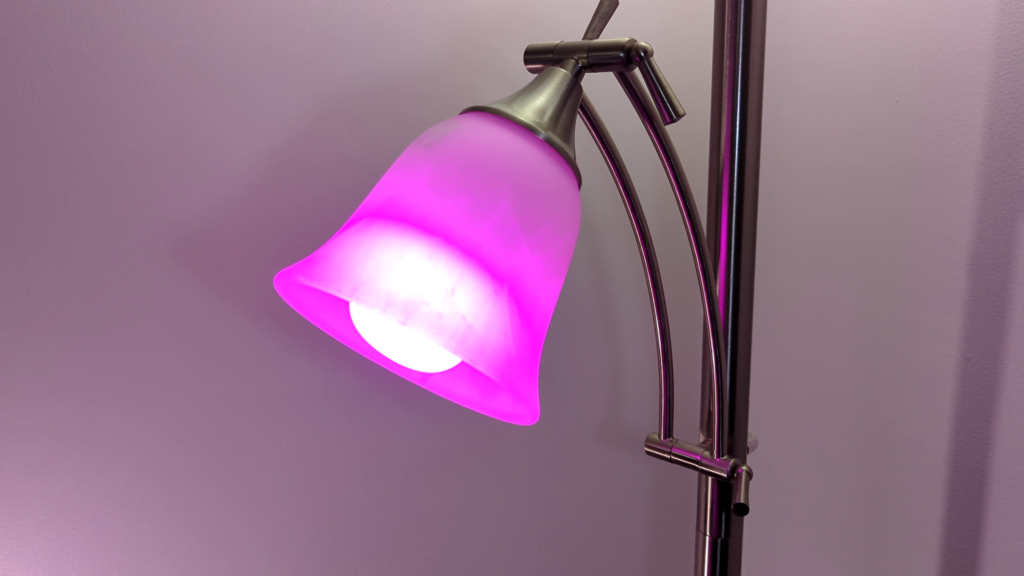
Ok, next we’ll look at the bulbs that use other protocols like zigbee or z-wave rather than WiFi.

Philips Hue

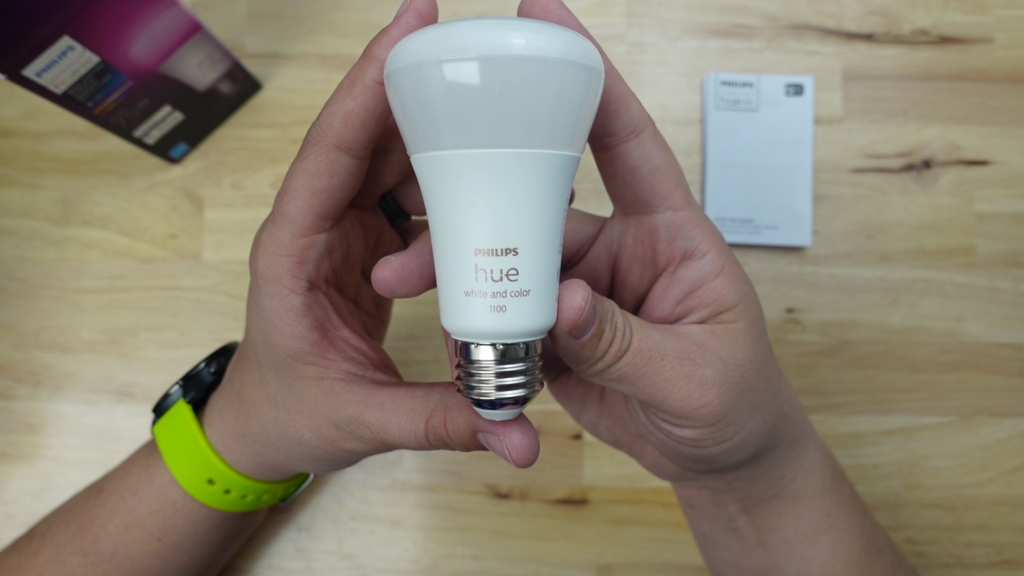
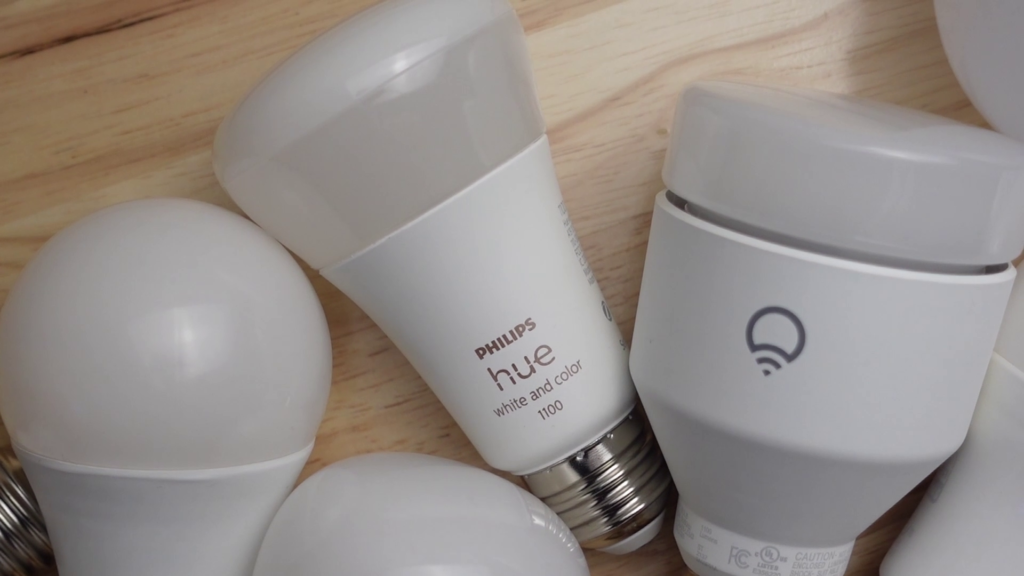
The first one is a legendary zigbee bulb that’s been the standard for a long time  – the Philips Hue bulb. There are a few different options, but I got the 1100 lumen, “medium lumen”, bulb. It has a non-standard design, but  it’s not super flashy, so you don’t feel like you’re paying for looks like you are with the LiFX. Speaking of price though, this is the most expensive bulb in this article!

It has the iconic Hue look – the weird trumpet shape that I honestly don’t particularly like, but that’s ok. It has the Philips Hue logo on the base in a copper color with some model information, and a plain screw end.

This bulb is different from the ones we’ve looked at previously because it typically requires you to connect it to the Philips Hue Hub. Then you could use the Philips Hue app to control it, and everything’s just peachy except that you’re wasting your money. Since other hubs like SmartThigns and Home Assistant can connect directly to the bulb, there’s no need to buy the Hue hub. However, Philips would rather you did, and I’ll explain that a little later. Anyway, it’s compatible with Home Assistant, SmartThings, and Hubitat (with or without the hub), and its compatible with Google Assistant, Amazon Assistant, and Apple Home only if you get the hub.

Home Assistant

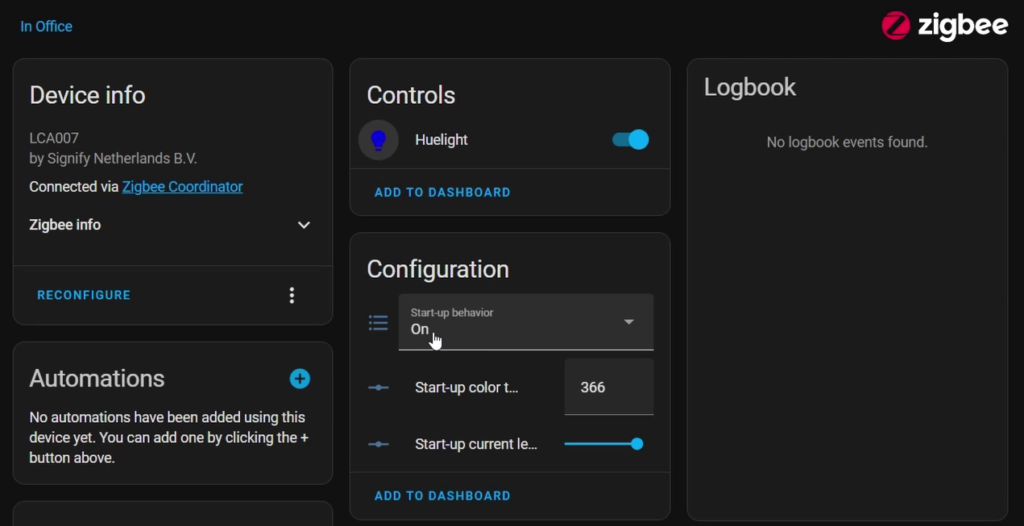
Since I use Home Assistant, I’ll show you how it looks there. Put ZHA into pairing mode, and then to put the bulb into pairing mode, you just have to screw it in and apply power. It starts out white, turns green, and then white again. ZHA should pick up the bulb pretty quickly, and you rename it and assign it to an area if you’d like. In Home Assistant it shows up with a light entity, as well as some configuration options. It allows you to set the state after power on which is really nice, as well as what color and brightness you like to have it start up with. The light entity gives you the standard color wheel and white warmth controls, and a single color loop effect.
Overall

Not gonna lie, I was more impressed than I thought I’d be with this bulb, but I’m still not sure that it’s worthy of the hype. Probably the best part of it was the color accuracy which was extremely accurate for red green and blue, but which looked horrendous for yellow.

Here’s the part I hated – if you ever delete one of these bulbs from your hub (other than Hue), you can’t put it back into pairing mode without the use of another Hue product! Factory resetting does nothing, and after researching about it I read that you have to use a Hue Dimmer to reset the bulb so that it can be paired. This problem bit me when I was testing it with other hubs, but I was super happy when I found out that you can use Zigbee2MQTT, an add-on I run alongside Home Assistant, to put it in pairing mode with a feature called Touchlink. Other than that, I’m not sure of any other way to put it into pairing mode, which is crazy.
Sengled

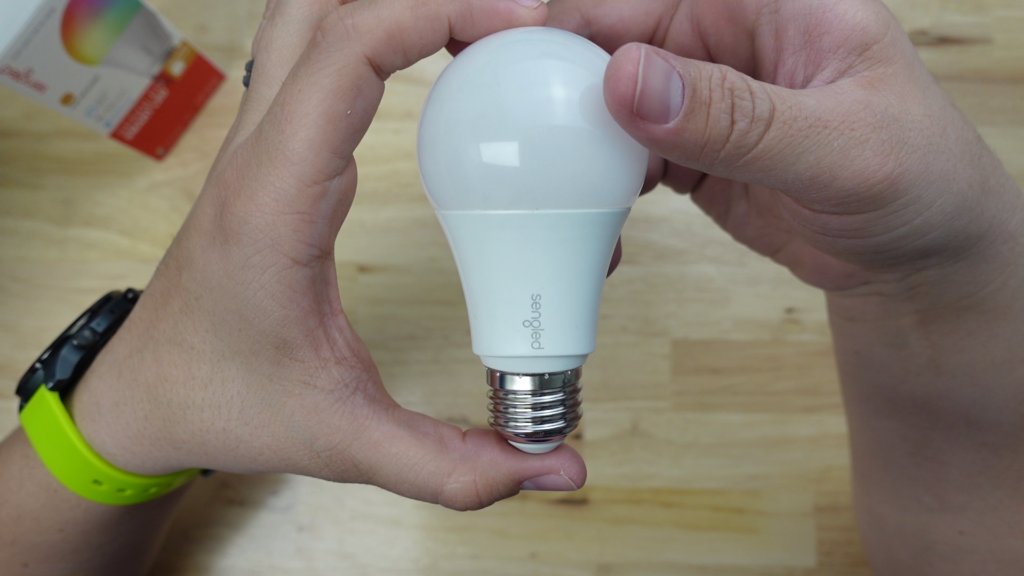
The next Zigbee bulb we’re gonna look at is the Sengled bulb. You may remember Sengled from my previous comparison videos/articles where we looked at their contact sensor and smart plug. Now we come to the bulb, which at first glance appears fairly ordinary. I do like the little bit of flair they put into the bottom edge of the base. Other than that, it just has the Sengled logo on the base and some Zigbee information. Similarly to Philips, Sengled does sell a hub that makes this bulb compatible with Google Assistant or Amazon Assistant, but by itself it’s compatible with Home Assistant, SmartThings, Hubitat, and Amazon Echos that have a Zigbee hub built in. Once again, I’m gonna skip using the Sengled hub since I think one hub should be all you need.
Home Assistant

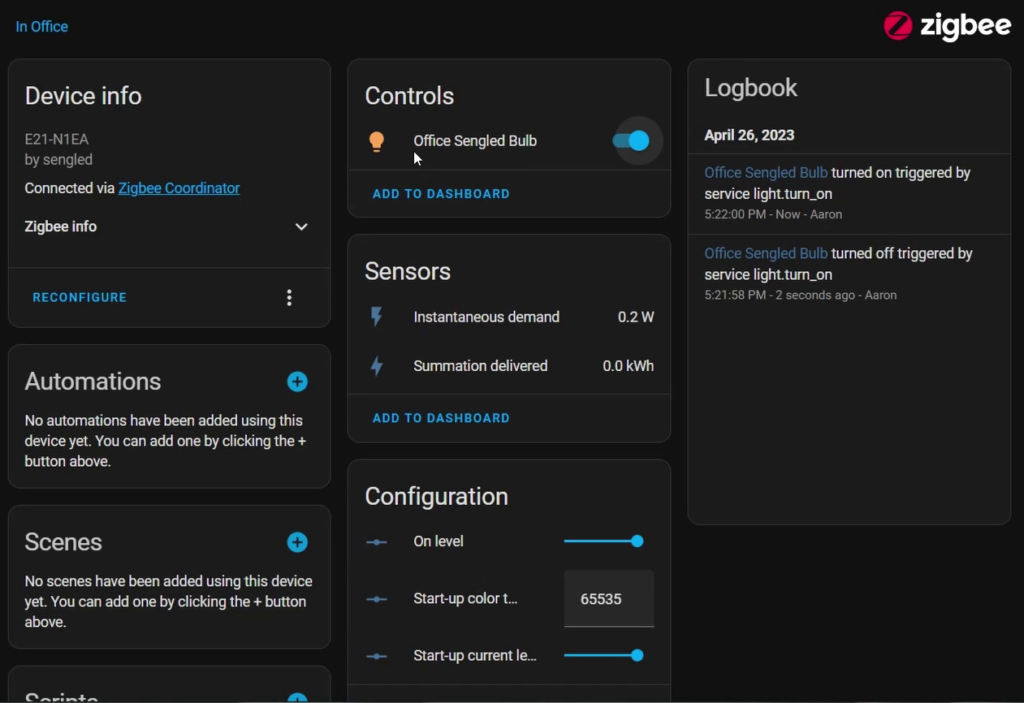
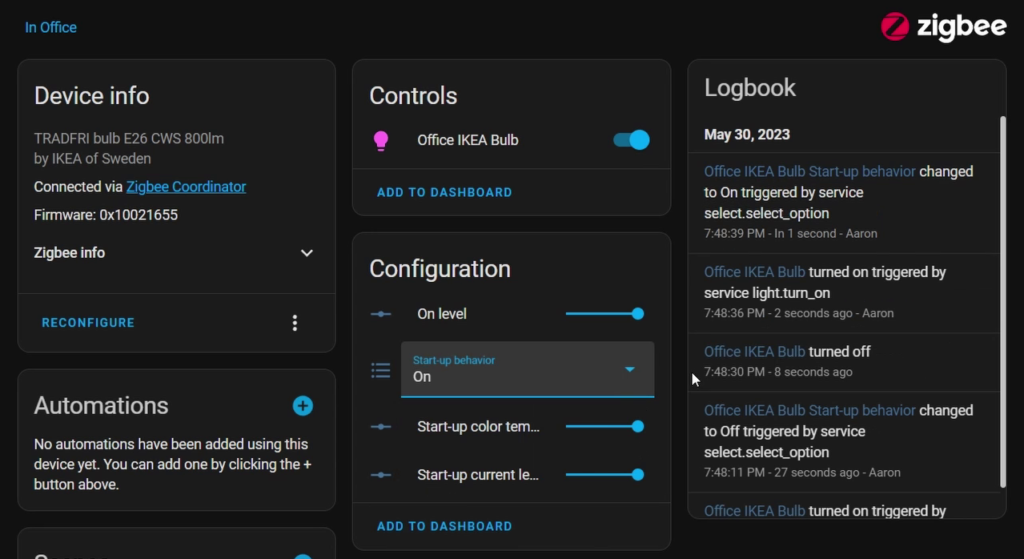
Adding this device to Home Assistant is pretty easy – just put ZHA into pairing mode, and then screw the bulb in and apply power. The bulb is gonna flash blue, green, red and then white. It should be picked up pretty quickly by ZHA and initialized. You can give it a name and assign it to an area if you want. In the device page you get a light entity with color and warmth controls, and also some configuration entities. There’s On Level, Start-Up color temperature and Start-Up current level entities. I assume these have to do with power on state, but I couldn’t any of them to do anything except color temperature.
Overall

Overall this bulb is okay, but the color accuracy wasn’t too great. Red and blue were spot on, but green had quite the blueish tint to it, and yellow was just horrible. However, unlike the Hue bulb, this one allows you to reset it but turning it off and on ten times fast.

innr

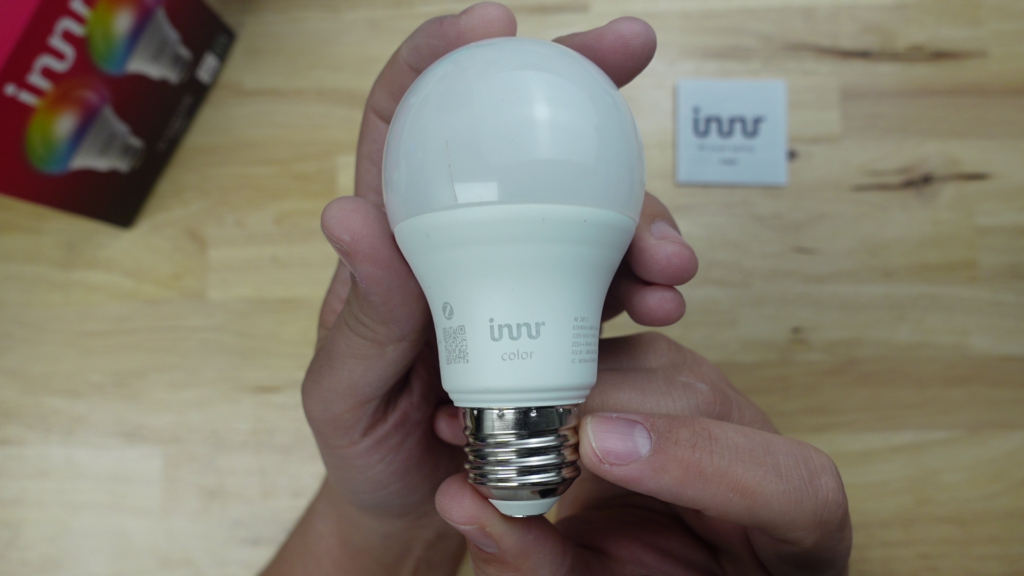
Another zigbee bulb that I tested out was the innr color. Out of the box comes a fairly generic looking bulb. It has the innr logo on the base, as well as some zigbee information. Innr doesn’t sell their own hub, so you’re definitely gonna need one that’s compatible if you want to use this bulb. It’s gonna work with Home Assistant, SmartThings, Hubitat, and an Amazon Echo that has a built in Zigbee radio. This bulb also allows you to reset it but turning it off and on six times fast, unlike the Hue bulb.
Home Assistant

To add it to Home Assistant, put ZHA in pairing mode and then screw in the bulb and apply power. It should get picked up right away, and you can give it a name and area.

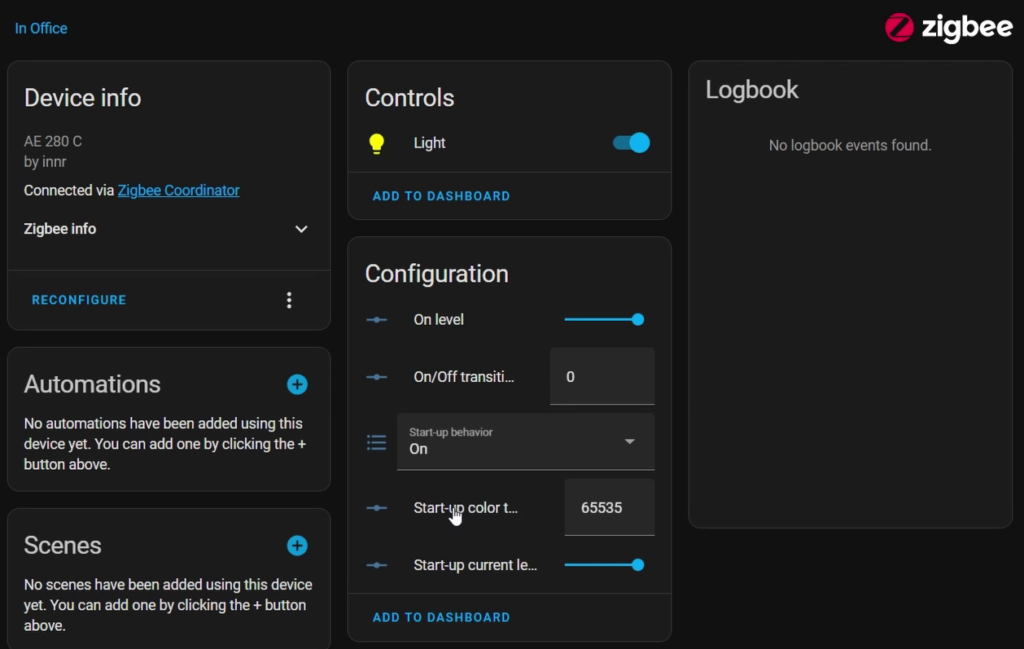
In the device info page you’ll see that you get your standard light entity as usual, but you also get a decent number of configuration options, including On level, On/off transition time, start up behavior (after power loss), the start up color temp and the start up brightness. I couldn’t figure out what On level does, but I can confirm that the rest of them work as you’d expect. The Start-up behavior setting even allows you to tell the bulb to go to whatever state it was in when power was lost. Very cool!
Overall

One thing I really like about Zigbee bulbs, and this one in particular, is that there are some configuration options that you can change without the need for the manufacturers app. I’m not sure how many of these options are available in other platforms like SmartThings, but in Home Assistant there is a lot you can do. Color accuracy was excellent for red, green, and blue, and even the yellow was pretty accurate. Brightness was about average.

IKEA Tradfri

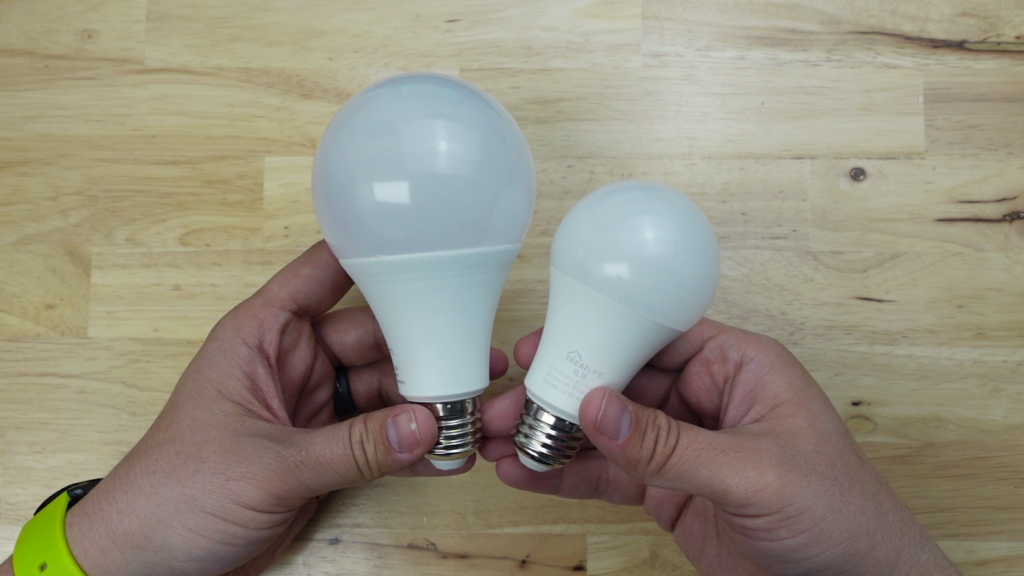
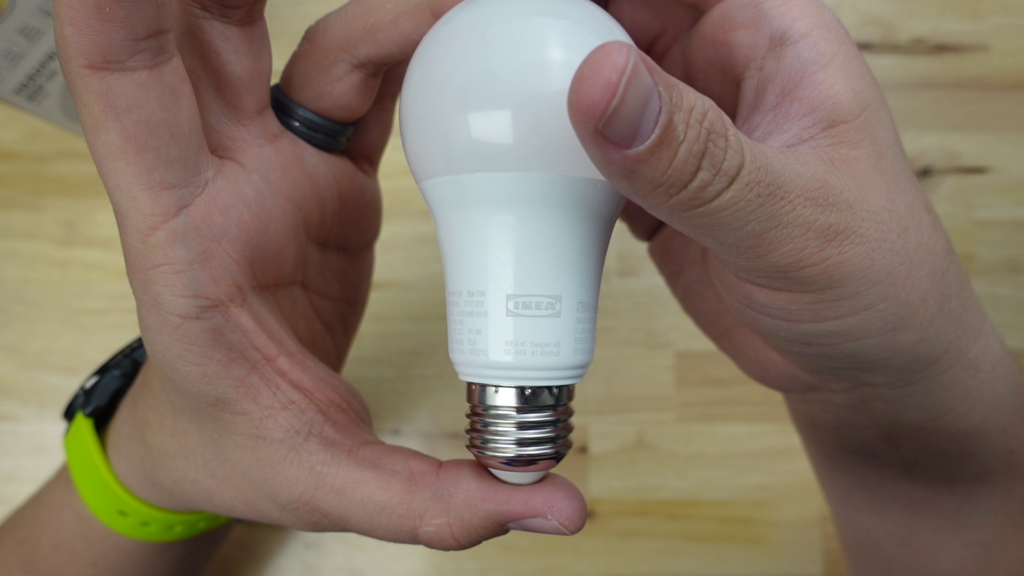
This one is the last of the Zigbee bulbs, and I almost didn’t include it. In almost all of my previous comparison vides/articles, people have asked why I didn’t include Ikea products, and I haven’t for the most part because they didn’t deliver to my area. Now they do, so here we are. The IKEA Tradfri bulb is probably the cheapest feeling and most generic looking bulb of all the ones in this article. Notably smaller than the other bulbs, it still packs 800 lumens and holds its own in terms of brightness. It works with both Home Assistant, SmartThings, and Hubitat, and if you use it with their Tradfri hub, it will also work with Google Assistant, Amazon Assistant, and Apple Home.
Home Assistant

To add it to Home Assistant, put ZHA in pairing mode and then screw in the bulb and apply power. It should get picked up right away, and you can give it a name and area.

In the device page you’ll see the light entity, an On Level entity, and then start up entities for state, color temperature, and brightness. Again, I’m not sure what the “On Level” entity does, but the startup entities work great.
Overall

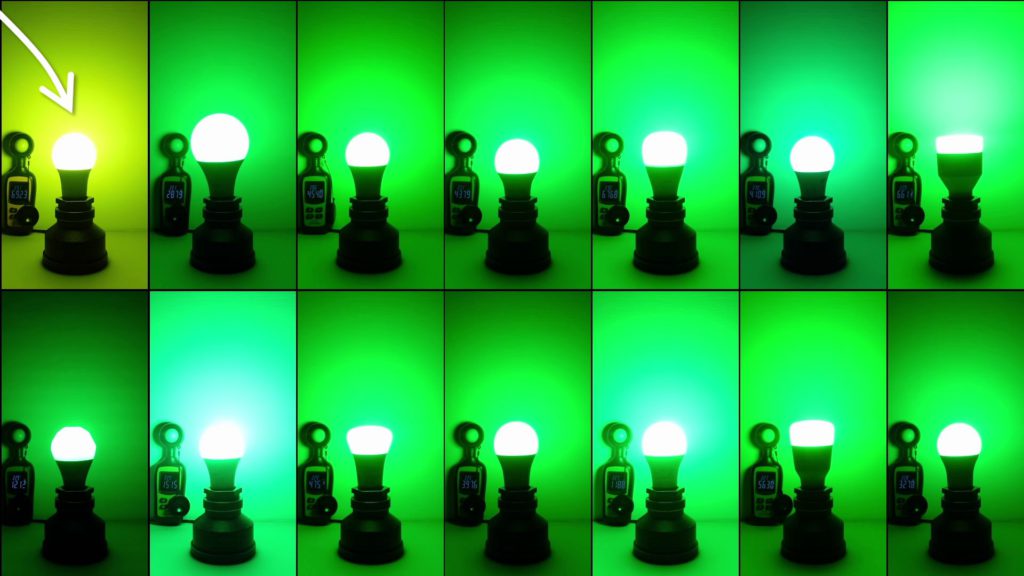
My biggest issue with this bulb was that I’m pretty sure I got a defective one. For some reason the green does not work – at least I can’t get pure green. The closest to green I can get is a greenish-yellow, which is really weird. The color accuracy was decent for red and blue, with what I’d say was a decent yellow, but the green was way off. Unfortunately it’s hard to recommend a bulb when you get a defective one, but anyway, on to the next.
Inovelli
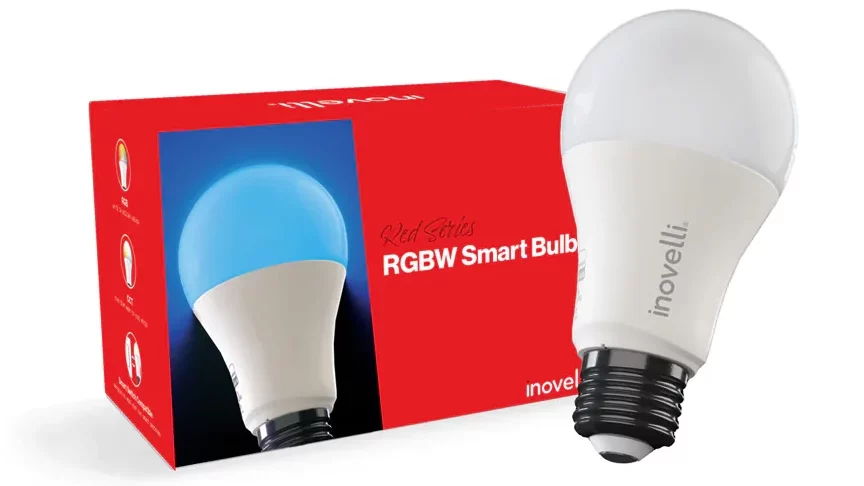
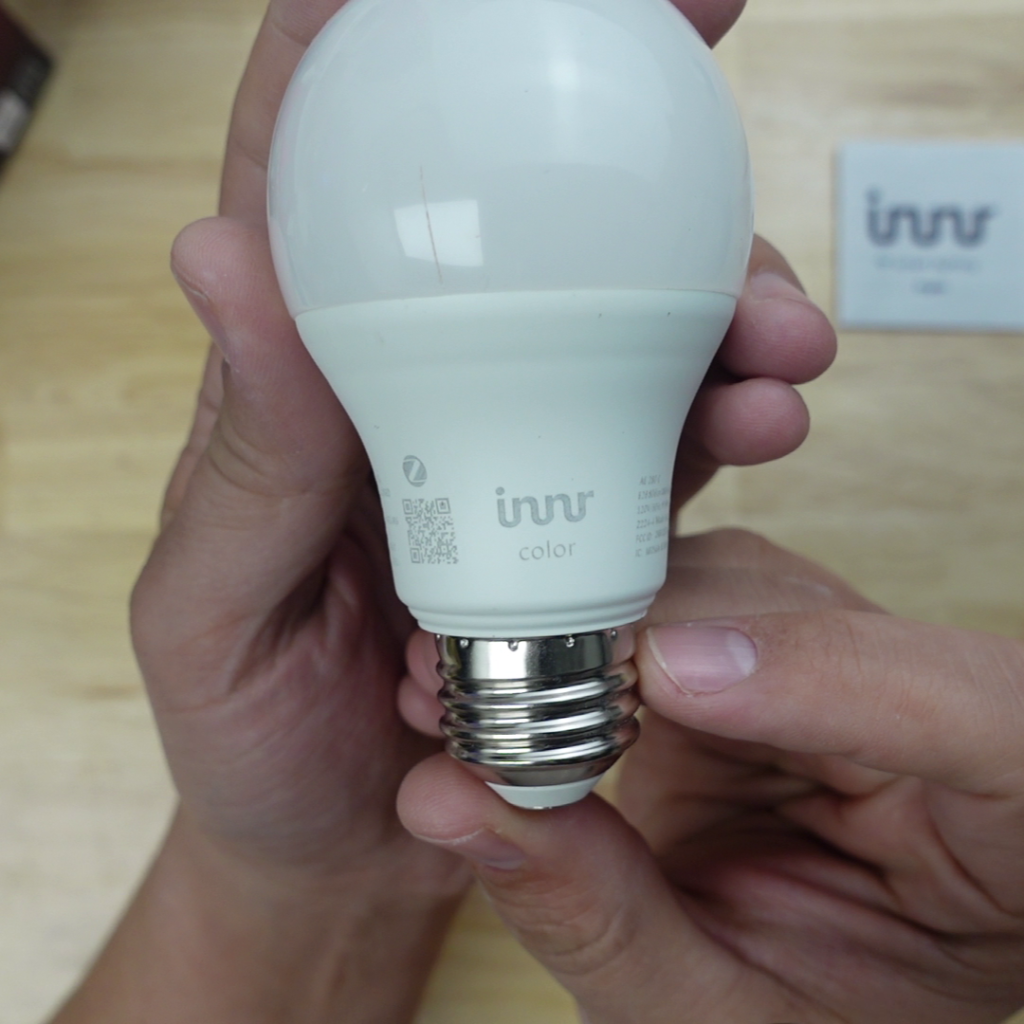
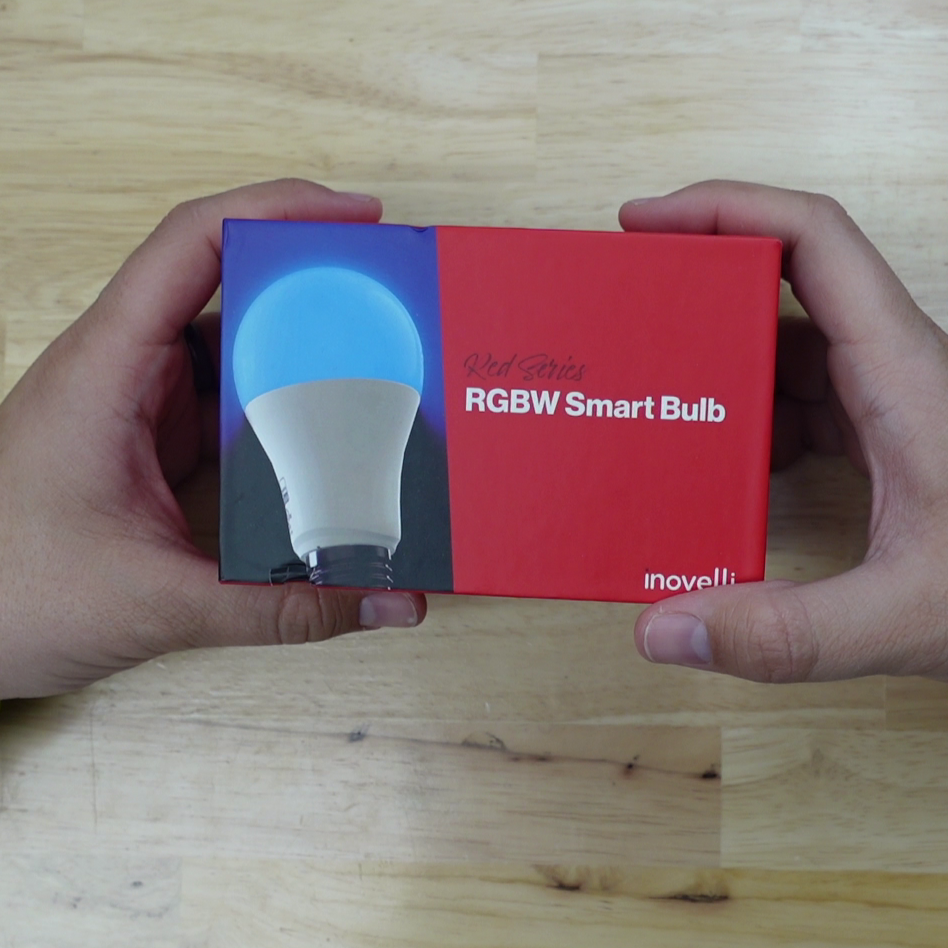
This next one is the only Z-Wave bulb we’re going to look at, and it’s made by a company called Inovelli. We’ve seen great things from this company, and although they’ve have some hard times, their partnership with Linus Tech Tips on a presence sensing switch is promising. If there’s one thing I love about the company, it’s their packaging – its fire.

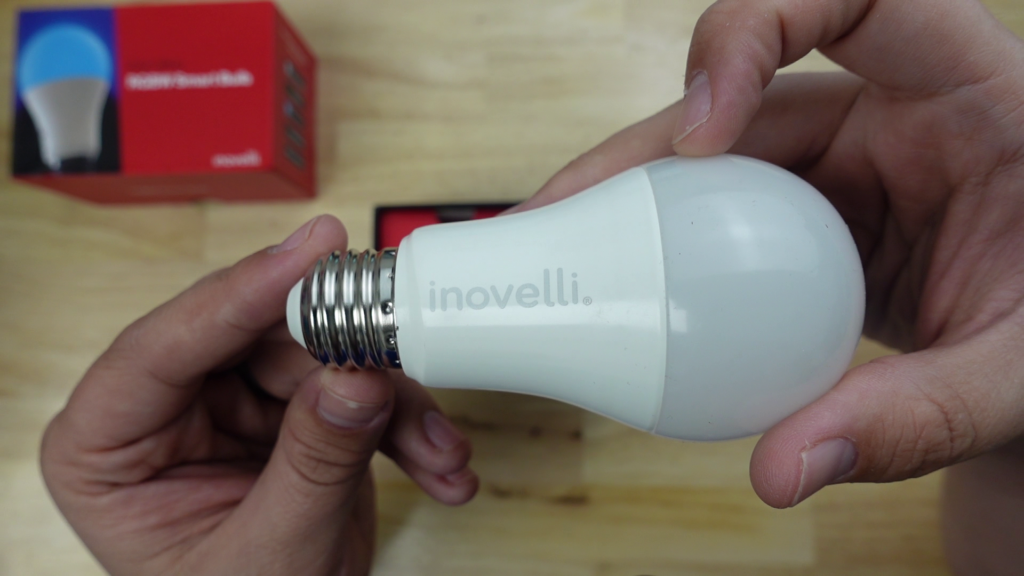
Anyway, the bulb is an 800 lumen bulb with a nice, hefty feel to it. It has the Inovelli logo in large grey letters on the base, and a bit of a wavy edge down by the screw. Otherwise it looks pretty basic. Since this is a Z-Wave bulb, there’s no native app, but it will work with Home Asisstant, SmartThigns, and Hubitat.
Home Assistant

To put the bulb into pairing mode, just screw it in and it should go into pairing mode.

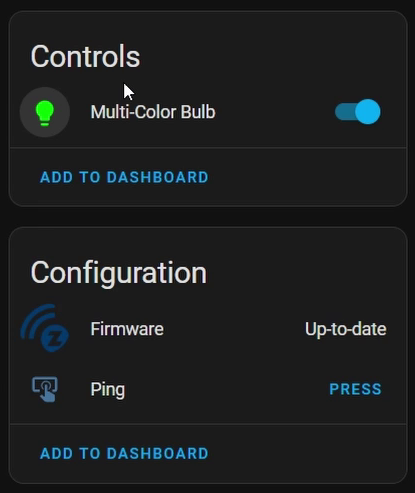
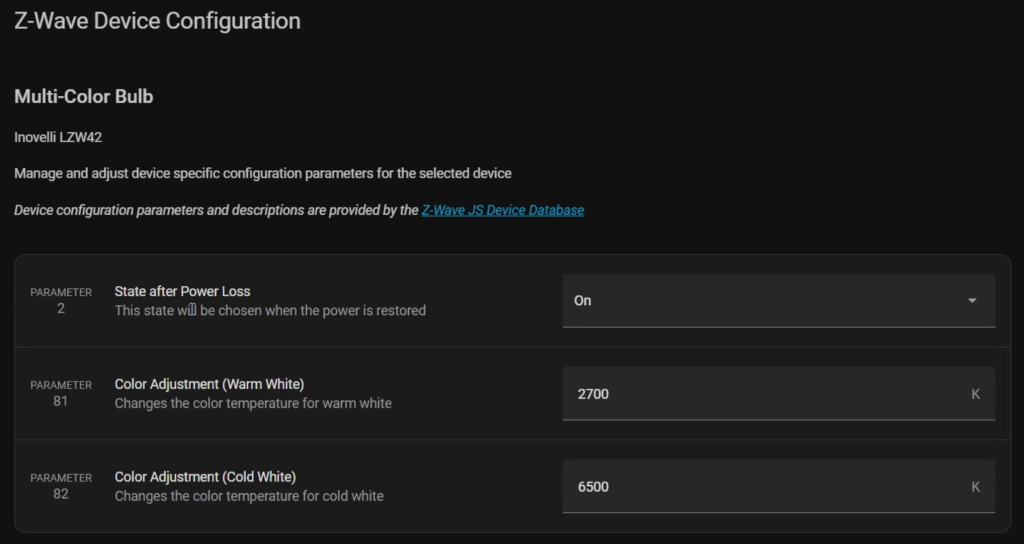
In the device page in Home Assisatnt you get a light entity with the expected controls, a Firmware entity, and a ping entity. The firmware entity lets you know if the bulb is up to date, and I believe any updates can be done directly through Home Assistant, which is really nice.
Overall

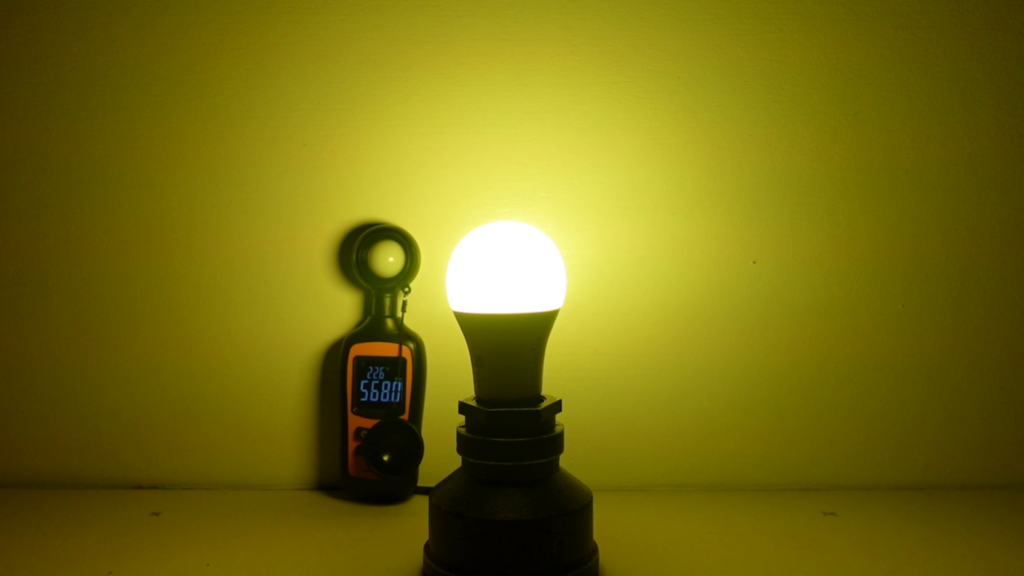
One thing about this bulb that I like is that it acts as a Z-Wave repeater, meaning that it strengthens your Z-Wave mesh. However, you may not see as good range as with newer Z-Wave devices because this one is only rocking a 500 series chip, although the latest is 800 I believe. I didn’t have any issues, but I do have a robust network with many Z-Wave light switches. The color accuracy was pretty decent for this bulb, with very accurate red and green, decently accurate blue, and a superb yellow color.
Nanoleaf

The next two bulbs I’m looking at are really a class of their own – one runs on Thread, and the other on Matter.

Nanoleaf has been a front-runner in the higher-end lighting arena, specifically with their edge-lit LED panels, but they also make standard RGB bulbs. Their main line of “Essentials” bulbs were what I’m showing first, a Thread-based bulb that was meant to be used with their Nanoleaf hub. Since they are Thread bulbs, the also work directly with Apple Home if you have one of their Home Pods which act as a Thread border router.
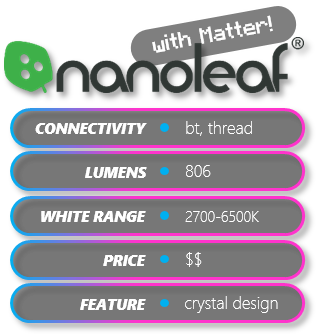
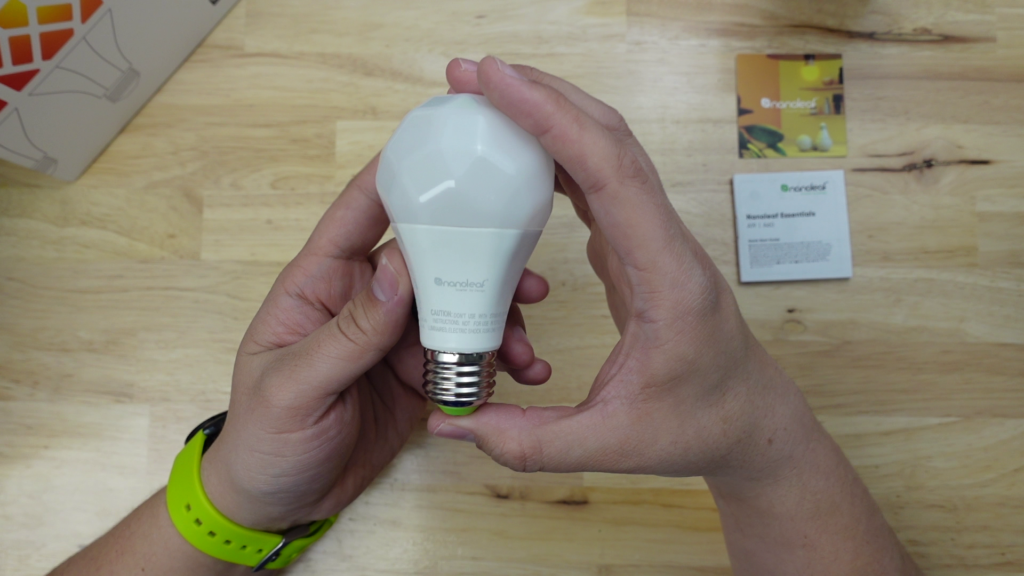
They are definitely one of the cooler looking bulbs, with their distinctive crystal diffuser design, squarish base, and touch of green accent on the screw. The base of the bulb also has the HomeKit pairing code, so you can add it to Apple Home pretty easily.

In the app the bulb is added via Bluetooth, and then it will  automatically search for and add the bulb to a Thread network. The app is pretty basic, with a power toggle and brightness slider at the top, and then 3 tabs, Basic, Scene, and Favorites. The basic screen has the color wheel and some presets below it, the scene tab has a bunch of preset scenes, and also allows you to created your own, and you can mark some of those scenes as favorites and they’ll show up on the Favorites tab.

Home Assistant

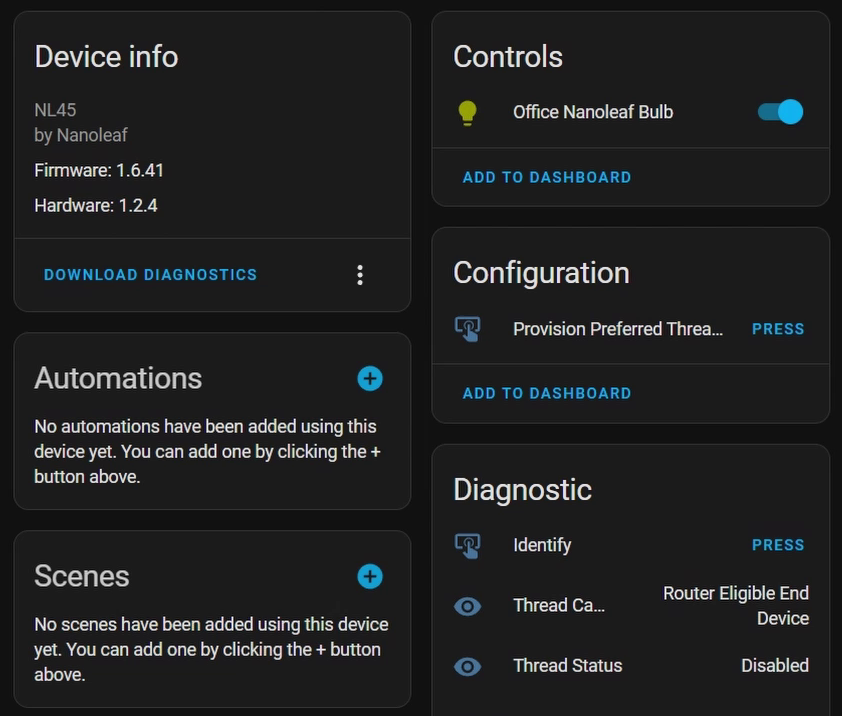
There is a Nanoleaf integration, but that only works for a few supported devices that use WiFi. Since Thread isn’t fully working with Home Assistant, we can’t add one of these bulbs directly to Home Assistant with that protocol either, but we can add it via Bluetooth using the HomeKit Controller integration.

Once added we should see a light entity, a thread provisioning button, an identify button, and some other thread entities. I’m not really sure what any of these do, but all you need is the light. Don’t forget that your Bluetooth range might be low, but it can be increased with Bluetooth proxies.

Anyway, thanks for sticking around to the end! Now let’s go over which ones I think are the best.

The Matter Version

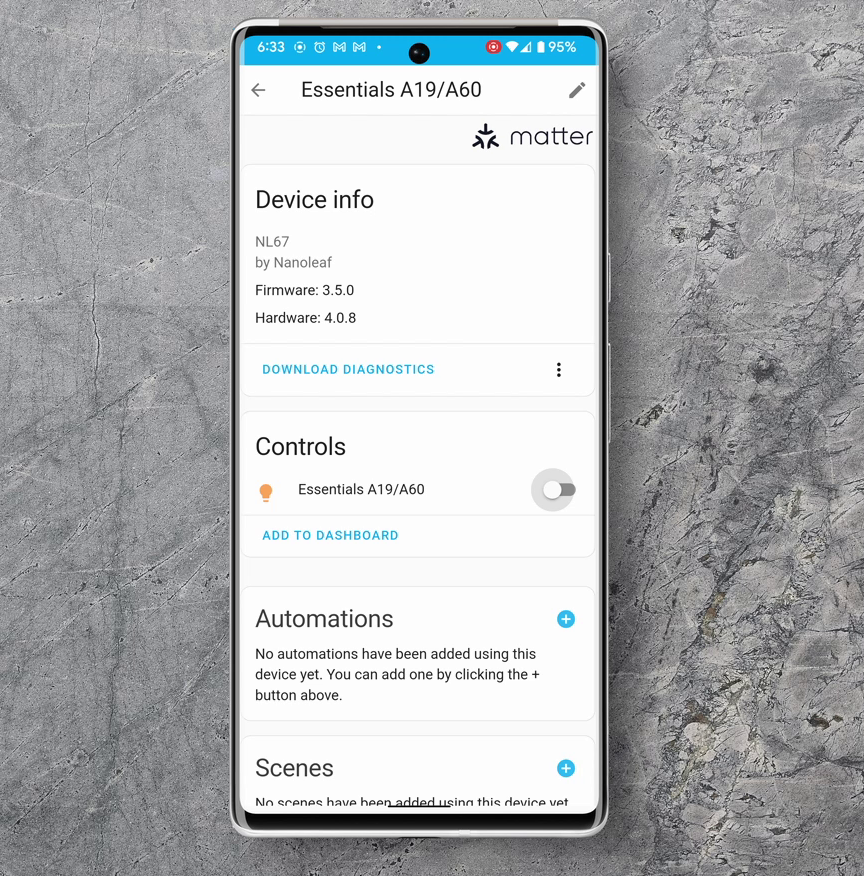
Nanoleaf has just realeased a new version of this same bulb, which, from what I can tell, has the exact same LED in it, but this one is controlled by Matter over thread. They actually sent me this one to take a look at, so I figured I’d put it in this article if I could get it working with Home Assistant. Well, wouldn’t you know, I was able to add it to Home Assistant with a bit of trouble, but understand that the Matter integration for Home Assistant is in Beta. I was also able to add it to SmartThings as well.
Overall

This bulb really does have a great look and feel to it – it seems like they put a lot of work into the design, but the brightness is where this bulb really suffers. This was by far the dimest bulb of all of them, the next brightest being the Philips hue. Red, Green, and Blue were decently accurate, with a moderately accurate yellow. If you have to pick between the two, I’d pick the Matter version since it’s replacing the original.
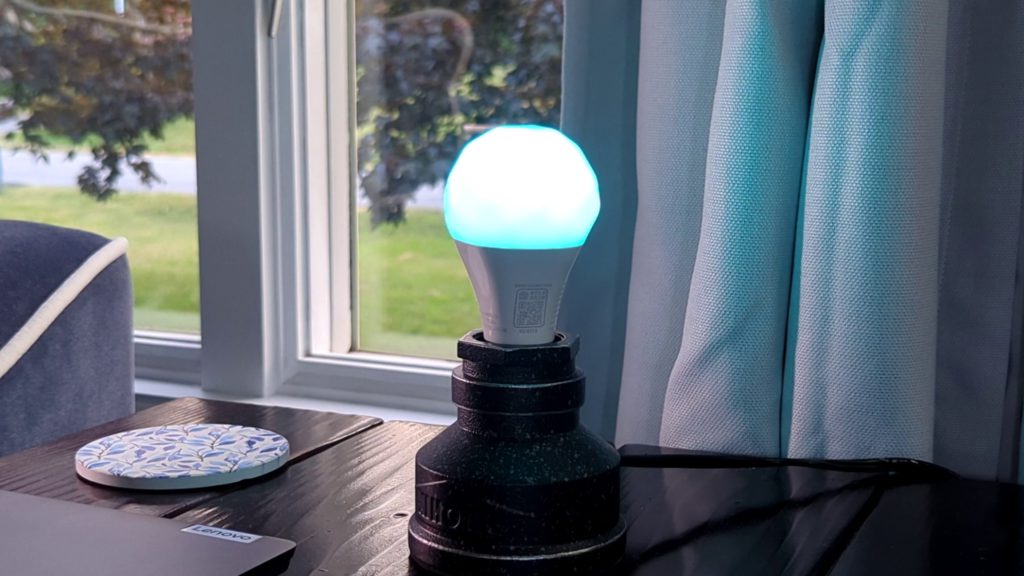
Testing

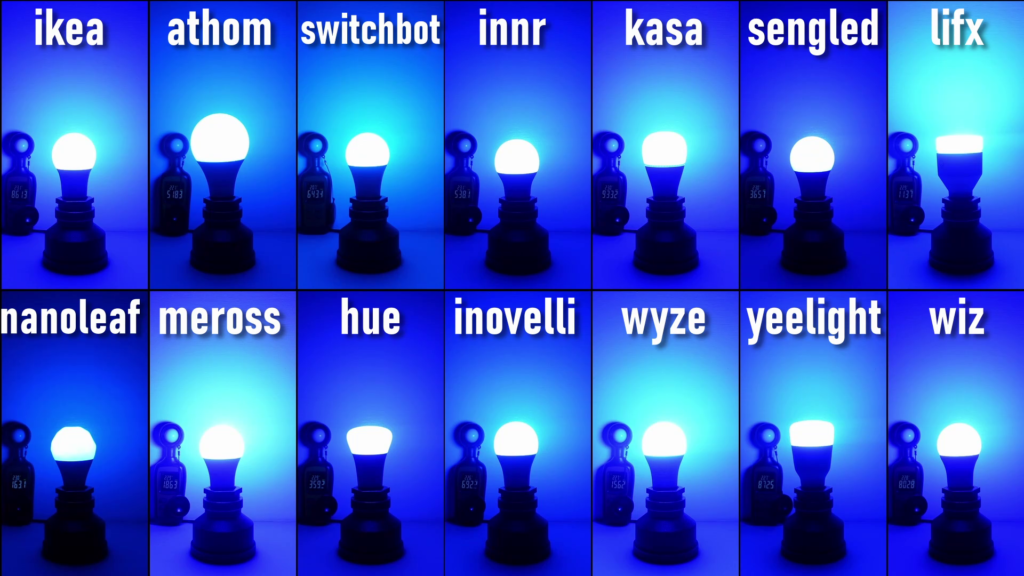
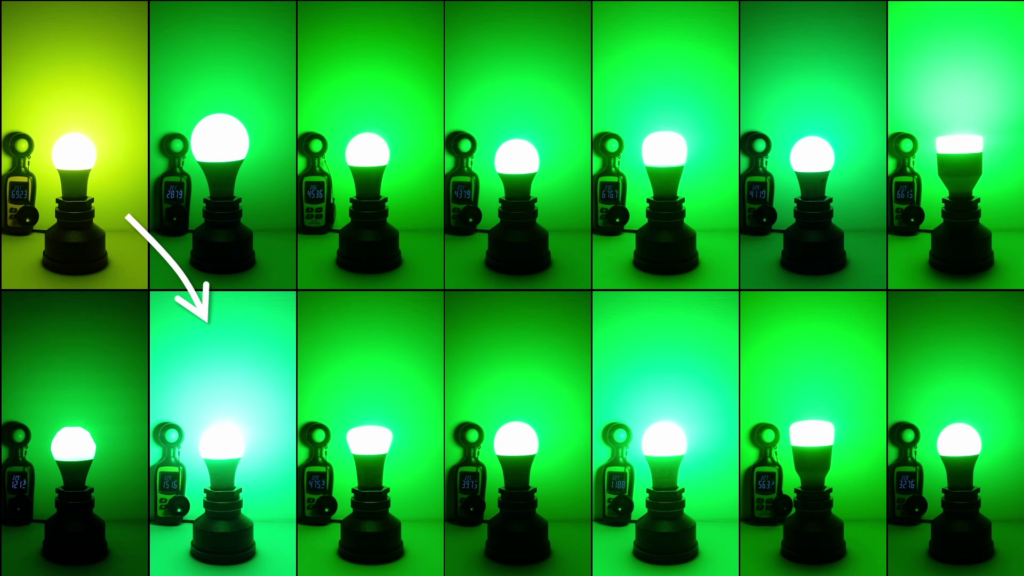
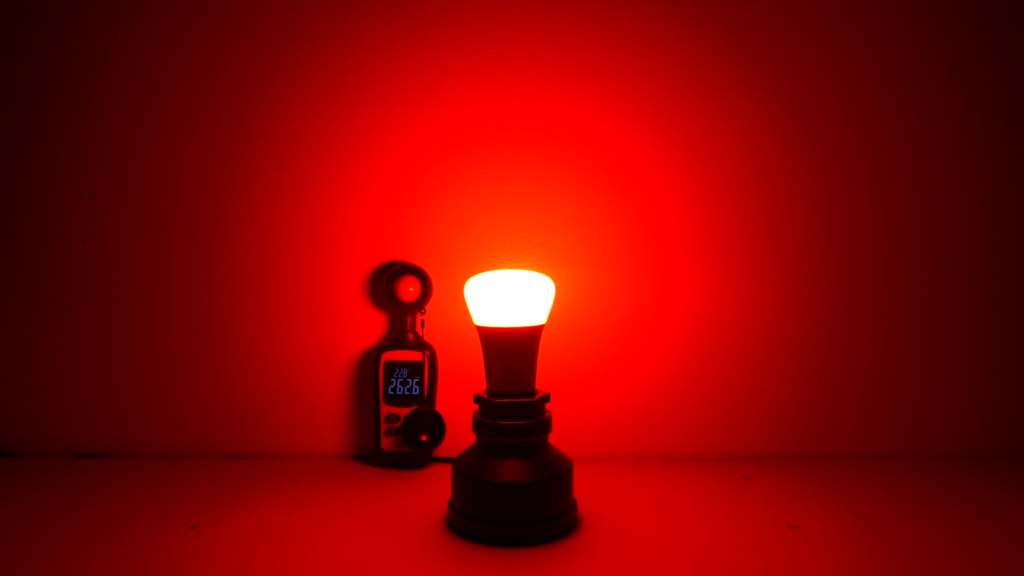
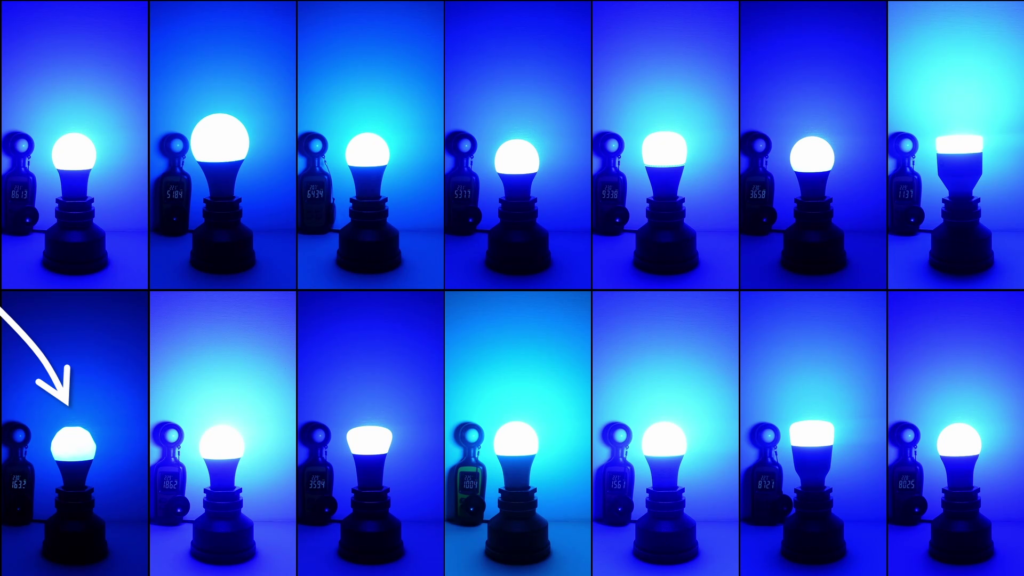
For each of these bulbs we’ve looked at, I set them to Red, Green, Blue, and Yellow at maximum brightness. I used a lux meter I picked up on Amazon to measure the brightness of the bulbs at each color. You can see the results below, and even though the actual values may not mean much, it’s a decent way to compare the relative brightness of the bulbs.
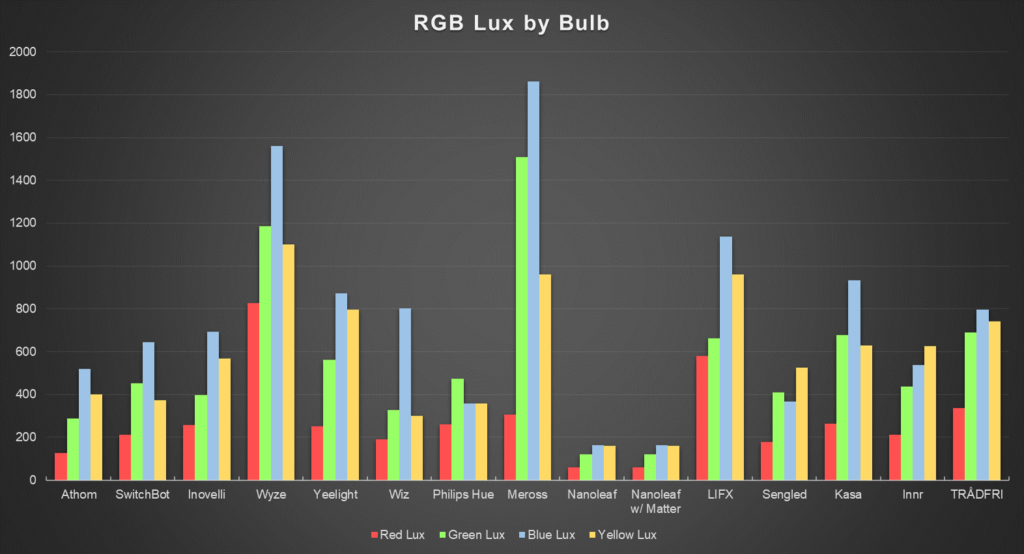
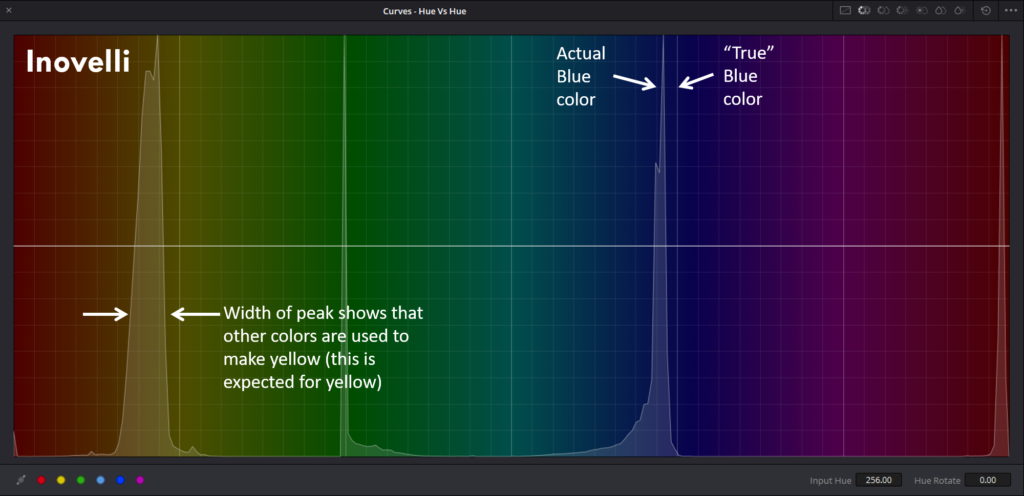
I also recorded this process with my camera and used a feature in Davinci Resolve to give an idea of the accuracy of each color. The feature is called Hue vs. Hue, and it shows you a spectrum of color, with peaks to show what colors are displayed on the camera. The location of the peak gives an idea of the “accuracy” of the color. You can see below that the Inovelli’s blue isn’t exactly “true blue”, the actual blue color is a tiny bit toward green. This difference is really insignificant. The other thing we get from this data is the width of the peak. A wide peak shows us that other colors were used to make that one color. For red, green, and blue, we should see narrow peaks because there are dedicated red, green, and blue LEDs. For yellow, it’s a mix of the different LEDs to obtain yellow, so we’d expect the peak to be wider. However, since yellow is a mix of the colors, the peak’s location can tend to be far from “true” yellow, which affects how nice of a yellow we see.
This helped confirm why some of the colors were inaccurate, especially with the Meross bulb which appeared abnormally bright for its lumen rating. You can see that the green color is significantly blueish, and also that the peak is extremely wide. This makes the green color very bright, but not very accurate. You can also see that the yellow is a bit orangey as well.
Anyway, I hope this data helps you out.

Ok, now let’s talk about my favorites and least favorites.

Favorites

For the best high end bulb, I’d put my money on the LiFX color bulb. I know it’s pretty expensive, but it’s more of an art piece than a bulb that hide under a lamp shade. That being said, I’d choose it anyday over the Philips Hue bulb.
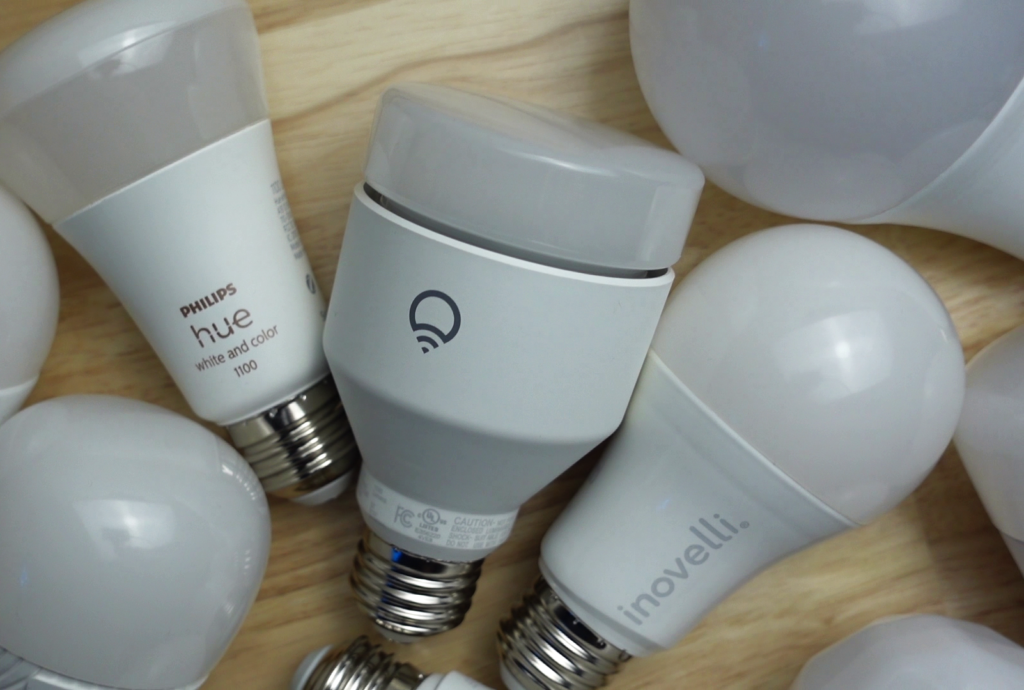
If you’re just looking for the brightest bulb, the Wyze bulb is a great choice. That combined with the fact that it appears to work locally with Home Assistant makes it a great choice. I really do like how bright it is, and may use it for some ambient lighting in my videos.
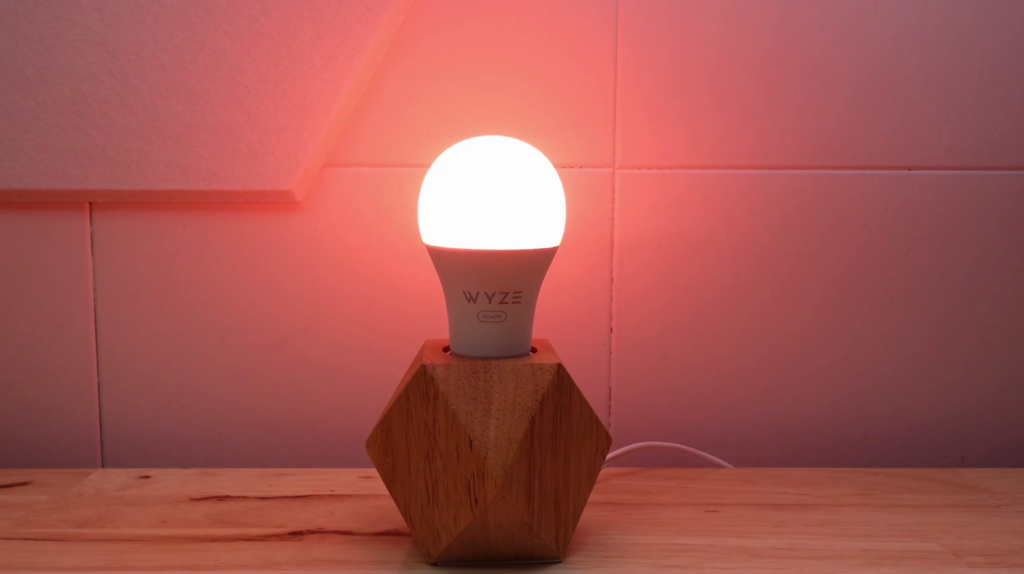
If you’re just looking for the best bulb for the price, I think a great cheap option is the Kasa smart bulb, which had decent color accuracy, an excellent yellow color, and works locally with Home Assistant.
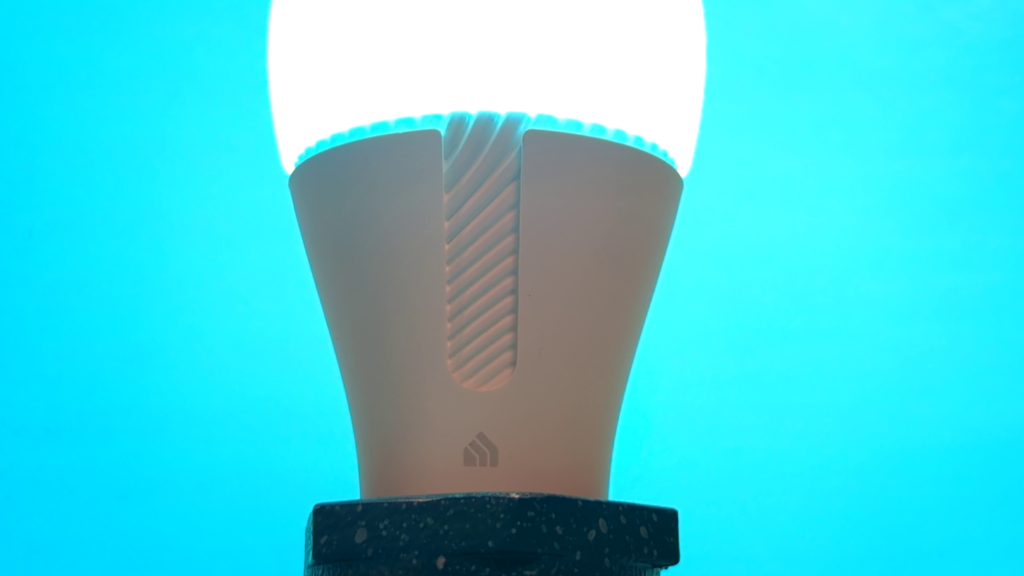
For a mid-range bulb that has top tier compatibility, I’d choose the Yeelight bulb, as it’s compatible with the top 6 smart home platforms, and the bulbs operate without the need for cloud connectivity.
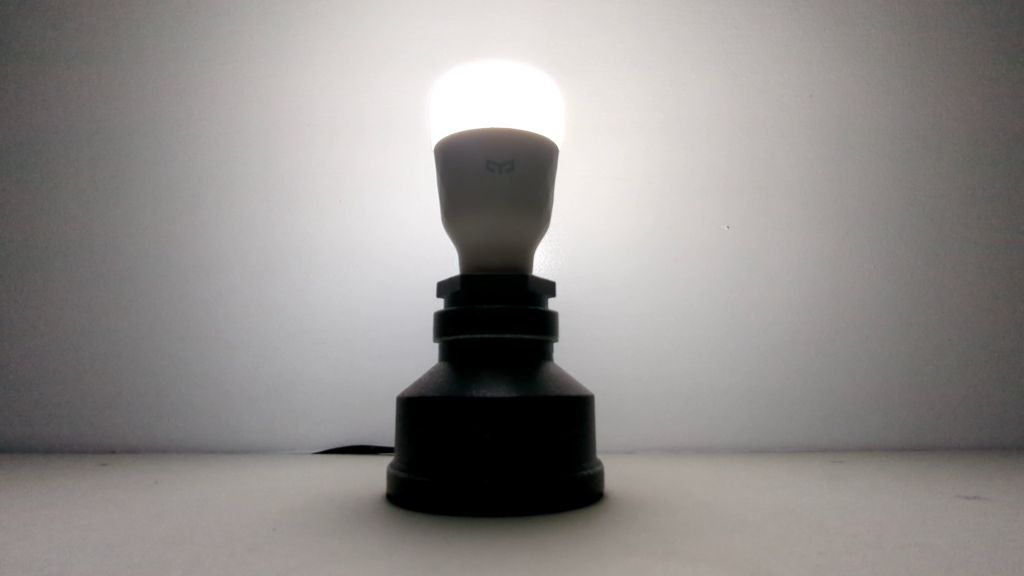
If you want a Zigbee bulb, the best in my opionion is the Innr bulb, although the price is a bit steep. If you want a Z-Wave bulb, the only one I looked at was the Inovelli.
Least Favorites

Ok, so here are the ones I would NOT recommend.

I’ll admit I’ve had a bias against this bulb from the start because of how much I spent on it, but the Philips Hue bulb is a no-go for me. The fact that it can’t be reset and put into pairing mode again without the need for custom software or ANOTHER Hue product is ridiculous, and it’s not something that the Smart Home community should stand for. That, combined with the fact that the yellow color quality was low and the price is super high hinders me from recommending this bulb.
The next one I would steer clear from is the Nanoleaf bulb. While it has some serious style, I was not at all impressed with it’s brightness or color accuracy, or really even the app. It doesn’t have enough going for it to merit the $20 price tag in my opinion. The Matter version is pretty cool, but I’m not sure that I’d buy it just for that.
The third least favorite is the Tradfri bulb. I had high expectations, but mine was defective, so I really can’t recommend it. It also seemed a bit cheap quality wise for the price.

Reminder & Thank You

Anyway, I hope you enjoyed this article and it helps you sort through some of the smart bulbs that are out there. Don’t forget though that a smart bulb isn’t necessarily the best way to go in every situation, and you may find that a smart light switch is a better way to go.

If you did enjoy the article, please take a second to share it with a friend! Also, links are in a table at the top – if you buy any of these bulbs through my links, I get a small commission at no cost to you! Thanks for your support!

Check out my YouTube channel if you want to see more comparisons like this in video form! Thanks for reading!

Best Water Leak (Flood) Sensors for Home Assistant

What’s up Smart Homers! In this article I’m going to compare 10 different water leak sensors that work with Home Assistant.

Water damage can be very costly for homeowners, and a source of annoyance for those who rent their living spaces. Often water leaks start out small, and can go undetected for a long time, and are only found when the damage is significant. Water leak sensors, sometimes called flood sensors, can be very useful for remotely detecting water leaks in suspected locations. They can be especially useful if you own a rental property, Air B&B, or vacation home that you aren’t always living in.

Water leak sensors basically work by using two or more conductive “electrodes” or “probes” that are exposed to water. Since most water (besides de-ionized or distilled water) is conductive, when it comes in contact with at least two of the “probes”, it closes the sensing circuit and tells the device that it has detected water. Even a damp paper towel has enough water in it to conduct!

Anyway, I bought a bunch of leak sensors from a few different brands and I’ll compare their prices and features, and I’ll also give you some ideas for how they can be used in your smart home. At the end of the article I’ll tell you my favorites and least favorites!

Requirements

The requirements for my sensor selection are:

  1. They have to work with Home Assistant
  2. They can’t require any other hub than a Zigbee or Z-Wave radio*
  3. They have to cost less than $50. 

*Note that the “no hub” requirement assumes that you have Home Assistant set up and that you also have Zigbee and Z-Wave radios working with your Home Assistant instance.

I’ll be adding these devices to Home Assistant using ZHA and Z-Wave JS.

I didn’t see any WiFi devices that I wanted to look at beside the Shelly leak sensor, and that one was going to take too long to arrive.

For each sensor, I put them in a dish and tried to determine their sensitivity levels. This didn’t yield anything super informative.

Overview

Name Model Protocol Price Battery Sensors
Aqara Water Leak Sensor SJCGQ11LM Zigbee $ CR2032 leak,device temp
Linkind Water Leak Sensor LS21001 Zigbee $ 2xAAA leak
Centralite Water Sensor 3315-C Zigbee $$$ CR2 leak, temp
Aeotec/SmartThings Water Leak Sensor Zigbee $$$ CR2 leak, temp
Third Reality Water Leak Sensor 3RWS18BZ Zigbee $$ 2xAAA leak
Sinope Sedna Water Leak Detector WL4200S Zigbee $$$$ 2xAAA leak, temp
Zooz Water Leak XS Sensor ZSE42 Z-Wave $$ CR2032 leak
Ecolink Wireless Flood/Freeze Sensor H214104 Z-Wave $$$ CR123A leak, freeze
HomeSeer Leak Sensor HS-LS100+ Z-Wave $$$ ER14250 leak, temp
Aeotec Water Sensor 7 Pro ZWA019-A02 Z-Wave $$$$ ER14250 leak, temp, hum

Zigbee Water Sensors

Ok, so let’s look at some Zigbee sensors.

Aqara Water Leak Sensor

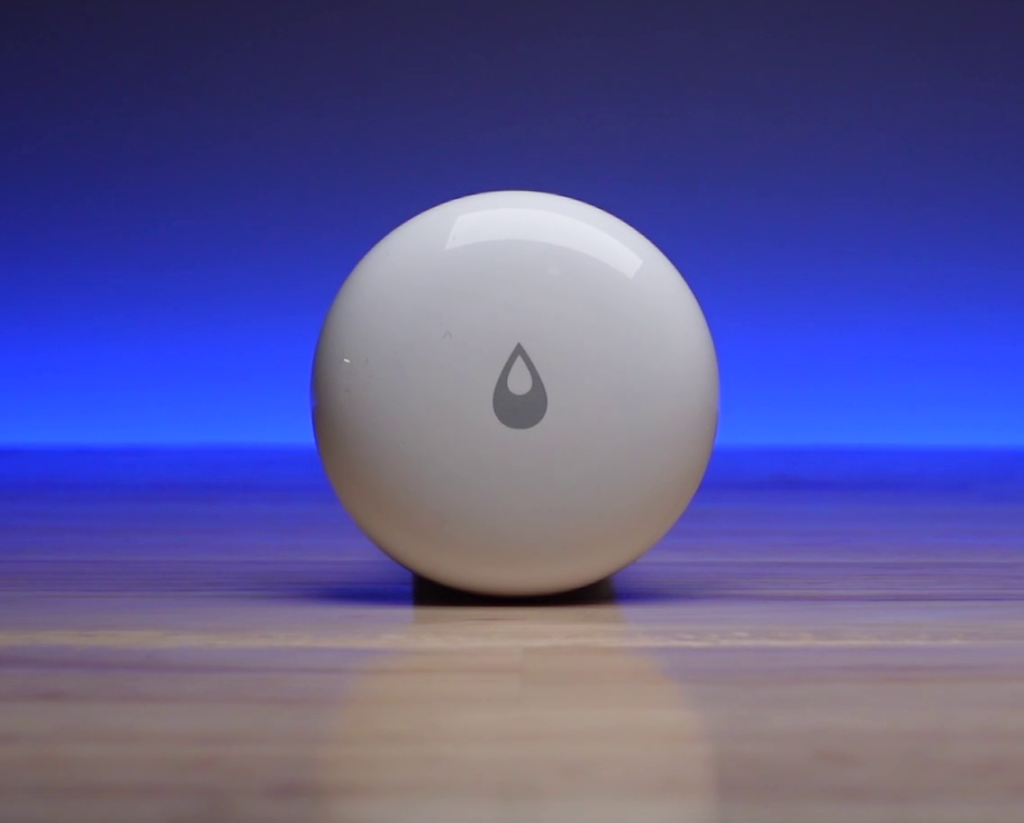
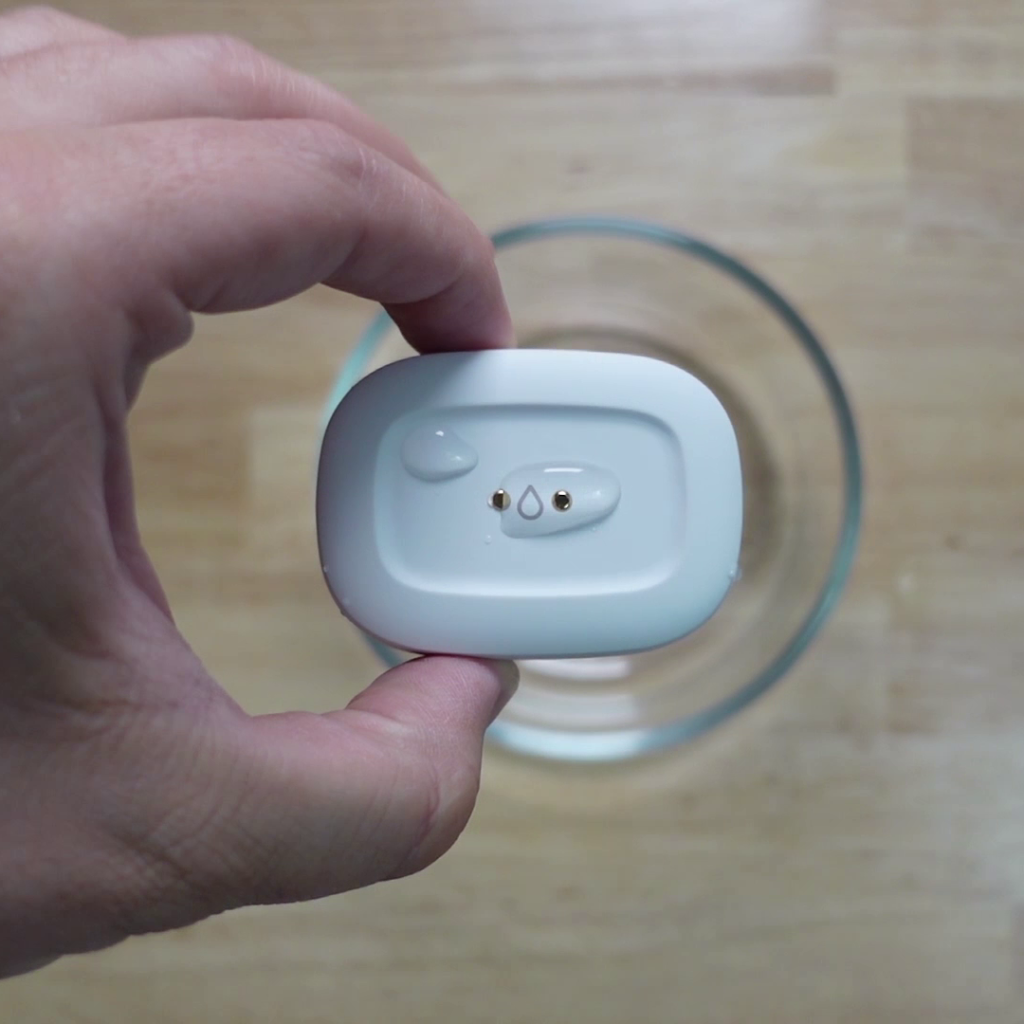
The first one is the Aqara Water Leak sensor. This one looks a bit different from the other Aqara products we’ve covered like the Aqara button and temperature sensor. Rather than the matte white body with gray accents, this one is all white with a glossy finish, and has a single water droplet in the middle.

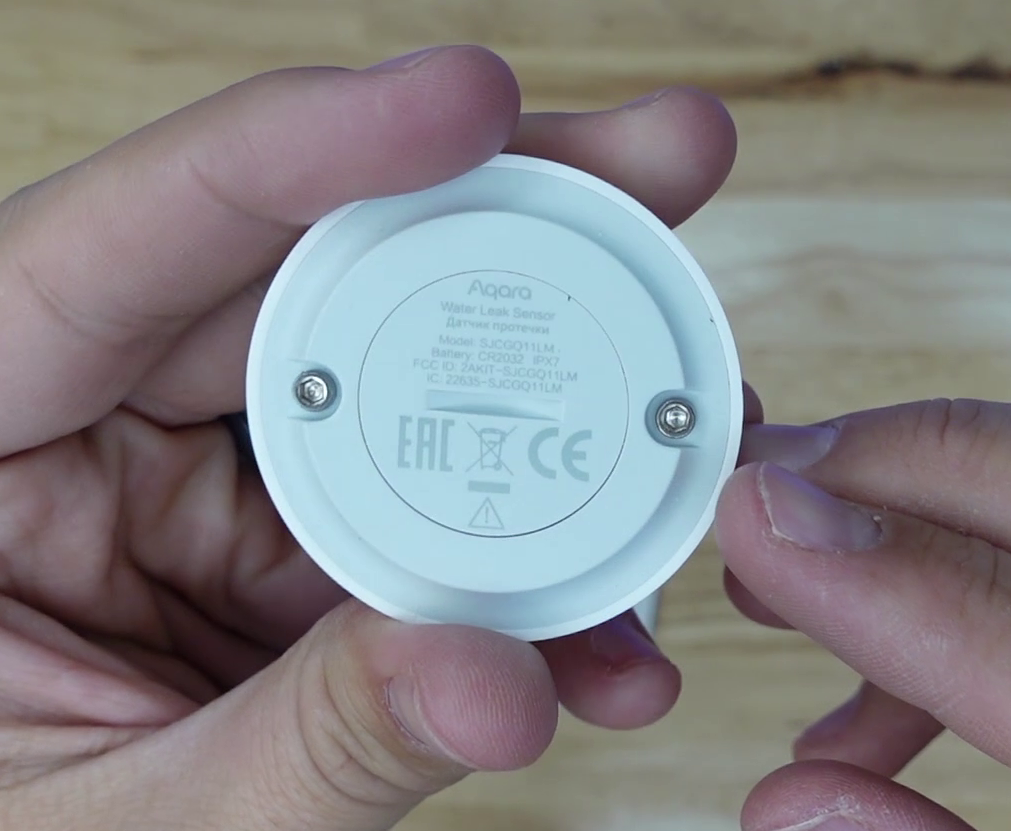
On the back side it has a battery compartment that can be opened with a flathead and two hex screw heads. The two screw heads are actually the electrodes used for sensing water. You can see that they are raised up from the flat surface of the bottom of the sensor by a few thousandths of an inch. This makes it so that the sensor can be set on a flat metal surface without closing the sensing circuit, and requires a very small amount of water surrounding the sensor for it to reach the electrodes. You can also unscrew them a little bit and connect probe cables to them if you want to use them for remote sensing of water instead of directly with the device.

If you take the battery cover off, you’ll notice that it has a rubber seal under the cover, sealing off the inside of the device from water. I did find in the fine print of the manual that this device is supposed to be waterproof, so I put it to the test. I left it in a dish for 24 hours, and water didn’t even make its way to the seal under the battery.

To pair this sensor with Home Assistant, you need to press the hidden button that’s underneath the water droplet icon on the flexible shell on the top side of the sensor. If you press and hold it for 10 seconds, the device will go into pairing mode and is instantly picked up by ZHA. In Home Assistant you get the water sensor, a device temperature sensor, and a battery sensor. This is the internal device temperature, and will not accurately report the air temperature.

Since this device is waterproof, I might be useful in places where you want to check for leaks, but large volumes of water could also be present. Just remember that it floats, so you might need to secure it.

Linkind Water Leak Sensor

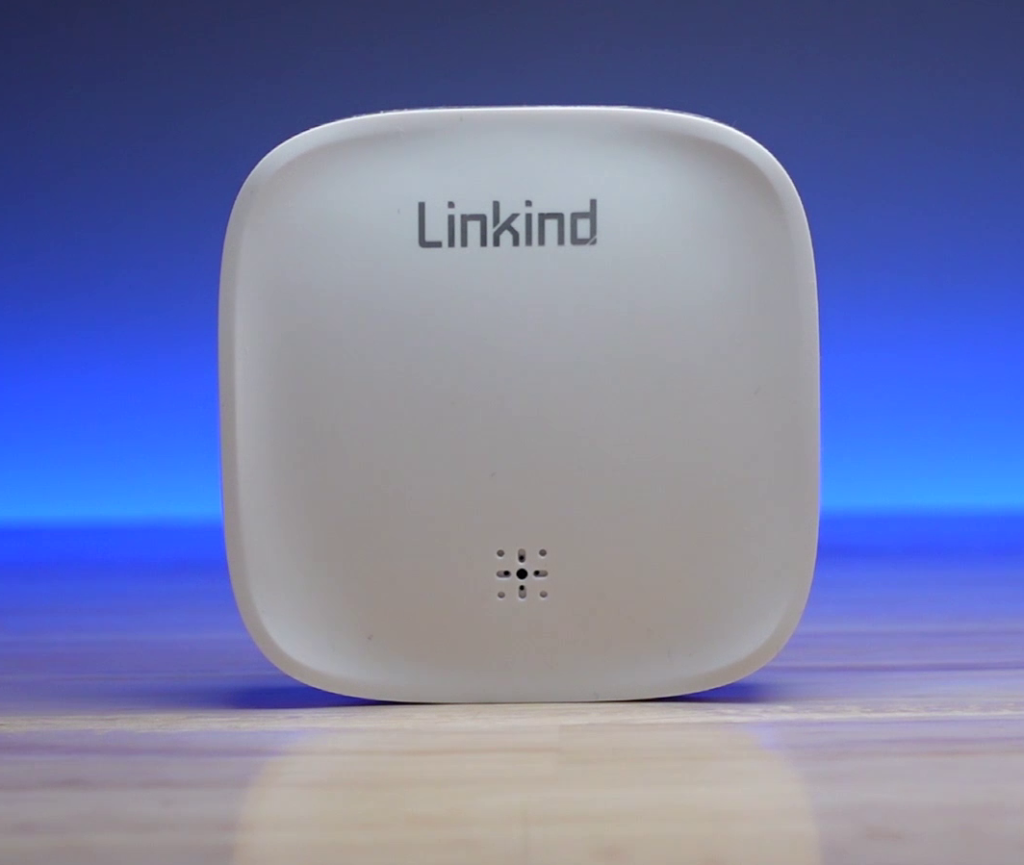
The next device we will look at is the Linkind Water Leak Sensor. Linkind makes a line of extremely cheap Zigbee devices, and this one is no exception. Once again, it’s the cheapest of all of the devices we’ll be looking at in this article. It’s much larger and heavier than the Aqara, and that’s mainly because it is powered by 3 triple A batteries. To replace these batteries, you’ll need to unscrew the four screws found on the back of the sensor. On the front you’ll notice the Linkind brand in large gray letters as usual, and while that has been a negative for some of the other Linkind devices, a leak sensor is probably not out in the open very often, so this probably doesn’t matter.

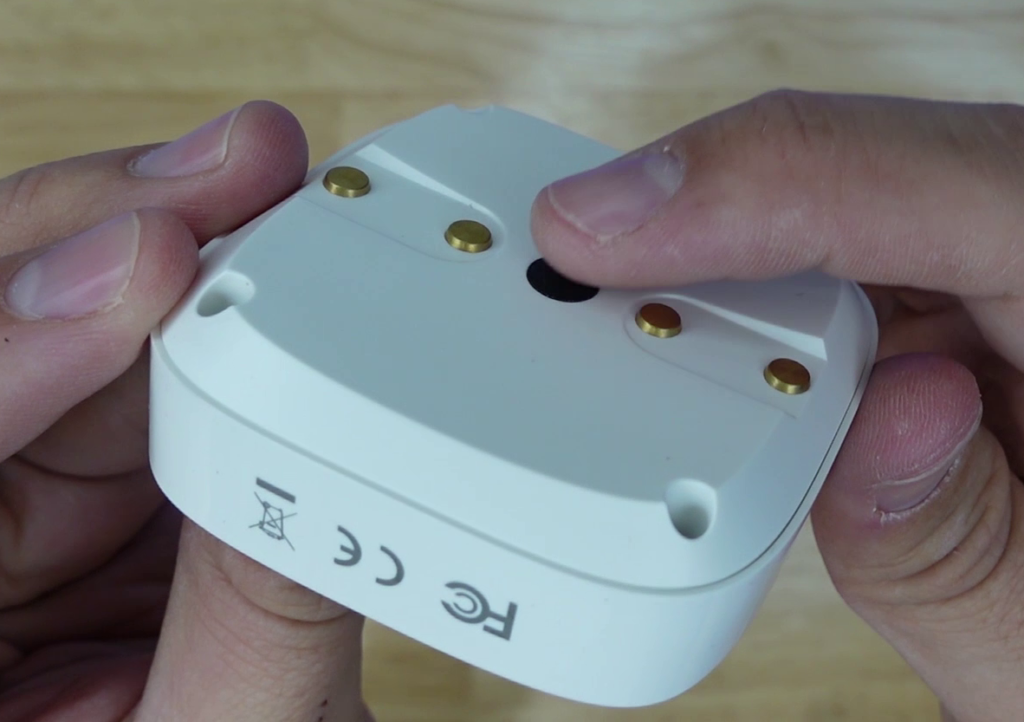
You can also see some holes on the front for the alarm speaker. This device has an 85 decibel alarm that is triggered when a leak is detected. On the back side you’ll see 4 electrodes, two on the top half, and two on the bottom. When at least one from each half come in contact with water, it causes the alarm to go off. In the middle of the back you’ll also see a rubber button. 

To pair the device with Home Assistant, triple-press the button to put it into pairing mode. If you hold the button down, the alarm will go off. In Home Assistant, you get water leak and battery level entities.

Centralite Water Sensor

The next one is the Centralite Water Sensor. This device has a similar look to the rest of the devices in Centralite’s line of Zigbee sensors, many of which have a set of holes on the face to allow ambient air to reach the temperature sensors inside them. This device has a series of indentations where the holes would typically be, but no actual holes! Despite the lack of holes, the device still does have a temperature sensor, and it does have a hole on the side which honest looks unintentional and bothers me a bit because it might allow water inside the device if the water gets a little too high. The device has a grey back, and a white cover with an icon of a water droplet falling into a pool of water. On the bottom you can see the two electrodes that are positioned very close to each other compared to the previous two sensors. This means that even a very small bit of water (just a few drops) could trigger this device if they come in contact with the metal electrodes. This one is definitely not waterproof, but does have IP20 touchproof rating.

To initiate pairing mode, pull the battery isolator tab, and it is immediately recognized by Home Assistant, giving you water, temperature, and battery entities. One thing I noticed during my testing was that, when I used a paper clip to bridge the electrodes and simulate a leak, the entity stayed “wet” until I pulled out the battery and then put it back in. Since then it has functioned normally with no issues.

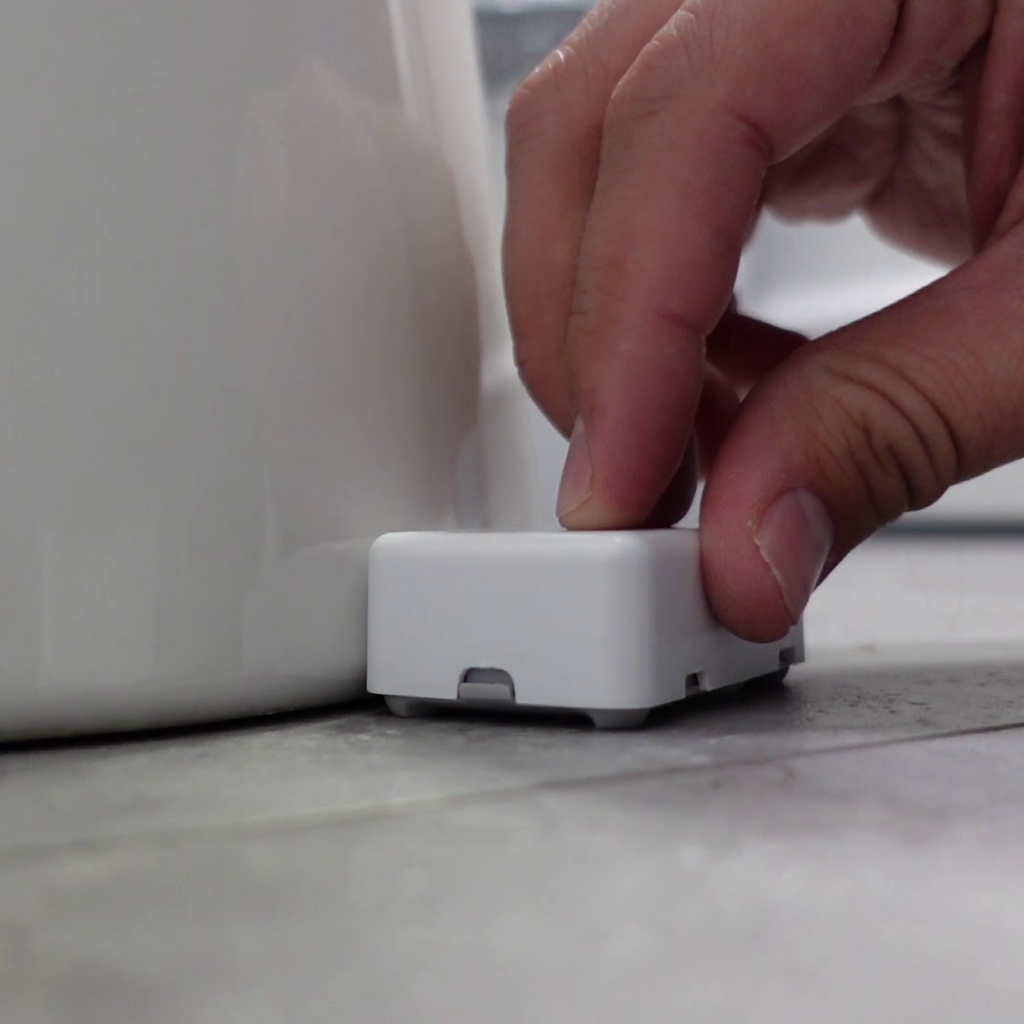
Since the electrodes are nice and close to each other, this one is good for putting up against the base of your toilet. If there is a leak, they should pick it up before it is all over the floor.

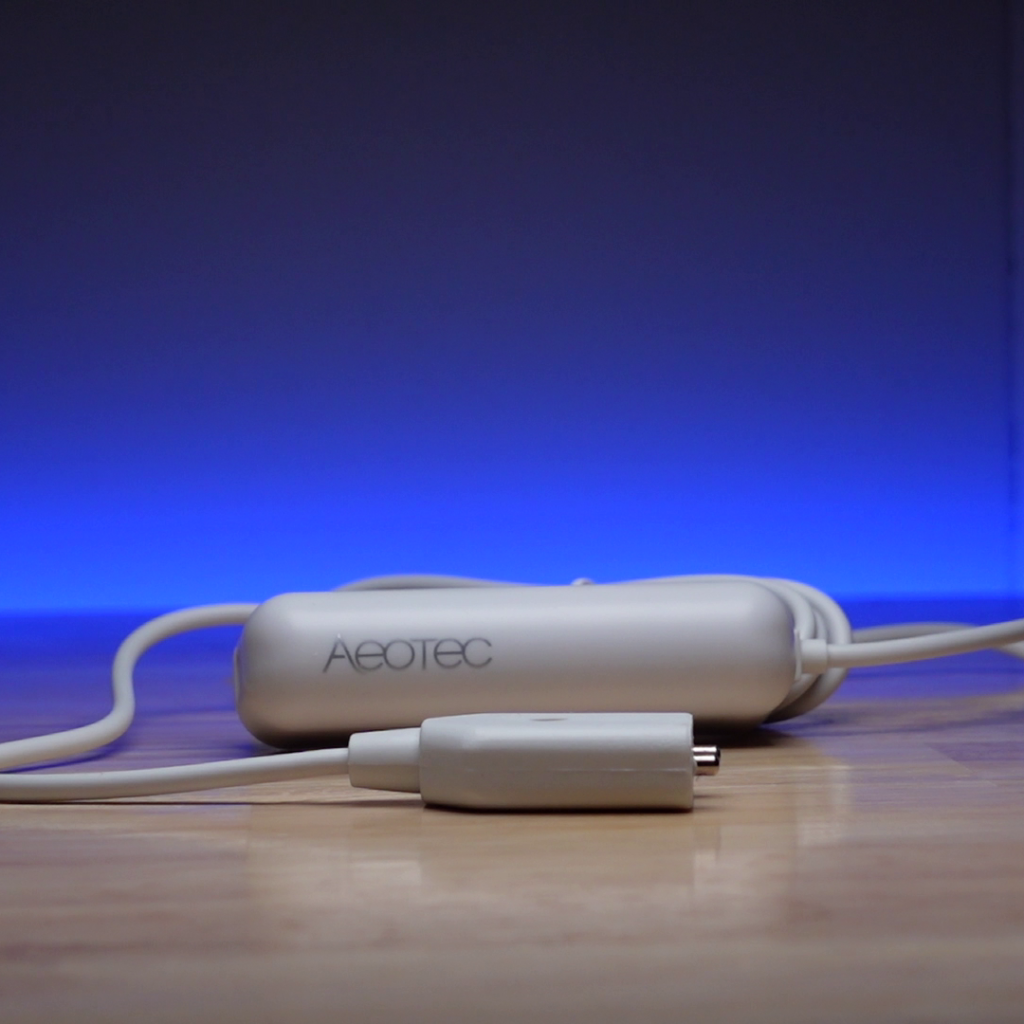
SmartThings (Aeotec) Water Leak Sensor

The next one is the Aeotec Water Leak Sensor, formerly branded as SmartThings. I’m going to refer to this one as the SmartThings sensor for the rest of this review. The sensor has two sets of electrodes, one set on the top in the indented area, and one set on the bottom. The bottom of the sensor is gray with a rubberized texture to it, with little stand-offs in each corner. These “feet” keep the electrodes from contacting the surface the device it set on. You can slide the bottom of the device to open it up, where you’ll see the CR2 battery, and also the contacts that connect the top-side electrodes to the body of the sensor.

This sensor is only one of all of the sensors we’re looking at that has a drip sensor. What I’m calling a drip sensor is this shallow indentation on the top of the device that has two electrodes in it. This is meant to be placed under a slow or potential leak in order to catch a small amount of liquid the drips on to the sensor. Even if not directly under the leak, the drips would eventually fill the small indentation and trigger the leak alarm.

To add this device to Home Assistant, put it into pairing mode by pulling the battery isolator tab. If you want to pair it in the future, triple press the button on the bottom. In Home Assistant, you get water and battery sensors, but you also get a temperature sensor!

I use this device to watch for leaks in some plumbing behind my toilet. Since it has the drip sensor, I may be able to catch the leak before it does any damage to my walls. Since it has a temperature sensor, I also can monitor the temperature in that wall since it gets pretty cold.

Third Reality Water Leak Sensor

Next we have the Third Reality Water Leak Sensor. I’d say this one is the most unique of all of the sensors because of its unique wqater droplet shape. Instead of going for a minimalist approach, they shot for a unique shape that’s all their own. The sensor has a raised plateau on top with little holes around the edge, and underneath it is a speaker is that sends out a 120dB alarm when a leak is detected. On the bottom you can see three flathead screws that act as electrodes for sensing leaks. If any two of them come in contact with water or other conductive surface, the leak alarm is triggered. You’ll notice that the screw holes for these screws are recessed quite a bit, meaning that the screw heads are raised up a bit from the flat bottom of the sensor. This means that more water would need to accumulate for this sensor to be triggered than for the other ones that we looked at. If you’d like to make this more sensitive, you could add some spacers underneath the screws to make protrude past the bottom surface of the device. Shout out to Caleb Pryor, who created a spacer that can be 3D printed and used for this device.

The device I ordered also came with a “dripping detection” kit. This is pretty much two metal pieces that can be attached to the device with the screws to extend the conductive surface of two of the electrodes so that they are closer together. The makes it so that you can place it underneath a dripping faucet, and if the drip hits just right, it will contact both pieces of metal and trigger the alarm. This isn’t a true drip sensor like the SmartThings sensor, but it does bring the electrodes closer together, meaning a smaller accumulation of water may be needed than without the dripping kit.

To put the device into pairing mode, remove the 3 flathead screws using the provided screwdriver and install the batteries. Honestly, this part was super annoying since flatheads are not fun to screw and unscrew. However, using my Wowstick made the job a lot easier. Shout out to these sweet little battery-powered drivers which make electronics jobs a lot easier.

The device also has a pairing button under the cover that can be used to pair the device in the future. In Home Assistant you get the water sensor, battery sensor, and an on/off sensor that doesn’t seem to have a function.

Sinope Sedna

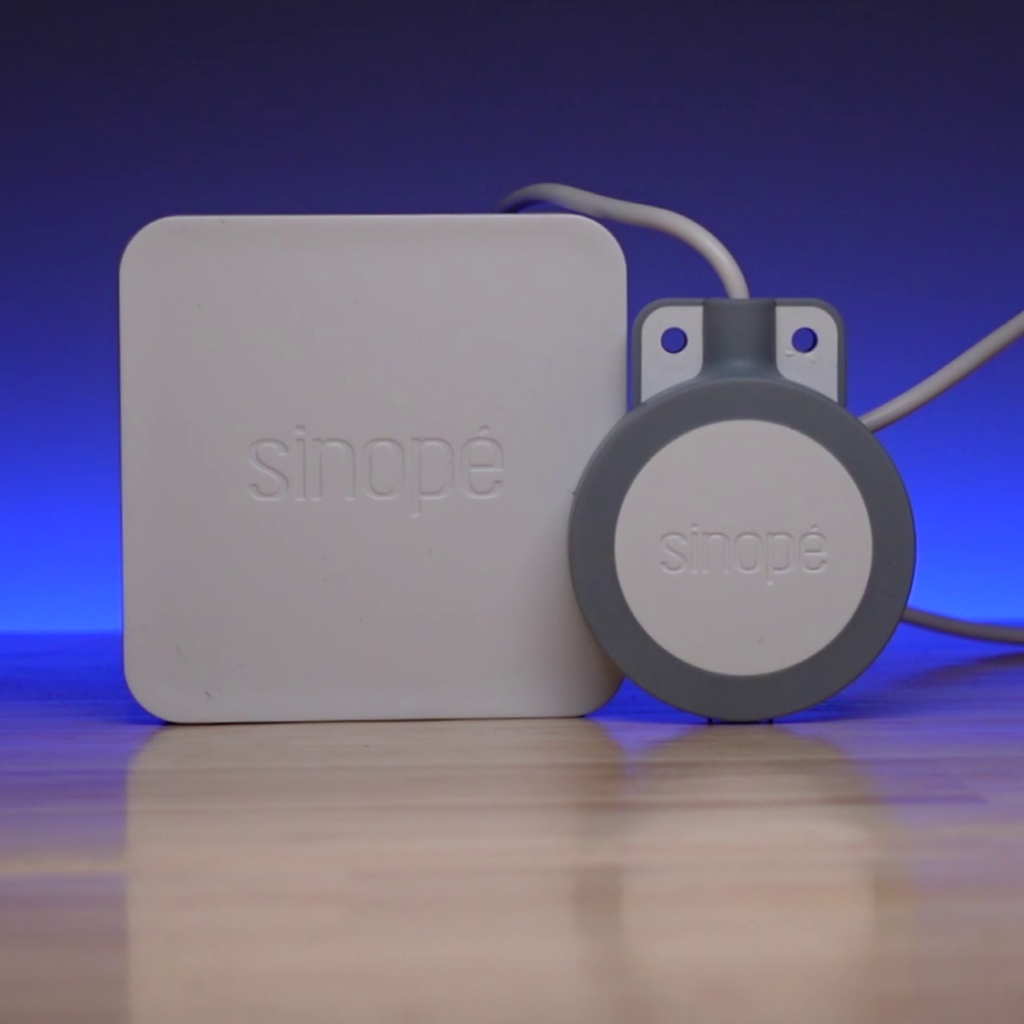
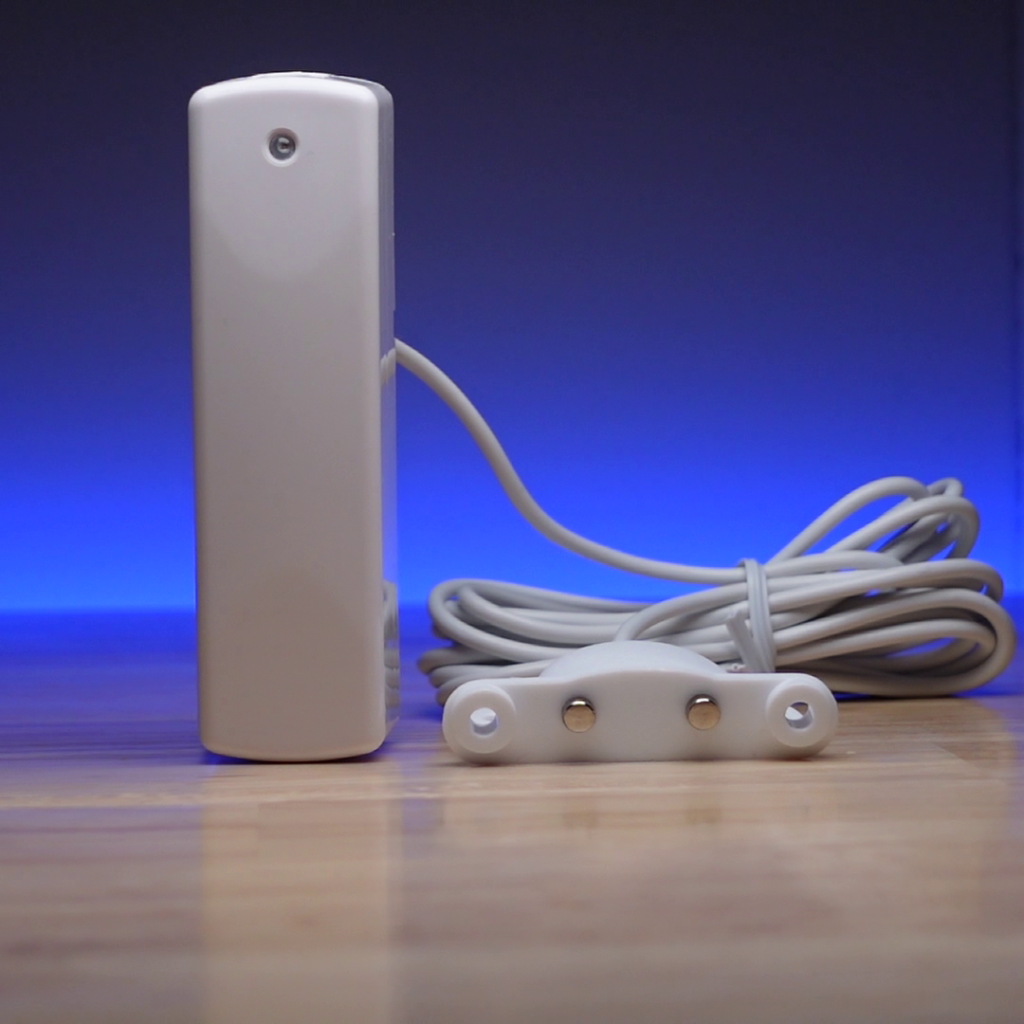
The last Zigbee sensor we have here is the Sinope Sedna Water Leak Detector with Probe. This is the first one we’ve looked at so far that has a probe rather than electrodes on the body of the sensor. The body of the sensor houses two triple A batteries which can be seen if you remove the cover, which is magnetically secured to the body. You’ll also see a pairing button and some LEDs under the cover. The back of the device has a pre-installed adhesive pad for mounting the body of the sensor, and also some slotted screw holes for a screw mount. On one side of the device there is a 3.5mm jack which is used to connect the sensor probe. The probe has a nice quality cable that is about 48” long including the probe head, and the electrodes are set up in an interesting way. Both electrodes form an L shape, so that the sensor can then be mounted either to a wall near a horizontal surface, or to the horizontal surface itself. The probe head has screw holes for securing it to whatever surface you choose, and there are little rubber feet to keep it off of the surface by just a bit.

When a leak is detected an audible alarm will sound. I’m not sure of how loud it is exactly, but it is a fair bit quieter than the ThirdReality and Linkind sensors. This device also has a temperature sensor which is located in the body of the device, not in the probe head. The temperature sensor is within a half a degree of the Xiaomi sensor that I showed in my temperature sensor review.

To add the device to Home Assistant, pull the battery tab, and then press the “Link” button under the cover. In Home Assistant you get water, temperature, and battery entities.

One thing I noticed with this device was that the probe has to sense water for about 5 seconds before sends the alarm, which is a much longer wait time than any of the other sensors, which were almost instantaneous. This really isn’t a big deal to me, but it might be for you if you want instant feedback.

This device is good for when you want to put a leak sensor in location that is hard to reach. This way, if the batteries do need to be replaced, you can do it without having to disturb the probe.

Z-Wave Water Sensors

Ok, that’s it for the Zigbee sensors, now let’s take a look at the Z-Wave devices.

Zooz Water Leak XS Sensor

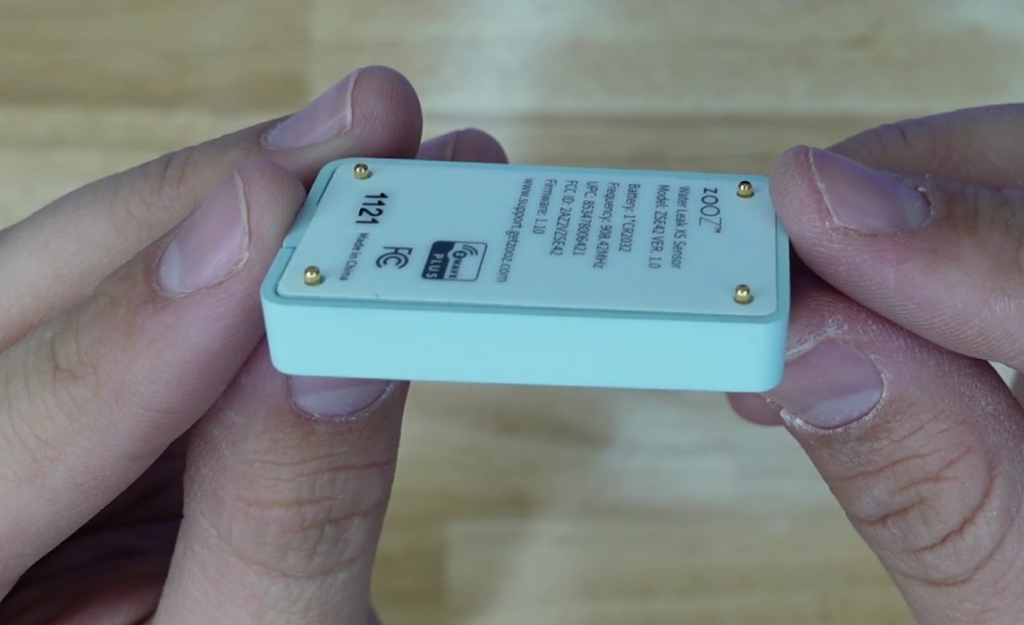
The first Z-Wave sensor is the Zooz Water Leak XS Sensor, also called the ZSE42. This one is actually the smallest of all of the devices we’re looking at today, and the first one that uses its electrodes as feet. What I mean by this is that the sensor has 4 conductive metal pads, one on each corner, and these sit directly on the horizontal surface where you set it. This means that it will be more sensitive than some of the others – it would theoretically trigger an alarm at a lower level of water than the other sensors, although the difference is probably miniscule. 

If you open cover you’ll see a PCB that looks extremely similar to the Zooz Temperature sensor and the Zooz Contact Sensor, all of which are part of their XS series. Pull the battery isolateor tab, and then triple-press the button on the PCB to put it into inclusion mode. When I first included this device in Z-Wave JS, I did it in S2 security mode, and some of the entities didn’t show up. Adding it insecurely fixed this issue, resulting in a water sensor, battery level sensor, and low battery sensor. The configuration options allow for setting the alarm clear delay.

One thing to note about the water detection with this sensor is that it doesn’t just require continuity between any two electrodes, but specifically between the top two, bottom two, or diagonally, but not between the top and bottom on the same side.

Ecolink Flood/Freeze Sensor

The next Z-Wave sensor is the Ecolink Flood Freeze Sensor. If you’ve seen my previous articles/videos, you may recognize this device because it looks very similar to Ecolink’s contact sensor. In fact, it has almost the exact same body as their contact sensor, but instead of a magnet, it has a probe-style water leak sensor with a length of about 85”! That’s the longest probe length in this article. It has an LED on the body that flashes when it senses water, and stays lit when the cover is removed. This is because it has a tamper sensor so that you can be alerted if someone is trying to bypass or disable it. It can be mounted with either the 3M adhesive or the screws provided, and a mounting plate is provided for the body of the sensor so that it can be clipped onto the plate once the plate is screw mounted. The plate is designed so that it clicks into place, and the cover has to be removed to release the plate.

Adding this device to Home Assistant is not too complicated. Put Z-Wave JS into inclusion mode, and then pull the battery isolator tab on the back of the device. As soon as you do this it instantly begins the interview process, the LED on the front turning solid green. In the future you can put it into inclusion or exclusion mode by pulling the battery and then putting it back in 

When first added, the only entities that showed up were a water sensor, battery sensor, and tamper sensor. When testing the water sensor, I found that it stayed wet after first trigger and never went back to dry. Also, no freeze sensor was available. I found 4 entities that were disabled by default. Enabling the water and freeze binary sensors, I tested them and they functioned properly, so I disabled the original one that wasn’t working. I tested the freeze sensor in my chest freezer, which worked great.

HomeSeer Leak Sensor

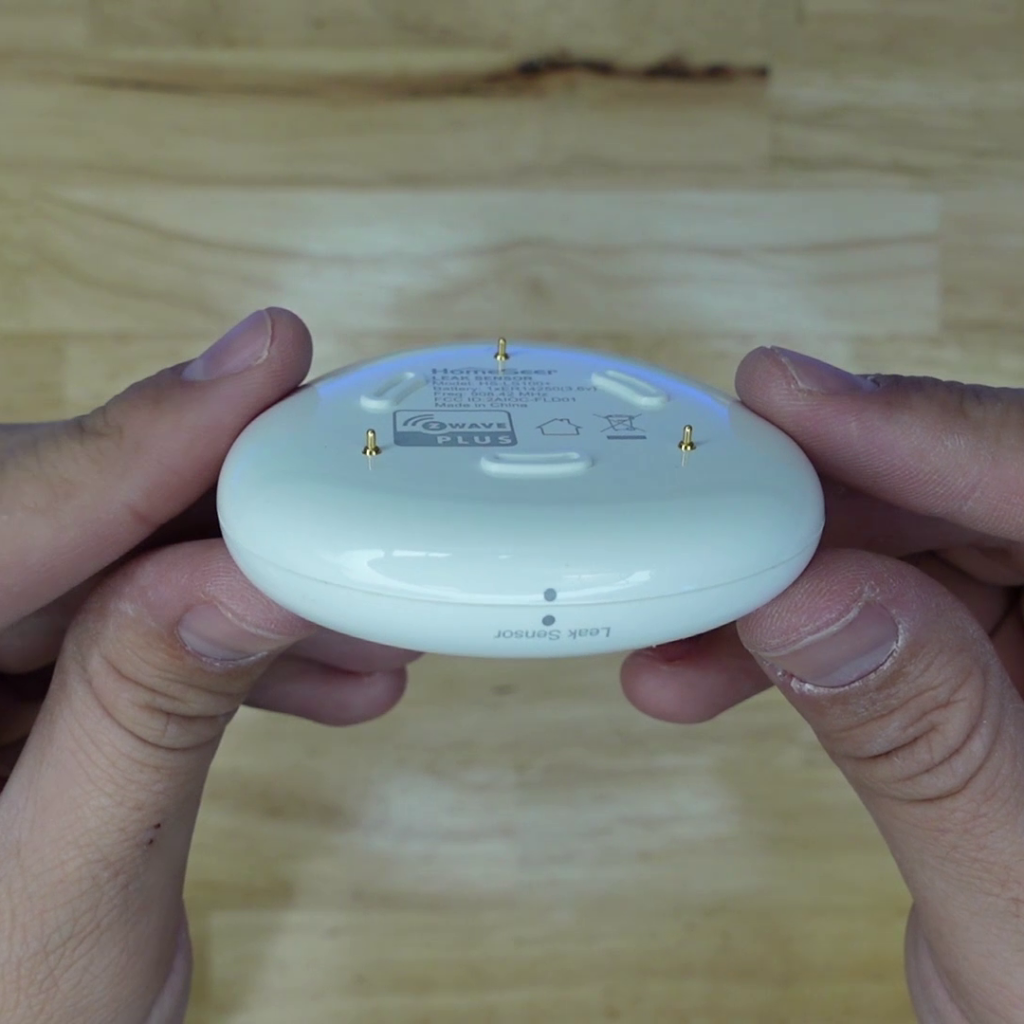
The next one is the HomeSeer Leak Sensor. This is my first HomeSeer device, because the previous ones I’ve looked at were a little expensive, but this one was under $50 so I gave it a shot. This device is different from the rest in one major way, it has electrodes on the body of the sensor that would sit directly on a horizontal surface, but it also has a probe with a 45” length that can be attached to the underside of the sensor magnetically. When aligned properly, the electrodes make contact with conductive pads on the magnet end of the probe. The magnet end of the probe has a slotted hole on it that can allow the sensor body to be mounted to the wall when you’re using it. While the underside of the sensor body has three electrodes, only two of them are actually used for sensing water. The third one is just a support, or a third foot.

The body of the sensor can be twisted to open the cover, revealing a PCB with an inclusion button and an ER14250 battery. The battery is wrapped in plastic, so you have to pull that off and re-install it, and then press the pairing button to put it into inclusion mode. In Home Assistant this thing comes packed with sensors, showing up with air temperature, freeze, heat, tamper, water, and water alarm sensors as well as battery level and low battery sensors. The water and water alarm sensors seem to do the same thing, so you could probably disable one or the other. I tested the Freeze sensor in my chest freezer and can confirm that it works, and the temperature sensor is within a degree of the Xiaomi sensor that I showed in my temperature sensor review. The configuration options have leak and temperature reporting intervals, enabling and disabling of the shock alarm, set-points for high and low temp sensors, and the low battery level threshold

Aeotec Water Sensor 7 Pro

The last device we’ll look at in this article is the Aeotec Water Sensor 7 Pro. Like the Ecolink, this sensor only has a probe option, and also just like the Ecolink, this one obviously has the same housing as the Aeotec door sensor. The probe has a cable length of 63”, and the head has a hole in it that can be used to screw it into place. If you open the cover, you’ll see an ER14250 battery. There’s a tamper switch inside as well as a temperature sensor. To pair the device, remove the battery isolator, and then triple tap the tamper sensor switch to put it into inclusion mode.

When I first added it to Home Assistant via Z-Wave JS, I added it in S2 security mode, and it only showed water and tamper sensors. However, when I removed it and added it without security, temperature and humidity sensors appeared as well. Along with air temp, humidity, tamper, and water sensors, you also get battery level, low battery, and replace battery sensors. The configuration page has LED indicator options as well as options for temp and humidity report change triggers, automatic reporting intervals, temperature units, and more.

Favorites Mentions

Anyway, thanks for sticking around to the end! Now let’s go over which ones I think are the best.

The cheapest non-probe style device is the Linkind sensor. Having 4 conductive pads makes it fairly sensitive to small volumes of water, and the two AAA batteries mean that it should last for a long time without having to worry about it. However, I’m not a fan of loud alarms, so the winner of this category is going to have to be the Aqara sensor. Not only is it priced just slightly higher than the Linkind, but it looks good so it’s ok if it’s out in the open. The screw electrodes on the bottom allow you to attach leads if you want, making this one even more versatile. If you want a non-probe-style Z-Wave device, I’d recommend the Zooz sensor. It’s very small and discreet, and the fact that the 4 electrodes sit directly on the ground make it very sensitive to moisture. However, the price is higher than the other two because it’s a Z-Wave device.

My favorite sensor for catching drips is the SmartThings sensor. The little indentation on the top is great for catching drips, and none of the other sensors have this capability. 

If you want one with a loud alarm, the Third Reality is gonna do it for you. It’s annoyingly loud, but if you need that audible alert, this one will do the trick. The fact that it has AAA batteries should mean that it has a decent battery life, but changing them will be a pain with those flat-head screws. However, many Home Assistant users have smart speakers, so the need for an on-board alarm is not strong.

My favorite probe-style sensor, and the one that I just love the look and feel of, is the Sinope Sedna Leak Sensor. The entire thing has a high-quality feel, and the magnetic cover makes changing the batteries a breeze, even though you shouldn’t have to very often. The audible alarm isn’t too loud, so it’s tolerable, and the extra temperature sensor is great. The only thing I would change is probably giving an option for longer probe cable length. However, this device is very pricey and the price has changed on Amazon since I bought it, so if that one doesn’t suit you, I’d say the runner-up is the HomeSeer sensor.

Least Favorites

Ok, so here are the ones I would NOT recommend.

The first one is the Centralite, and that’s really because it’s just kind of underwhelming. Beside the built-in temperature sensor, there isn’t much else positive to say about it, and the hole on the side very close to the bottom of the sensor has me worried that it could be damaged by water before you get the leak stopped.

Next, the Ecolink sensor. I love the fact that it has a super-long cable, but the fact that it doesn’t even have a temperature sensor, and only a freeze sensor means it doesn’t have much else to offer.

Anyway, I hope you enjoyed this article and it gives you a good idea on what leak sensor is right for your smart home.

Best Temperature Sensors for Home Assistant

What’s up Smart Homers! In this article I’m going to compare 10 different temperature and humidity sensors that work with Home Assistant.

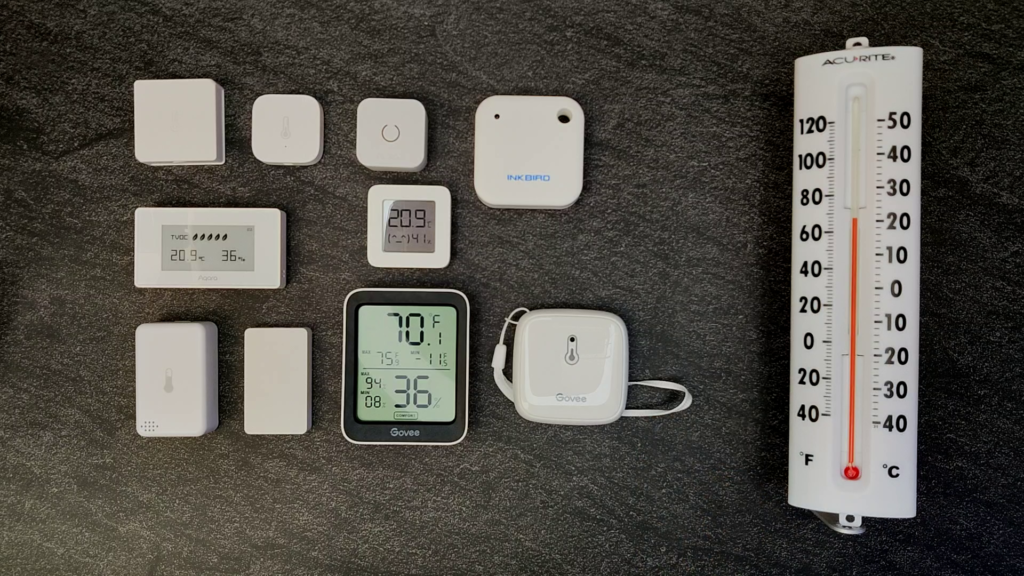
Previously I’ve looked at smart buttons, contact sensors, motion sensors, and smart plugs, and in this review I’m doing the same thing, but with temperature and humidity sensors. I bought a bunch of temperature and humidity sensors from a few different brands and I’ll compare their prices and features, and I’ll also give you some ideas for how they can be used in your smart home. At the end I’ll tell you which ones I would and would not recommend!

Requirements

The requirements for my sensor selection are that they have to work with Home Assistant, they can’t require any other hub than a Zigbee, Z-Wave, or Bluetooth radio, and they have to cost less than $50.

I’ll be adding these devices to Home Assistant using ZHA, Z-Wave JS, and the Passive Bluetooth LE Monitor custom integration.

Note that the “no hub” requirement assumes that you have Home Assistant set up and accessible via WiFi, and that you also have Zigbee, Z-Wave, and Bluetooth radios working with your Home Assistant instance.

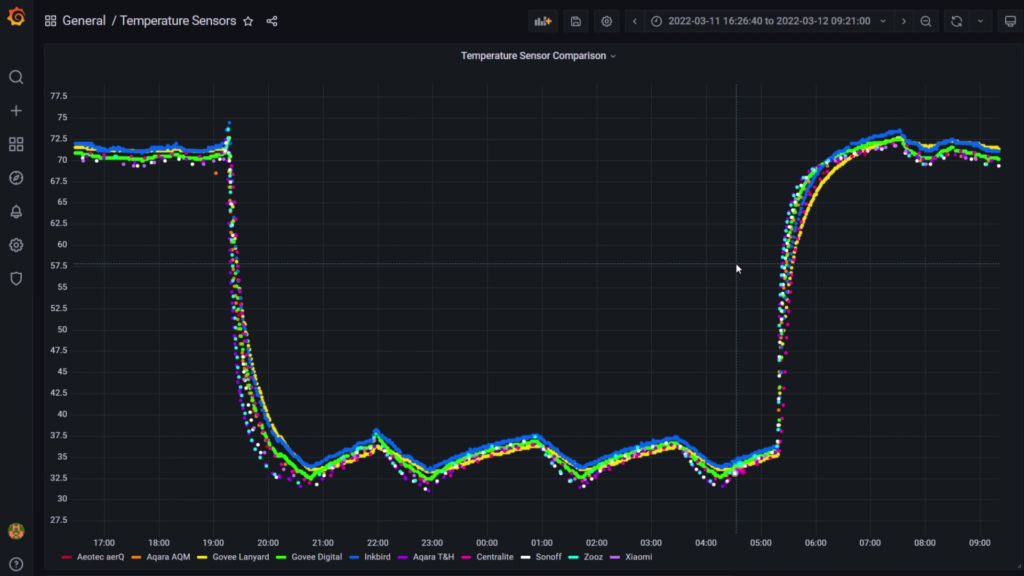
For each sensor, I subjected them to large temperature swings by placing them in my refrigerator and freezer.

Overview

Name Model Protocol Price Battery Mounting Method Temp Range Ref Rate
Sonoff Temperature Sensor SNZB-02 Zigbee $ CR2450 adhesive 14 to 104 F 30 sec, 1 deg
Aqara T&H Sensor WSDCGQ11LM Zigbee $$ CR2032 adhesive -4 to 122 F 10 sec, 1 deg
Aqara Air Quality Monitor AAQS-S01 Zigbee $$$$ CR2450 × 2 adhesive, magnetic 32 to 122 F 30 sec, 1 deg
Centralite T&H Sensor 3200-C-P Zigbee $$$ CR2 screw, adhesive 14 to 185 F 1 min, 1 deg
Aeotec aërQ ‎ZWA039-A Z-Wave $$$$ CR2477 14 to 146 F 15 min, .1 deg
Zooz XS T&H Sensor ZSE44 Z-Wave $$ CR2450 adhesive 4 to 104 F 1 min, 1 deg
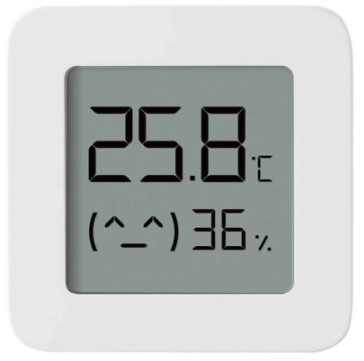
Xiaomi Mijia Smart T&H Sensor YTC4018CN Zigbee $$ CR2032 adhesive 32 to 140 F 11 min, 1 deg
Govee Lanyard Thermohygrometer H5174001 Bluetooth $ 3 x AAA Lanyard -4 to 140 F 2s
Govee Digital Thermohygrometer H5075001 Bluetooth $ 2 x AAA Stand -4 to 140 F 2s
Inkbird T&H Monitor IBS-TH2 Bluetooth $$ 2 x AAA magnetic -40 to 140 F 2s

Zigbee Devices

First, let’s look at some Zigbee devices.

Sonoff

The first one is the Sonoff Temperature and Humidity sensor. I asked on social media which devices you guys used, and this one was a popular one. You’d recognize the look anywhere – the same square, sharp look with the chamfered corners that we’ve seen with all of Sonoff’s devices. In fact, this sensor looks almost identical to the Sonoff smart button that we looked at previously – you actually couldn’t tell the difference from a distance unless you saw the thermometer icon on the front. It has a little button on the bottom for pairing, and on the top it has a few vent holes that allow the ambient air to reach the sensor. It comes with adhesive backing as the only mounting option.It’s a little tough to open, even with a screwdriver, but when you do you’ll see the battery. If you remove the battery isolator you can close it back up and then hold the pairing button down for a few seconds to put it into pairing mode.

In Home Assistant it shows up with temp and humidity sensors as well as a battery level entity. From my testing it seems to have decent reaction time to large temperature swings, like when I put it in my refrigerator. It has a refresh rate of 15 minutes and a threshold of 1 degree, meaning temperatures are recorded every 15 minutes, or every 1 degree change in temperature, whichever is sooner.

Aqara Temperature & Humidity Sensor

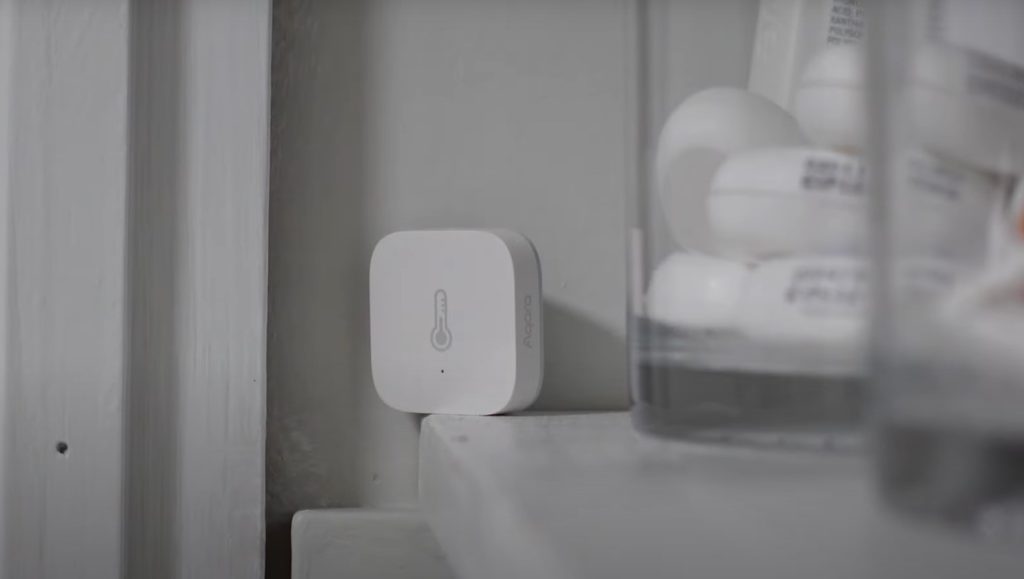
Next we have the Aqara Temperature & Humidity Sensor. This one is the smallest of all of the sensors by volume. It looks very similar in shape and size to the vibration sensor and smart button that they make. It has a clean modern look – a white body with gray accents, and has a thermometer symbol on the front that is very similar to the Sonoff. It comes with an adhesive ring that can be used to mount the sensor to a surface. Unfortunately, this makes accessing the battery a little more difficult since the cover is on the back. While it is mounted, you just need to twist the sensor counter-clockwise and it should open. The cover will stay mounted to the surface. The one thing I don’t like about this sensor is that it has holes for ambient air on the bottom of the sensor. This means that if you have it standing upright, the holes are covered. This hasn’t been a big deal for me since I have most of these mounted with adhesive, but it’s something to be aware of.

To put it into pairing mode, just pull the battery isolator tab and then hold the pairing button for a couple of seconds. In Home Assistant it shows up with temp and humidity sensors as well as a battery level entity. From my testing, this sensor has the best reaction time to large temperature swings of all the sensors in this article. I’ll show a little more about this in the testing results section of this article.

This sensor looks great aesthetically, so it’s a good choice to use in locations where it’s visible. I use one of these in my bathroom to sense the humidity and automatically turn the exhaust fan on when it reaches a certain level.

Aqara Air Quality Monitor

The next one is the Aqara air quality monitor. I guess this is more of a multisensor, so maybe I shouldn’t have included it, but I have been wanting to get my hands on it since they released it, so this was a good excuse. This device measures temperature, relative humidity, and the total volatile organic compounds in the air, or TVOC.

Probably my favorite feature about this device is the E-ink display. E-ink displays allow for high-contrast display of information without high battery drain. There are 3 different display configurations which you can cycle through by double-tapping the button on the top. In typical Aqara style, this device has a white body with a gray back which can be removed to expose the batteries. This device has two CR2450 batteries in it, so the battery life should be great. The vent holes that allow the ambient air to reach the sensors are on the sides, which I think is better than on the bottom. The device can be mounted either via adhesive, or magnetically. A magnet is provided with an adhesive

To pair the sensor, just pull the two battery isolator tabs and then hold the pairing button on the top for a few seconds. In Home Assistant, you get the temperature, humidity, and VOC level in parts-per-billion.

The high-contrast display makes this a nice sensor for using to quickly glance at the temperature. A good use for this could be a place like a baby’s room where you want to keep an eye on the temperature more than other rooms in the house. A quick glance can tell you if it’s too warm or cold, too dry, or if you need better ventilation in the room.

One problem I have with this device is that it displays the temperature in Celsius rather than freedom units, and there’s no way to switch between the two without the Aqara hub and setting up an Aqara account. To me this is an issue, and a step away from complete local control of a device toward cloud-locked features. This should probably be fine for literally everyone except people that live in the US.

The other problem I had was that this sensor dropped out multiple times, showing as unavailable in Home Assistant. Pressing the button would wake it up and it reconnected, but It shouldn’t be dropping out like that.

Centralite

Next we have the Centralite temperature and humidity sensor. This sensor is pretty hefty, much thicker than the Aqara sensor. At first I wondered why, because in a previous article I covered the Centralite contact sensor which was smaller than this, and the contact sensor had a temperature sensor inside it! Popping the cover open, you can see right away why it is so big – it has a big old CR2 battery inside. This should give the sensor very decent battery life, but it also could be a problem because CR2 batteries are not very common in smart devices, at least in my experience. IT’s too bad they couldn’t have used a CR123A instead, which is far more common.

Anyway, it has an array of ambient air holes on the front which gives it a distinctive Centralite look, and it has a grey thermometer icon on the front which apparently is a requirement for all temperature sensors. The sensor can be mounted with adhesive, but it also has a slotted hole on the back that can be used to mount it with a screw or nail.

To put the device into pairing mode, pull the battery isolator tab. In Home Assistant, you get temperature, humidity, and battery sensors.

Ok, so that’s it for the Zigbee sensors, now let’s take a look at some Z-Wave devices.

Z-Wave Devices

Now let’s take a look at some Z-Wave devices.

Aeotec aërQ

The first one is the Aeotec aërQ sensor. This sensor is quite small – maybe a little larger by volume than the Aqara. It has a round button in the center of its face, with an LED indicator behind it. It has a gap around the edges of the button which I assume allows the ambient air to reach the sensors. Inside, it has temp and humidity sensors, and it uses these sensor values to calculate the dew point. If you pop off the back cover, you see that this sensor uses a CR2477 battery, which is not very common in smart home sensors.

To pair the device, remove the battery isolator tab (which is a little hard to grab). I ended up taking the battery right out so that I could get the isolator out. Put the cover back on, and then triple press the button on the face of the device. So, here is where I ran into trouble. The device was taking an extremely long time to pair in secure S2 mode, and when it did, there were no configuration options! Conducted a bunch of testing with all of the sensors, and then later found that I had to pair it on non-secure mode, and then it seemed that it was properly included. It took me about 4 tries to finally get it paired properly, which was kind of annoying.

In Home Assistant, you get a temperature, dew point, humidity, overheat, underheat, and moisture sensors as well as battery level, low battery, and replace battery sensors. The configuration options when included properly give you a wide range of options including temp and humidity reporting thresholds, refresh rate, temperature units, and much more. It’s important to note that the dew point sensor is only  a calculated value that you could probably set up in Home Assistant with a template sensor.

Zooz XS Temperature & Humidity Sensor

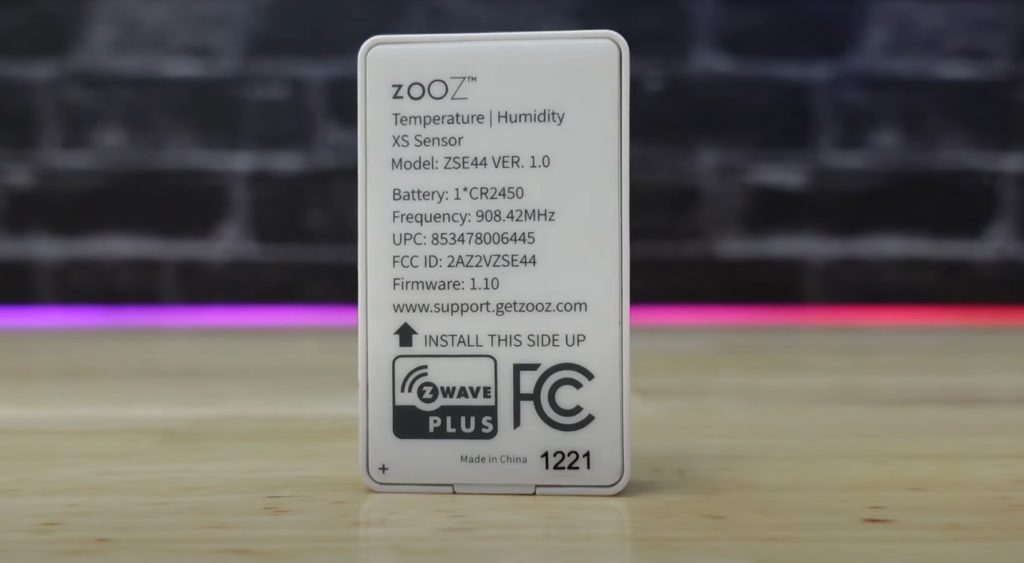
The next Z-Wave sensor is the Zooz XS Temperature and Humidity sensor. This sensor is the most non-descript of any of the sensors in this article. It has a thin, rectangular body, with no marking of any kind on the front. The back has a bunch of information about the sensor, and the bottom has some ventilation slots for temperature sensing purposes. The back also shows that the sensor needs to be installed with the vents facing down. This could present a problem if you wanted to rest the bottom on a flat surface, but it does come with an adhesive pad for mounting purposes. If you pop off the cover, you’ll see a CR2450 battery with a battery isolator, and you’ll also see a pairing button on the PCB. Remove the isolator and then triple press the pairing button to put it into inclusion mode.

In Home Assistant you get Air temperature, Humidity, Overheat, Underheat, Moisture, Battery level, and Low battery level sensors. Similar to the aerQ, the Zooz sensor has a ton of configuration options including Report Thresholds for Battery, Temperature, and Humidity; Overheat and Underheat thresholds, Temperature Scale, Temperature and Humidity Offsets, and Temperature and Humidity reporting intervals.

This sensor has a slim profile which could make it very useful up against trim or other locations where it can be tucked away but still in sight. During my testing I did find that the device stopped communicating when I put it in the freezer. I’m not sure if it was the metal freezer or the cold that caused the issue, but it is a noteworthy occurrence.

Bluetooth Sensors

Ok, next we’ll look at the Bluetooth devices. Before I began researching for this review, I had not used Bluetooth devices with Home Assistant because I use a Home Assistant Blue for my main setup, and it doesn’t have a Bluetooth radio. However, someone on YouTube (The64BitKid) mentioned Bluetooth Low Energy devices to me, and mentioned that there are a lot of cheap BLE temperature sensors out there that work well. My test setup is a Pi4 with Bluetooth built in, so I decided to test some out. I also picked up a Bluetooth adapter and USB extender for my Home Assistant Blue so I can use these BLE sensors on my main setup. To connect these devices, I used the Passive BLE Monitor HACS integration, which I understand works better than the BLE Tracker integration native to Home Assistant.

Xiaomi Temperature and Humidity Sensor

The first of the Bluetooth sensors is the Xiaomi Temp and Humidity sensor. This sensor is the cheapest of all of the sensors in this article, and has become pretty popular among the DIYers of the smart home community. The devices has a very small footprint, only a little larger than the Aqara sensor, and it comes with a digital display. The display has both temp and humidity readings on it, and although it seems pretty cheap, it is readable from a short distance away without issue. It comes with a small adhesive pad for mounting purposes, but can also stand on edge.

Connecting this sensor to Home Assistant is not as straightforward as the other BLE sensors we’ll cover because you actually have to connect this one to the Xiaomi Mi Home app first. There you can change the temperature scale if you want to. Once you do that, you have to use a special web program to obtain a device key, and then enter that key in Home Assistant in the setup. Then, you’ll have to wait about 10 or 15 minutes for the device to show up. In Home Assistant you get the temp, humidity, and battery sensors as well as RSSI and voltage entities.

From my testing, both at ambient temps and in my freezer, the Xiaomi remained within 1 degree of the Aqara at all times. The only major difference was the reporting frequency – the Xiaomi reported much less often than the Aqara, and more erratically. As I understand it, the Xiaomi can be flashed with custom firmware to change the reporting frequency, but the only time this reporting frequency would be a problem for me would be if I was trying to track large and immediate temperature swings.

Govee HS5174 Lanyard

The next one is the Govee HS5174. Govee has  staggering number of Bluetooth temperature sensors, many of which work with HA, but I’m just going to cover this one and one other. This one has a really unique look to it, being the largest sensor we’ve covered so far. It has a glossy finish on the front, and a matte finish on the rest of the body. It really has a quality feel to it, with a nice weight when you hold it in your hand. The sensor has a thermometer symbol on the front, but this symbol has an LED indicator behind it that flashes blue when the sensor is communicating. It also has a hole in it that allows the ambient air to reach the inside. If you pop the back cover off, you can see that it is powered by three AAA batteries, which is why the sensor body is so big. It also comes with a lanyard that can be installed with a bit of difficulty so that the device can be hung by it. This might come in handy if you have a greenhouse or something and you want to monitor the temperature during certain times of the year. You could hang it on a nail or hook with the lanyard, and remove it when you don’t need it anymore.

To add the device to Home Assistant, you’ll need to pull the battery isolator tab and then find it in the Passive BLE Monitor integration. In Home Assistant you get the temp, humidity, and battery sensors as well as an RSSI entity.

From my testing, the Govee Lanyard was typically between 1 and 2 degrees higher than the Aqara, but I also noticed that it took longer to adjust to abrupt and large swings in temperature. I’ll show more of that data in my testing section.

Govee Digital H5075

The next one is the Govee H5075, which is a larger device with a digital display that shows the temp and humidity as well as the min and max values. The screen isn’t the greatest, but it’s pretty big so you can get a look at temperature from some distance away. The top of the sensor has a button that you can press to change the temperature scale if you want to, and the back has a little kickstand that can be pulled out so that it can stand up on a flat surface. It also has a slotted hole for a nail or screw so it can be mounted to a wall. If you open up the battery hatch you’ll see that it takes two AAA batteries.

To add the device to Home Assistant, install the batteries and then find it in the Passive BLE Monitor integration. In Home Assistant you get the temp, humidity, and battery sensors as well as an RSSI entity.

The standout feature of this device to me is the price. You get a large display, and a decent working temperature range, and it’s the cheapest of all of the devices we’re looking at today! The device performed in line with the Aqara as well as most of the other devices at room temperature, but in my freezer test, it reported temperatures consistently about 2 degrees F lower than the other sensors.

Inkbird

The last one is the Inkbird IBS-TH2 Temp and Humidity sensor. Inkbird has a line of Bluetooth temperature sensors, at least two of which work with Home Assistant. Of all of the sensors, I really think this one is the best looking. I has a clean matte white finish with a distinctive hole in the upper right corner that goes all the way through the body of the device. You could put a lanyard through it, or hang it on a nail with this hole. It also has a magnetic back, so it can attach to a magnetic surface. In the upper left corner it has a hole that allows the air to reach the sensor inside. It has the brand name written on the front, and on the back you can see a battery hatch. Using the provided screwdriver, you can open the battery hatch, and then install two AAA batteries. 

To add the device to Home Assistant, once again you need to find it in the Passive BLE Monitor integration. In Home Assistant you get the temp, humidity, and battery sensors as well as an RSSI entity.

What makes this sensor special is its operating temperature range, which is the widest of all the sensors’ ranges in this review. This makes it an excellent choice for putting in your refrigerator or freezer to monitor the temperature. The magnetic mounting option also can be useful if you’re looking for something to attach to your refrigerator door.

Testing

One thing that I noticed when testing these are that, when active scanning is enabled for the Bluetooth devices, they have a higher refresh rate than any of the Zigbee devices.

Another thing I noticed was that generally the Inkbird reads the higher than the other sensors by a degree or two.

Refrigerator Test

The first test I did was placing all of the sensors in the refrigerator.

I noticed that the Aqara sensor had the fastest response time to the sudden swing in temperature. I’m thinking that this is because of how small it is. The more mass the device’s body has, the more heat it holds, and the longer it takes for that heat to dissipate and for the sensor to sense a reduced temperature. The Zooz was the next most responsive here, and I think it also has to do with the mass of the device. The rest of the devices took a little longer to reach steady state temperature in the fridge.

Another thing I noticed in this test was that the Aeotec and Xiaomi devices both have pretty large refresh rates, and it shows with the sudden change in temperature. The Aeotec rate can be changed in the configuration settings, but unfortunately the Xiaomi can’t – at least not without flashing new firmware.

Again, when warming back up to room temperature, the Aqara and Zooz responded the quickest.

While in the fridge, the temperature readings were all within 2 degrees of each other, the Inkbird being the highest, and the Aqara being the lowest.

Freezer Test

The next test I did was to put all of the sensors that were rated for low temperatures into the chest freezer in my garage. This includes the Aqara T&H, the two Govee devices, and the Inkbird. Once again the Aqara responded the quickest, an this time there was a bout 3 degrees difference between them. The Govee with the digital display reported the lowest temperature, while the Inkbird reported the highest.

Next, at a risk of damaging them, I tried putting all of the sensors in the freezer. Right away you can see that the Zooz and the Xiaomi had trouble communicating. The Zooz must have been having trouble because it is a metal chest freezer, but it’s interesting that the Aeotec, which is also a Z-Wave device, didn’t have this problem. At steady state in the freezer, there is a temperature cycling that occurs approx. every 25 minutes or so. I confirmed this matches up with the power usage cycles with a power monitoring plug. Because of the temp sampling thresholds and the sampling rate, the Zigbee devices weren’t really able to capture this cycling except for the Aqara T&H.

Weirdly, after the freezer test I noticed that the Inkbird temp sensor was a bit higher than it had been before relative to the others. I then realized I had laid it on its back rather than stood it on end – and when I stood it back up, the temperature came back down like it had been before. I suppose that the desk top it was laying on must have been affecting the temperature slightly.

True Temp Test

During some of these tests, I used a mineral spirit Acurite thermometer to validate the temperature measurements, and it seemed like the thermometer agreed most with the Centralite sensor. This information isn’t something I’d rely heavily on since it didn’t use any calibrated instruments of any kind.

Multisensor Comparison

Lastly, I included a few of the different sensors I’ve reviewed in the past to give you a little comparison of how they perform. In particular I chose the Zooz Q Sensor, the Philips Hue Motion Sensor, the Aqara Motion Sensor, the SmartThings Button, and the SwitchBot Meter.

Based on my comparisons, the SwitchBot Meter and SmartThings Button perform well, with measurements that fall in line with all of the other sensors.

The Aqara Motion sensor’s temperature swings all over the place, and doesn’t really give an accurate representation of the air temperature at that time. In its defense, the temperature sensor is really called the “device temperature” and is listed in the diagnostics section of the device page in HA, as there is no way for the ambient air to reach the sensor on this one like we have seen with the temperature sensors.

The Zooz Q Sensor was likewise pretty inaccurate, typically about 3 degrees below the average of the other sensors, and even though it is a Z-Wave device, none of the configuration options allow for a temperature offset.

The Philips Hue Motion Sensor was by far the most inaccurate, reading 5 degrees below the actual room temperature. It’s a good thing I found out about this because I had it set up in my kid’s room to monitor the temperature, but now I think I’ll just use a solo temperature sensor.

Favorites & Honorable Mentions

Anyway, that’s all the testing I did. Thanks for sticking around to the end! Now let’s go over which ones I think are the best.

Favorites:

I really like the Bluetooth Low Energy devices because of their high sample rate, and also because of their cost. My favorite of all of the BLE sensors we looked at would have to be the Inkbird sensor because of how good it looks, and also because it has that magnetic mounting option. Although I did find the weird temperature reading when it was lying on the desk, I still feel like this sensor was pretty consistent otherwise.

The best Zigbee sensor, and the one that was the most responsive to large temperature swings would be the Aqara Temperature and Humidity sensor. I have a bunch of these throughout my house and they have not disappointed.

If you’re looking for a Z-Wave sensor, it’s a close call, but I’d have to choose the Zooz sensor. Even though the Zooz sensor failed to communicate from inside the freezer, it has a few advantages including the ability to set a temperature offset and also to set the reporting frequency lower than the Aeotec is able to. I also just think the Zooz looks better.

If you’re looking for a sensor to put in your freezer, I’d recommend the Govee Lanyard or the Inkbird, since both are rated for freezer temperatures and both have 2xAAA batteries so they should last for quite a while.

Lastly, if you’re looking for a sensor with a screen, the Xiaomi’s looks pretty good, but fair warning, it’s a bit of a pain to set up. This is actually the reason it is going on my list of least favorites as well.

Least Favorites:

Here are the ones I would NOT recommend.

The first is the Xiaomi Bluetooth sensor. As much as I loved the device, the setup process was pretty painful. Yes, the price was low, but I’m not sure it justifies the other issues it has. Not only is the sample rate fairly low, but if you want to change the temperature units on the display, you have to do it in the Mi app. If you remove the battery, it goes back to the default, degrees C. That’s a deal-breaker for me, because that means having to pair it with the Mi app, change the units, and then re-pair it with HA every time you change the battery.

The next one that I would not recommend is the Aqara Air Quality Monitor. Despite its amazing E-Ink screen, in the month that I used it, it disconnected 3 or 4 times and I had to re-pair it with ZHA. That’s far too unstable in my opinion, and the price doesn’t justify it if you’re just looking for a temperature sensor.

Thanks for Reading!

Anyway, I hope this article helps you choose the temperature sensor that’s right for your situation. There were so many other Bluetooth options that I really couldn’t cover them all, but hopefully you can at least get an idea of they might perform.

Best Motion Sensors for Home Assistant

What’s up Smart Homers! There are a TON of different motion sensors out there, but things like overall value, sensing distance, trigger time, and others make a big difference in which one you choose. In previous articles I did comparisons of different smart buttons and contact sensors that are compatible with Home Assistant, and in this article I’m doing the same with motion sensors. I bought a bunch from a few different brands and I’m going to compare their prices and features, and I’ll also give you some ideas for how you can use them.

At the end I’ll give my recommendations.

Requirements

I had a few basic requirements when choosing these sensors:

  1. They had to work with Home Assistant
  2. They had to be available on Amazon or the Smartest House
  3. They couldn’t require any other hub than a Zigbee or Z-Wave dongle (no other manufacturer’s hub)
  4. They need to cost less than $50 (US). (Note: This price limit removed the Aeotec Multisensor from the list.)

There may be some motion sensors that you like that are not in this article, and if so, drop a comment in the comment section or hit me up on Twitter, maybe I can cover it in a future article!

Note about WiFi Devices…

I purposely did not choose any WiFi devices, simply because most of the WiFi ones I saw were Tuya powered which I want to stay away from if I can, and also a lot of them are big and clunky because of the large batteries required to keep connected to WiFi. The one WiFi device that someone mentioned I should check out was the Shelly motion sensor, but it was a little expensive for me to add it to the huge list I already have. For these reasons, we’ll only be looking at Zigbee and Z-Wave devices, and I’ll be adding them to Home Assistant using ZHA and Z-Wave JS.

Also note that all of these sensors are reported to work with Smart Things.

Overview

Here are some of the technical specs of the different sensors I tried. Because prices vary, I rated them from 1 to 4 dollar signs (“$”), where “$” is 0 to $20, “$$” is $20 to $30, etc. all the way up to $50.

NameProtocol .BatteryPrice . Field/Dist. .CooldownInstallation
Aqara Motion SensorZigbeeCR2450$170° / 22 ft1:10adhesive
Linkind PIR Motion SensorZigbeeCR2450$110° / 16 ft??adhesive, screw
SONOFF ZigBee Motion SensorZigbeeCR2450$110° / 19.7 ft1:07adhesive
THIRDREALITY Zigbee Motion SensorZigbee2xAAA$$120° / 30 ft0:36adhesive, screw
AduroSmart ERIA Smart Motion SensorZigbee2xAAA$$$120° / 26 ft0:40screw
Centralite Micro Motion SensorZigbee‎CR2450$$? / 15 ft0:37adhesive
AGSHOME ZIGBEE Motion SensorZigbee3xAAA$170° / 16.4 ft1:03adhesive, screw
Philips Hue Indoor Motion SensorZigbee2xAAA$$$$100° / 16.40:13screw, magnet
ZOOZ Z-Wave Plus 4-in-1 SensorZ-WaveCR123A$$$125° / 40 ft0:13 +adhesive, screw
Ecolink Z-Wave + PIR Motion DetectorZ-WaveCR123A$$$100° / 45 ft3:17adhesive, screw
ZOOZ Z-Wave + Q SensorZ-Wave2xCR123A, USB$$$100° / 20 ft0:37 +adhesive, screw
ZOOZ Z-Wave + Motion SensorZ-WaveCR123A, USB$$120° / 25 ft0:33 +adhesive, screw
FIBARO Motion SensorZ-WaveCR123A$$$$100° / 23 ft0:33 +adhesive, screw
Some links are affiliate links

Zigbee Motion Sensors

Let’s start by looking at Zigbee motion sensors.

Aqara Motion Sensor

The first one I want to look at is the Aqara Motion Sensor. This is one of the most popular motion sensors for Smart Homers, and especially Home Assistant users. It’s compact size and low price point makes it an easy buy for beginners and veteran smart homers alike. In fact, this sensor is the 2nd cheapest of all the sensors in this article, and I think one of the best looking. It has a cylindrical body, with a rubber ring on the underside, which gives it a little grip if you want to set it on a horizontal surface without an adhesive. As with all Aqara devices, it has a grey and white look that looks very sleek and modern, without drawing too much attention.

It comes with an adhesive pad for the body of the sensor, as well as a mount that can be attached to the sensor and the wall with adhesive pads. The mount allows you to set the proper angle, and is sturdy enough to support the lightweight body. No matter which way it’s mounted, a twist of the sensor body will open it up, exposing the battery if it needs to be replaced.

As usual, the Aqara hub is not required for this device to be paired with Home Assistant using ZHA. Pressing the small reset button located on one side of the sensor repeatedly allowed me to pair it with no trouble. In Home Assistant it shows up with 4 sensors: a motion sensor, occupancy sensor, illuminance sensor, and battery level sensor.

I currently have 3 of these motion sensors in my house, one in the garage for turning on the lights and keeping them on while I’m working in there, one in the basement play area on a bookshelf, and one in the living room. In the living room I installed it on the underside of the bookshelf’s top shelf where it’s out of sight, but still picks up motion in the room.

Linkind PIR Motion Sensor

This next one has the lowest price of all of the sensors in today’s article– that’s the Linkind Door Window sensor. Linkind has a line of Zigbee smart home products that are often extremely cheap on Amazon, and this sensor is no different. In the contact sensor comparison article, I reviewed a Linkind device which worked very well. I was pleasantly surprised by the performance for the price. This sensor was a bit difficult for me, and when I released my video, I had given up hope of it ever working. However, some helpful commenters pointed me in the right direction of figuring out what was wrong.

This sensor has a lot going for it; not only is it cheap, but it looks nice (besides the large branding on the side), and while the Aqara sensor only comes with adhesive as a mounting option, this one comes with a plastic bracket that the sensor body clips onto. The bracket has screw holes, and can also be mounted with adhesive. I did find that the bracket was a big flimsy because there are two little arms that go inside of the sensor body, and they can break easily.

Pairing with ZHA was pretty straightforward – there is a pairing button under the battery cover, but when you first remove the battery isolator tab, it’s automatically put into pairing mode and fairly quickly connects. In Home Assistant the device shows up with two entities, a motion sensor and a power sensor the reports the battery life.

When it first connected it seemed to be picking up motion, but not long after it got stuck in the motion “Detected”, and never went away. I tried deleting the device and reconnecting it, and I also tried pulling the battery, but nothing worked. I actually returned and got a spare… still nothing. This happened before I could do any further testing with. It wasn’t until after I had finished my testing and the video that I found out that it is angled downward, and so doesn’t like to be set on a flat surface. Once I put it on the edge of my doorframe, it cooled down and then began working great! My bad.

Sonoff ZigBee Motion Sensor

The next one I want to look at is the Sonoff ZigBee Motion Sensor. This device has recognizable Sonoff look, very square with sharp corners.

This one is actually one of the smallest of all of the sensors we’re looking at today (about the same size as the Aqara), which is nice if you’re trying to keep it discreet. It comes with adhesive backing, but you’re still able to pop the sensor open to change the battery while it’s stuck to a surface. It has a cooldown time of just over a minute, meaning you’ll need to wait a minute after it detects motion before it can trigger again

Pairing this device in ZHA was pretty straightforward. All you have to do is press and hold the reset button with a sim card tool for 5 seconds until the LED indicator flashes three times. The sensor is then recognized immediately. I do wish a sim card tool was provided with the sensor, but I have a ton of them. The device shows up with two entities, a binary sensor for motion detection, and a power sensor the reports the battery life.

Long term use showed that this sensor was not always reliable – many times it seemed to miss detecting some motion, and in general was a little finicky.

ThirdReality Zigbee Contact Sensor

This next sensor is pretty unique because of its shape. It’s long and thin, which really makes it stand out from the others; and like the ThirdReality contact sensor, this sensor is powered by 2 triple a batteries. It can be mounted with adhesive or screws – to mount with screws, the cover of the sensor’s body has to be opened, and then the provided screws can be run through the screw holes and into whatever you’re mounting it to. The shape of the sensor makes it a nice fit up against trim or other raised edges. It gives it the ability to hide, while still housing those big ol’ batteries. The sensor should be mounted in a vertical direction about 7 feet from the floor, with the lens at the top. When mounted this way, it will not pick up motion approx. 2 feet above the floor and below. This allows it to ignore pet motion and only be triggered by humans.

This sensor can easily be added to Home Assistant by installing the batteries, since doing this for the first time puts the sensor into pairing mode, and a blue LED begins flashing. There is also a pairing button under the cover on the PCB that you can press to put it into pairing mode in the future. Once it’s added, you’ll see motion sensor and battery percentage sensor entities in HA.

AduroSmart ERIA Smart Motion Sensor

My first thought when I opened up the AduroSmart ERIA motion sensor was, “woah, that’s big”, because although it’s shaped like the Aqara sensor, it is MUCH bigger. AduroSmart products definitely have their own unique style. Like their contact sensor, the motion sensor also has a square indicator on the front with a green LED behind it. There are a couple features that make it really unique. Like the previous device, this one also takes two triple a batteries, which you can put in via the hatch on the bottom. It comes with a mount that can be attached to a vertical surface with screws, and the mount has a ball joint for positioning it correctly. The green indicator blinks when the sensor is triggered, but as far as I know there’s no way to turn it off.

Once the batteries are in, the device is automatically put into pairing mode, and adding the device to Home Assistant is instantaneous. There’s a pinhole on the side of the sensor that gives access to the pairing button if you need it in the future. This sensor only has two entities in Home Assistant, a motion sensor and a battery level sensor. It’s kind of surprising to me that this sensor doesn’t have more features for its size, and for the $10 step-up in price from the previous two sensors. For how big this can is, you’d think they’d at least be able to throw in a temperature sensor or something!

Centralite Micro Door Sensor

Next up is the Centralite Micro Motion Sensor. It is our first motion sensor that also has a temperature sensor in it! The device has holes on the front that allow ambient air to reach a temperature sensor inside, and also allow you to see the LED indicator behind them. It has a reset button on one edge, and on the bottom edge it has a battery hatch release button that pops the battery tray out the side when you press it. This makes it easy to change out the battery while it’s mounted to the wall.

This sensor can only be mounted with the supplied adhesive strips, but it has an interesting option. The back side of the sensor has two edges that are chamfered at 45 degrees. The adhesive strips fit on these chamfers so that the sensor can be mounted in a corner where two walls meet.

To add the device to Home Assistant, you pull the battery isolator out by the tab and it goes directly into pairing mode. You’ll see the flashing LED through the holes on the front, and it gets picked up by ZHA straight away. Pairing in the future requires opening the battery tray, holding down the reset button, and then closing the tray. Four entities show up in Home Assistant; a motion sensor, occupancy sensor, temperature sensor, and a battery level sensor.

AGSHOME Motion Sensor

The AGSHOME sensor is a generic one, a brand you’ve probably never heard of before. It’s comes in such a nondescript box that I had to write the name on it so I could easily identify it. But its blandness goes beyond just the box – this Zigbee sensor has nothing really special about it except that it’s too big and it isn’t that great looking. Comparing it with the Sonoff you can see just how big it is with a bubble that’s just about the same size. Fun fact, almost NO ONE wants the name of the sensor printed on the front, especially AGSHOME.

It comes with a plate that can be mounted to the wall, and then the sensor can be clipped onto that. On the back of the sensor there’s an on/off switch, a reset button, and the battery hatch. This sensor takes 3 triple A batteries. That’s a lot of battery!

To pair the sensor, just press and hold the reset button using the provided sim card tool and it gets picked up pretty quickly. You’ll see a red light under the lens flashing, telling you that it’s in pairing mode. It’ll stop flashing once it’s paired. In Home Assistant you’ll see two entities, a motion sensor and a battery level sensor. If you look over at the Device info for this sensor, you’ll see that the manufacturer is TUYATEC… very interesting. It seems this is a Tuya Zigbee device.

In my opinion this sensor is just too big and noticeable to be used in the house, but it has been a very reliable sensor so far.

Philips Hue Indoor Motion Sensor

The next one is the Philips Hue Indoor Motion Sensor, the most expensive device we’ll be review, and the last of the Zigbee sensors in this video. It’s actually the first Philips Hue device I’ve ever purchased, and I have to say, it has a nice quality feel.

The front of the sensor has the lens and a small circular transparent window, which I assume allows the light in for the lux sensor. This device also has a temperature sensor built in!

It has a magnetic mounting method is kind of cool – it has a small, rubberized, magnetic cylinder that has a hole in it. A screw can be used to secure the cylinder to a surface, and then the sensor attaches to the cylinder magnetically. The back of the sensor has a sort of semispherical shape so you can angle the sensor a bit. You could also mount it to your fridge without any screws at all. Removing a single screw on the back allows you to take off the back cover, exposing the battery compartment. Inside you’ll see that it’s powered by 2 triple A batteries. From what I’ve read, these last for 2+ years, which is pretty awesome!

To add it in Home Assistant for the first time, just pull out the battery isolator tab. In the future you can pair it by pressing the setup button on the back using a sim card tool. I’m very impressed by the number of sensors that this device has! In Home Assistant there are five entities that show up – a motion sensor, occupancy sensor, illuminance sensor, temperature sensor, and a battery level sensor. Once strange thing I found with this sensor is that the motion sensor entity remains “clear” and never seems to change when motion is detected. However, the Occupancy sensor changes to detected as soon as it senses movement. I’m not sure why this is the case, and it might be different if it was connected to the hue hub first and then integrated with Home Assistant, but this is how it seems to work in ZHA.

This device has one of the shortest sensing distances, at around 16ft, and also one of the shortest cooldown times, which I measured at 13 seconds.

Z-Wave Motion Sensors

Now let’s look at a few Z-Wave sensors. One of the advantages with using Z-Wave sensors is that, a lot of times they have more configuration options than the Zigbee sensors. With certain devices you can change motion sensitivity, cooldown time, LED settings, and much more.

Zooz 4-in-1 Sensor (ZSE40)

The first one is the Zooz 4-in-1 sensor. As the name implies it has 4 sensors: a motion sensor, illuminance sensor, temperature sensor, and humidity sensor. Fun fact, this device was the first Z-Wave device I ever purchased, back when I was using SmartThings.

The device has a typical square look, with the lens and an LED on the front. It really isn’t too big for all of the sensors it’s packing. It comes with an adjustable mount that can be mounted to a horizontal surface or a corner, and the device can easily be detached from it if the battery needs to be changed. The case can be opened if needed, revealing the battery and internal PCB. When you open the case, you’ll see a little tamper switch on the board that is depressed when the cover is in place.

To pair this device for the first time, just remove the battery isolator and it will go into inclusion mode. I’m not showing that here, because this is the one I originally bought, but that’s how you do it. If you want to pair it in the future, there is a pairing button on the bottom accessible via a sim card tool.

Once added to Z-Wave JS, you’ll see a motion sensor, Temperature sensor, humidity sensor, and illuminance sensor. You’ll also see a battery level sensor, low battery sensor, and a tamper sensor. Removing the cover will change the tamper sensor to an “on” status.

As I mentioned before, Z-wave sensors often have some pretty cool configuration options. With this sensor, you can change temperature units, reporting thresholds for temp, humidity, and brightness, the trigger interval (cooldown time), sensitivity of the motion sensor, and when the LED behind the lens flashes. If you change any of these settings, you need to wake the device up after the change for it to take effect. Pressing the Z-Wave inclusion button with a sim card too once will wake the device up.

The battery lasted about 1 year on this device with a cooldown time of 15 seconds, and the flashing LED off. Keep in mind that this was in my kitchen, the room with the most activity in a typical day than any other room. In addition to motion, it was also reporting humidity, temp, and lux! – I’d say that’s pretty impressive.

Ecolink Z-Wave Plus PIR Motion Detector

The next Z-Wave sensor is the Ecolink PIR motion detector. So, I thought the AduroSmart sensor was big until I opened this bad boy. This thing feels like a grenade in your hand! We’ve seen some pretty unique features in Ecolink products in the past, but the question is, do the features of this sensor make up for its massive size?

This device comes with a bracket that clips onto the back of it, and it can only be removed by opening the body of the sensor. When you open it up, you’ll see that there’s a little swtich on the PCB – that’s a tamper switch that lets you know if the cover has been opened. The bracket has screw holes so that it can be mounted to a horizontal surface or in a corner.

There’s also a little jumper that can be moved to change the sensitivity of the sensor to account for small and medium sized pets. I never messed with this because I don’t have any pets. The jumper can also be configured to change the cooldown time. This sensor has the longest advertised range of all of the sensors, but unfortunately it has the longest cooldown time. I found that this sensor has a cooldown time of 3 minutes and 17 seconds. The jumper can be completely removed to change the cooldown time to 4 minutes, and it can be moved to the “TEST” position to bring the time down to 5 seconds.

To add this device to Home Assistant you just remove the battery isolator tab. In the future you need to remove and reinstall the battery to put it in inclusion or exclusion mode.

In Z-Wave JS, the device shows up with 5 entities, Motion, Battery level, Low battery level, Replace battery, and a Tamper sensor.

Overall, this device is REALLY big, and is going to be very noticeable, pretty much no matter where you mount it.

Zooz Z-Wave Plus Q Motion Sensor

The Zooz Q Sensor is another Z-wave device that has a unique look. This one is has a puck-shaped body, with a ball mount. The mount allows the sensor to be mounted to a flat surface and then angled to satisfaction. It’s quite a bit larger than the Sonoff, but it’s still smaller than the AGSHOME, and in my opinion has a clean look to it. One of the really cool features about this device is that it has the ability to be powered by micro USB, not just battery. If you look at the back you can see the USB port, and also the slot where the mount clips into place. The mount can be secured to the mounting surface with the provided adhesive or screws. This device also has a temperature sensor, humidity sensor, illuminance sensor, and a tamper sensor in addition to the motion sensor!

Before pairing this device, you need to decide whether you want it to be battery powered or USB powered. If you choose to power it via battery, then you can always power it with USB later, but if you choose to power it via USB, your hub will recognize it as a Z-Wave repeater. This means that if you decide to power it via battery later, the battery will drain extremely quickly. I think this is SO cool that they give the option for the device to act as a repeater – I wish more ZigBee devices would do that! Anyway, to pair it you twist the back cover counter-clockwise to open it, and then pull the battery isolator tab. It should automatically go into inclusion mode and the LED on the front will start blinking. In my case, I accidentally pulled the batteries out when pulling the tab, so putting them back in starts the inclusion. If you are using USB power, powering via USB starts the inclusion mode. In the future, you can quickly triple-press the button under the cover to initiate inclusion mode.

In Home Assistant this device shows up with temperature, humidity, illuminance, motion, battery level, low battery level, and tamper sensors.

When I first added the sensor, it was not registering motion, but Zooz has some setup docs that mention that you need to go into the device configuration and change parameter 16, so that instead of binary motion reports, it will send notification reports to Home Assistant. I’ll show that in a second.

I also found that the temperature of the sensor suddenly jumped up about 80 degrees to around 157 degrees F. Then I had a big brain moment, and realized that it was possible that the sensor was reading in Fahrenheit, but Home Assistant was taking it as Celsius and converting it to Fahrenheit. Sure enough, the room the current temp based on the other sensors was about 69 degrees F, and 69 degrees C is approximately 155 degrees F. I went into the device configuration page and change the units from F to C, and that seemed to correct the issue! I have no explanation for why it jumped up, unless I changed that setting without knowing it. Anyway, speaking of configuration, this device has a lot of configuration options. You can change the sensitivity of the sensor, cooldown time (The cooldown time has a minimum of 10 seconds and a maximum of 3600 seconds, but it is set at 30 seconds default), LED options, when it should alert you of low battery, minimum reporting frequency for all sensors, and how much the sensor values need to change to send reports. As I mentioned a few seconds ago, parameter 16, needs to be disabled so that the motion detection will be functional. There’s a little bit of setup to this one, but I think it’s a pretty great sensor, especially when you compare it to some of the other sensors.

Zooz Motion and Vibration Sensor

Ok, so the third one from Zooz is the Zooz Motion and Vibration sensor. This one is a medium sized sensor that has a unique spherical shape. Beside the lens, a single hole on the face allows you to see an LED indicator beneath. The sensor body can magnetically attach to the provided mount, allowing you to easily angle the sensor once the mount is attached to a surface. The mount can be attached to a flat surface using a single screw, adhesive, or you can put it on something that is magnetic like your refrigerator. Like the Q Sensor, this one can also be powered with a battery or a micro USB cable, and when powered via USB, it can act as a Z-Wave repeater.

If you twist the body of the sensor, you expose the battery and Z-Wave pairing button. You can also see on the inside of the back cover that there is some sort of magnetic material that makes the sensor body magnetic.

To put the sensor into inclusion mode for the first time, pull the battery isolator tab, and you should see the LED on the front light up solid blue.

So, this is where I ran into problems with this sensor. In Home Assistant, I see entities for Motion, Battery Level, and Low Battery Level. Vibration is missing! The device configuration allows for the vibration sensor to be turn off, but it’s on for me and still I can’t see vibration. I tried all sorts of things, including and excluding it, and even enabling the disabled entities, with no luck. I’ve been in contact with Zooz support, and they say that “there are issues with JS implementation outside of MQTT” and that they can only confirm it will work with zwaveJS2MQTT. I’m not planning to switch over to zwaveJS2MQTT, so I’ll have to live without the vibration sensor.

In the device configuration, you get a few different options, including adjusting the motion sensitivity, turning on and off the vibration sensor, adjusting the cooldown time (which can go from 6 seconds to 18 hours), enabling or disabling the LED, and even adjusting the low battery threshold.

One thing I noticed with this device is that it was over-sensitive to motion. I was so sensitive that it was triggering when no one was in the room, and nothing was moving. All of the other sensors were clear, but that one kept going off. I reduced the sensitivity by one in the configuration page, and that seemed to fix the issue, making it as sensitive as the other devices. My testing for this device showed that, when the cooldown time was set for 30 seconds, it average about 33. That’s pretty close.

Fibaro Door Motion Sensor

Lastly, we have the Fibaro Motion Sensor. Surprisingly, it isn’t the most expensive of all of the sensors we’re looking at today, Philips Hue being a few cents more. The first thing I thought when I saw this device, is that it looks like an eyeball, and that has to be on purpose! It’s has a spherical shape, which a lens that’s flush with the spherical curve, looking an awful lot like an iris. Since it’s shaped like a ball, it can easily roll around, so it comes with a mount that can also be used like a stand. The mount actually acts like a socket, clipping around the spherical body of the sensor. It can be secured to a flat surface using a single screw or adhesive, and it’s loose enough that the eyeball – I mean sensor – can be tilted to whatever angle is necessary.

Twisting the body allows you to remove the back cover, exposing the battery and the inclusion button.

To put it into inclusion mode, pull the battery isolator tabs, and it should be picked up by Z-Wave JS right away. When it begins inclusion, you should see the LED inside the lens on the front light up blue. If you saw my contact sensor video, the Fibaro had a ton of different entities in HA, and this is no different. This guy has an accelerometer, so it has entities for X, Y, and Z direction acceleration. It also has a temperature sensor, illuminance sensor, motion sensor, and a seismic intensity sensor – that’s right, apparently it has an earthquake sensor. It also has a battery level, low battery level, and tamper sensors. Note that the tamper sensor doesn’t get triggered when the cover is taken off, but rather when vibration is detected.

There are a TON of configuration options for this sensor, including motion detection sensitivity, cooldown time, pulse counter, the ability to only have the sensor on at night, tamper sensitivity, reporting intervals and thresholds for the auxiliary sensors, and tons more. You can also set the color and brightness of the LED so you can make it look like the eye of Sauron. There’s even a temperature offset, so if it is reading a few degrees off from a calibrated thermometer, you can make that adjustment. Pretty cool! There are so many features that this sensor has, that you could probably make a whole video just dedicated to its setup and use. When I tested the cooldown time, I found that it averaged about 33 seconds when configured at 30 seconds.

Testing

Temp Sensor Comparison

I compared the temperature readings of all of the sensors at the same time and same place on multiple occasions, and they were all fairly consistent. The Hue sensor read the lowest of all of them, and the Fibaro read the highest – over 5 degrees higher than the average of the other sensors. However, the Fibaro does have a configuration option to offset the temp, so this can be remedied.

Lux Sensor Comparison

I tried comparing the illuminance sensors, but they were so wildily different from each other that I wasn’t able to come to a conclusion.

Range Comparison

I made little chart of sorts that shows the range of each sensor, and the shapes on the chart show the FOV angle of each sensor. You can see that the Ecolink has the longest range of all of them, followed by the Zooz 4-in-1. Notice that the Hue sensor has one of the shortest ranges, but it is one of the most popular! Bigger isn’t always better!

Left axis is distance in Feet.

I tried to test the range of the sensors outdoors, and for some reason the sensors didn’t seem to pick me up until I was very close. I’m not sure if the cold affected the sensors, or the sun reflecting off of the snow, or me wearing a coat, or maybe a combination of all three, but the only sensor that seemed to pick me up at a decent distance was the Zooz 4-in-1 sensor, and the rest only detected me when I got fairly close. Next I tried indoors, but I don’t really have a spot where I can mount them at the recommended height but still get a fairly long distance. This resulted in quite a few of the sensors not detecting me until I was fairly close. Results are non-conclusive.

Favorites and Least Favorites

So guess what? That’s it! Thanks for sticking around to the end, and it’s ok if you used the chapters to skip to the conclusion.

It’s kind of hard to compare the Zigbee devices with the Z-wave ones, because, although the Z-Wave devices cost more typically, they are far more configurable.

Favorites

The best basic motion sensor that performs well above its price range is the Aqara motion sensor. Its 170 degree field of view gives it the ability to cover large areas, and its sensible cooldown time of 1 minute 10 seconds gives is the ability to conserve a lot of battery life. Aqara has done it again in my opinion – I have yet to see a device of theirs that doesn’t perform well for the price. However, it is somewhat noticeable because of its unique look, so if you’re looking for something a little more subtle, the Sonoff is a good choice.

My next favorite is the Zooz Q Motion sensor. If you’re looking for a Z-Wave motion sensor with a decent sensing distance, quick response time, and a temperature sensor, this is the one for you. This sensor looks really good in my opinion, and it’s cheaper than the Hue! The fact that it allows you to adjust the motion sensitivity as well as the cooldown time makes it stand out from many of the others, and one of the coolest features is that it can be USB powered and act as a Z-Wave repeater. Zooz makes a ton of awesome Z-Wave devices, and this one is no exception.

One other favorite of mine is, surprisingly, the Philips Hue sensor. It is definitely a bit pricey, but if you’re looking for a Zigbee device that looks really good, has a temperature sensor, and price isn’t a big factor, then the Philips Hue is actually a pretty good choice. I’ve heard the battery life is great, but that’s highly dependent on where you use it. The magnetic mounting feature is the icing on the cake in my opinion. If you’re looking for a Z-wave sensor that has this magnetic mount style, the Zooz Motion and vibration sensor might be right for you. Just remember that the vibration sensor doesn’t seem to work with Z-Wave JS.

Least Favorites

Here are the ones I would NOT recommend.

First, the AGSHOME motion sensor. It really looks ugly in my opinion, and has no features that make up for it. It’s large and bulky, and doesn’t have any special mounting options.

Second, the Ecolink sensor. This massive sensor looks like it comes from the 90s. It’s big, obvious, and that cooldown time is WAY too long. There may be some applications where you might find this device useful, but it really isn’t worth the price in my opinion.

Anyway, that’s all I’ve got for you in this article. I hope you found the information in this article useful, and if you have any suggestions for other devices I didn’t look at, or other comparisons you’d like to see, feel free to drop a comment!

Thanks for reading! See ya.
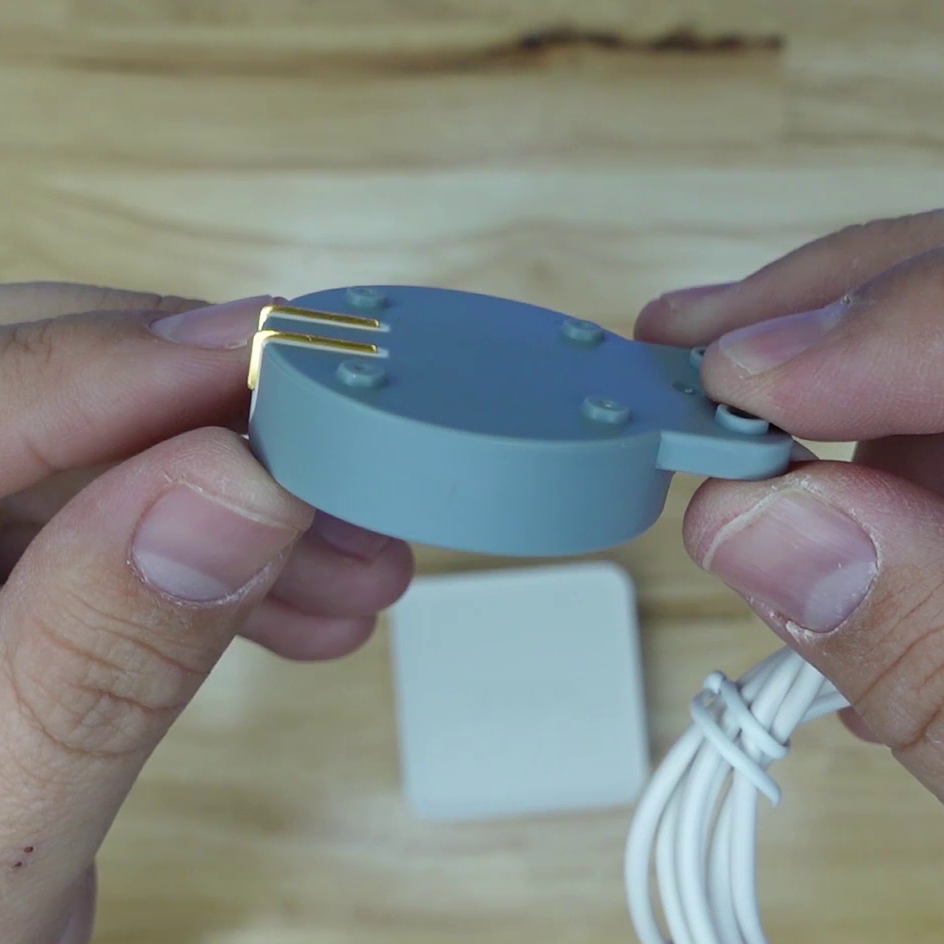
836]); ?>

Best Contact Sensors for Home Assistant

What’s up Smart Homers! Contact sensors, sometimes called door or window sensors, seem like a pretty simple thing. But why are there so many out there on Amazon, and what are the differences? In this article (which is a written version of my latest video) I’m doing a review of 10 different contact sensors. I bought a bunch from a few different brands and will compare their prices and features, and I’ll also give you some ideas for how they can be used around the house. 

At the end I’ll give my recommendation and some honorable mentions.

Requirements

The requirements for my contact sensor selection are that they have to work with Home Assistant, they have to be available on Amazon, they can’t require any other hub than a Zigbee or Z-Wave dongle, and they need to cost less than $50 (US).

Of the 10 contact sensors that I chose, none of them are WiFi devices. This is simply because most of the WiFi ones I saw were Tuya powered, which I want to stay away from if I can (since I don’t want to rely on the cloud) and also a lot of them are big and clunky because of the large batteries required to keep connected to WiFi. For these reasons, we’ll only be looking at Zigbee and Z-Wave devices, and I’ll be adding them to Home Assistant using ZHA and Z-Wave JS.

Also note that all of these sensors are reported to work with Smart Things.

For each of the contact sensors, I’ve done testing to determine how close the sensor needs to be to the magnet before it is “closed”, and again how far it needs to be for the sensor to be “open”. In some cases, this data differs from what is advertised. It’s worth noting that the magnet part of the sensor can typically be changed out with a stronger magnet to change these data.

Overview

Here are the technical specs of the different sensors I tried. Because prices vary, I rated them from 1 to 4 dollar signs (“$”), where “$” is 0 to $20, “$$” is $20 to $30, etc. all the way up to $50.

NameProtocol Battery CD*InstallationPrice
Aqara Door and Window SensorZigbeeCR163211mm / 14mmAdhesive$
Sengled Smart Window & Door SensorZigbeeCR163210mm / 12mmAdhesive$
Linkind Door Window SensorZigbeeDL203216mm / 29mmAdhesive, bracket$
SONOFF ZigBee Door Window SensorZigbeeCR20329mm / 12mmAdhesive$
THIRDREALITY Zigbee Contact SensorZigbeeAAA (x2)33mm / 45mm +/-2mmAdhesive, screw$
AduroSmart ERIA Door Window SensorZigbeeCR203211mm / 12mmAdhesive, screw$
Centralite Micro Door SensorZigbeeCR245032mm / 35mmAdhesive, screw$$
Ecolink Z-wave Door & Window SensorZ-WaveCR123A21mm / 26mmAdhesive, screw$$$
Aeotec Recessed Door Sensor 7Z-Wave +CR123A 9mm / 15mmRecessed, screw$$$
Fibaro Door / Window Sensor 2Z-Wave +ER1425012mm / 16mmAdhesive, screw$$$$
Some links are affiliate links.

*CD is the measured contact distances (closed/open)

Zigbee Contact Sensors

Let’s start by looking at the contact sensors that use Zigbee protocol.

Aqara Door and Window Sensor

The first one I want to look at is the Aqara Door and Window Sensor. This is one of the most popular contact sensors for Home Assistant users, and Smart Homers in general. Of all the sensors in this article, this one is the smallest and I think is the least noticeable. It has Aqara’s typical grey and white modern look which makes it fit well in the modern home.

Although Aqara’s description of this sensor on Amazon says that an Aqara hub is required, that’s not really the case. I’ve paired many Aqara devices with ZHA with no trouble, and this was no different. Pressing the small reset button located on one side of the sensor allowed me to easily pair it with ZHA. In Home Assistant the device shows up with two entities, a binary sensor for the open and closed states, and a power sensor the reports the battery life.

Aqara has become a big name in the smart home community, and for good reason. Their reliable sensors typically have great battery life, and the signal range is excellent in my experience. I have two of these sensors mounted on my garage doors to tell me if they are open or closed. They stay connected to my Nortek USB radio better than some of the other sensors in my house that are a bit closer, and after 6 months they are both at roughly 60% battery. One of the garage doors I open every day, and one I rarely do, but the battery percentages are both about the same.

Another fun way I’ve used this sensor is by attaching it to my projector screen so that Home Assistant knows if it is open or closed. I did a whole video on automating my projector setup, but this will be an added feature. The only downside with this sensor is that, when mounted with the adhesive provided, the battery cover is not accessible, so changing out the battery requires you to remove it from the mounting surface.

Sengled Smart Window and Door Sensor

The Sengled contact sensor was the first Zigbee sensor I bought for my smart home, back before I made the switch from SmartThings. They are a little bit bigger than the Aqara sensor, and not quite as good looking in my opinion, but they are solid white, so they blend in fairly well with white trim. There is no visible marking on the device except for an engraved infinity symbol on the top, which is not really an eyesore at all. Overall these sensors have performed well, although I do have one sensor that seems to drop out and become “unavailable” in Home Assistant. This sensor is on our deck door, which is pretty far from the hub, but closer than the Aqara sensors on the garage doors. Opening the deck door seems to wake the sensor up and it functions properly after that. I may try getting a Zigbee repeater since I do not have any in my network.

Pairing this sensor with Home Assistant was super easy using ZHA – all I had to do was press and hold the reset button with a sim card tool until the red LED under the cover flashed, causing the button to be recognized immediately. In Home Assistant the device shows up with two entities just a like the Aqara sensor, a binary sensor for the open and closed states, and a power sensor that reports the battery life.

Linkind Door Window Sensor

The lowest priced of all of the sensors in this article is the Linkind Door Window sensor. Linkind has a line of Zigbee smart home products that are often extremely cheap on Amazon. The sensor has their brand name written in large, dark letters on the side, which some people might find aesthetically unappealing, but otherwise the sensor has a clean cut look to it. I tried removing the logo with Isopropyl alcohol as well as by scraping and sanding, but it wasn’t easy to do and while the alcohol did nothing, I kind of made it look worse with the sanding. A solution to this could be to just replace the magnet part of the sensor with a better looking magnet, or just don’t use the sensor where it is visible.

 While the previous two sensors only come with adhesive as a mounting option, this one comes with a plastic bracket that the sensor body clips onto. The bracket has a 3M adhesive back, but also has screw holes and comes with screws and anchors for an alternate mounting method. The magnet part of this device only has an adhesive back, so it can’t be screw-mounted.

Pairing with ZHA was pretty straightforward – there is a pinhole for a sim card tool to access the pairing button, but when you first remove the battery isolator tab, it’s automatically put into pairing mode, so the pairing button is only needed when you want to re-pair the device. In Home Assistant the device shows up with two entities like the previous devices, a binary sensor for the open and closed states, and a power sensor that reports the battery life.

I used this sensor for an idea I got from Dr. Zzs. I put it on the toilet lid in my bathroom, so if the lid is lifted, the fan comes on, and a smart plug with an air freshener turns on. I’m not sure this one will pass the wife approval, but it was still fun to try.

Sonoff ZigBee Wireless Door Window Sensor

The next one I want to look at is the Sonoff ZigBee Wireless Door Window Sensor. This sensor has the same sharp, square design that many of the Sonoff products have. It has tiny little arrows on the front to show where the sensor should line up to the magnet, but no other visible markings.

It comes with adhesive backing, but no screw mounting option. Honestly the sensor looks kind of boxy when mounted to your trim, and since it has such a sharp outline, it doesn’t blend well with my door casing.

Pairing this device with Home Assistant in ZHA was pretty simple. All I had to do was press and hold the reset button with a mechanical pencil until the LED under the cover flashed red causing the button to be recognized immediately. It’s kind of annoying that it doesn’t come with some kind of sim card tool like the Sengled sensor does, but hey, I guess they saved some money on that. In Home Assistant, once again the device shows up with two entities, a binary sensor for the open and closed states, and a power sensor the reports the battery life.

ThirdReality Zigbee Contact Sensor

This next sensor is pretty unique. One of the standout features of the ThirdReality Zigbee Contact Sensor is that it is powered by 2 triple A batteries. For someone who doesn’t want to stock a bunch of extra batteries, it’s pretty great that this sensor can use typical household batteries. However, the 2 AAA batteries do make the body of the sensor pretty chonky – it’s pretty much the size of 3 Aqara sensors. But this isn’t the thiccest sensor we are looking at today – stick around to see even bigger! The sensor can be mounted with adhesive or screws – to mount with screws, the entire body of the sensor can be opened, allowing the provided screws to be run through the screw holes and into whatever you’re mounting it to. One weird thing with this sensor is that the magnet portion is about half the thickness of the sensor. While this doesn’t prevent the sensor from sensing the magnet, it kind of looks weird and you need to add some sort of spacer if you want them to be flush with one another.

Adding this button to Home Assistant was simple since installing the batteries for the first time put the sensor into pairing mode. When the batteries are installed, a blue LED begins flashing indicating it is ready to pair. If you want to pair it in future, you are required to access the pairing button which is inside the sensor housing. Once it was added, it showed the binary open/closed sensor and battery percentage sensor.

When I added this sensor 11 days ago it was at 27% battery, and then at some point it went as high as 42%, and now it’s down to 38%. It doesn’t seem to me that the battery percentage reported is super reliable for this sensor. I used this sensor on my child safety gate at the top of my stairs, replacing the sensor I used to have there. It can trigger alerts if the gate is left open and the baby is crawling around.

AduroSmart ERIA Smart Home Door Window Sensor

The AduroSmart ERIA sensor is another uniquely styled device, and one that I think really looks good. While it is a bit larger than the Aqara and Sengled sensors, it has a look that I personally like – it’s not ugly, but it’s not trying to hide either. The solid white color and the nice rounded corners, make it look really clean, and the square-shaped indicated in its corner really makes it stand out. The indicator blinks green when the sensor is either opened or closed, but as far as I know there’s no way to turn it off. It can be mounted with either screws or adhesive (although the magnet can only be mounted with adhesive) using a pretty clever mounting plate design. The sensor can be slid into place onto the provided mounting plate after the plate is mounted with screws or adhesive. This makes changing out the battery a lot quicker than other devices like the Aqara or the Sengled sensors, because you can slide it off of the plate and change the battery. 

One issue I had was that the battery contacts inside the sensor were forcing the battery back out of its slot when I tried to put it in, so I actually had to bend the contact so that it wasn’t pushing the battery out anymore.

Once I got the battery in, adding the device to Home Assistant went pretty smoothly. The sensor was put into pairing mode as soon as the battery was installed, and was instantly recognized by ZHA. There’s also a pinhole that gives access to the reset button if you need to re-pair it. There are the typical two entities showing up in Home Assistant, the open/closed state and the battery percentage.

Centralite Micro Door Sensor

The next sensor I want to show you, the Centralite Micro Door Sensor, is the last of the Zigbee sensors in this article. It is also the most expensive of the Zigbee devices, the first one over $20 US. It has an interesting design, with one of the most obvious features being an array of holes on the front of the sensor housing. These holes allow ambient air to reach a temperature sensor inside. That’s right, this device is two sensors in one unit! It also has a reset button on one side, and it has some hash marks on the front of the magnet and sensor. It has a very simplistic look, without trying too hard, and I like it. It also has a battery hatch release button that pops the battery tray out to one side when pressed. This makes it easy to change out the battery without pulling it off of the wall.

This sensor can be mounted with the provided adhesive or screws. It comes with screw mounting brackets for both the sensor and the magnet, so both can be attached to the wall with screws, and then the magnet and sensor clip into them. However, the screws provided are machine screws, not wood screws, so they really aren’t the best for attaching to a door or door frame. Machine screws are typically for metal or plastic.

It’s different than the previous sensors we’ve looked at when it comes to the contact distance. Based on my testing, this sensor has a contact distance that is much larger than the previous sensors, which means the door or window you are sensing will need to be open wider in order for the sensor to recognize it as open, and if a door is not closed fully, it may still tell you that it’s closed.

Adding the device to Home Assistant was fairly straightforward. For first time pairing, you pull the battery isolator out by the tab and it goes directly into pairing mode demonstrated by a flashing LED that can be seen through the temperature sensor holes on the front, and it’s fairly quickly picked up by ZHA. If you want to re-pair it, you need to perform a reset by opening the battery tray, holding down the reset button, and then closing the tray. In HA, the device has three entities: a binary sensor for the contact state, a temperature sensor, and power sensor for the battery percentage.

I used this sensor in my refrigerator to monitor the temperature of the fridge, as well as send alerts if the door is left open for too long. It’s hardly noticeable, and the wide sensing distance helps with placement of the sensor.

Z-Wave Contact Sensors

Ecolink Z-Wave Plus Rare Earth Magnet Door Window Sensor

Now let’s take a look at Z-Wave contact sensors. The first one is the Ecolink Door Window sensor. This monster of a sensor is the largest contact sensor I’ve ever seen, and definitely the largest in this review. It has an LED on the body that flashes when it senses open or closed, and stays lit when the cover is removed. This is because it has a tamper sensor so that you can be alerted if someone is trying to bypass or disable it. What you’ll also notice when you have the cover off is a set of screw terminals that allow you to hook up a wired sensor. This can be a contact sensor or any other type of dry contact, and allows so that the body of the sensor itself doesn’t even have to be close to the point of contact. Here I’m demonstrating with a momentary push-button switch. You could put the sensor in a dry, safe place, and then put a more weather resistant, wired contact sensor outdoors. All you would do is connect the two wires from the wired sensor to the terminals here, and when the wired sensor was “made” or closed, the Ecolink sensor would report that it was open, or vice versa.

The cover of the device also has an arrow on the one side, showing where the magnet needs to be aligned to it. Ecolink actually advertises the battery life at 3 years, and after more than 10 days the sensor is still reporting 100% battery. It can be mounted with either the 3M adhesive or the screws provided, and on this one, both the sensor body and the magnet itself can be screw mounted. A mounting plate is provided for the body of the sensor so that it can be clipped onto the plate once the plate is screw mounted. The plate is designed so that it clicks into place, and the cover has to be removed to release the plate. That’s smart so that you get a cover open alert if someone tries to remove it.

One of the most unique things is that this sensor comes with a complete second housing, a brown one instead of white. This gives you multiple options depending on where you’re mounting it.

Adding this device to Home Assistant is not too complicated. Put Z-Wave JS into inclusion mode, and then pull the battery isolator tab on the back of the device. As soon as you do this it instantly begins the interview process, the LED on the front turning solid green. Once connected, you’ll see quite a few different entities that show up. You have the “cover removed” entity which I’ve already explained, you have a “low battery level” sensor which would turn on if battery gets critically low, you have the open/closed contact sensor, a “replace battery” sensor, and the battery level.

Aeotec Recessed Door Sensor 7

The next Z-Wave sensor is the Aeotec Recessed Door Sensor 7. This device stands out from the rest because of its mounting method. Rather than being an adhesive or screw on mount, this sensor is made to be recessed into a door. This allows for a very discreet sensor, that isn’t standing out and noticeable to most people. For both parts of the sensor, 3/4” holes need to be drilled, one in the door that is a little over 2 and a half inches deep, and the other in the door-jamb that is a little over a half of an inch deep. Then the sensor can be inserted into the one hole and the magnet into the other. The sensor part can be screwed into the door by its flange using the provided screws, but the magnet part should be glued into its hole.

The sensor supports S2 security and uses a 700 series Z-Wave module, allowing it to have fast response time and a long battery life. The battery life on this device is advertised at 3+ years. It uses the same type of battery as the Ecolink sensor a CR123A.

To add the device to Home Assistant, you have to use a screwdriver to pop off the flange of the sensor part. Then, use your fingers to slide the circuit board out of the cylinder. You should see the battery, and the tab of the battery isolator. Pull the tab, and then slide the board back into the cylinder. Next, put Z-Wave JS into inclusion mode, and then press the button on the end of the circuit board. An LED should begin flashing showing that it is in pairing mode. Once it is picked up by Home Assistant, you can snap the flange back into place on the face of the sensor. In the future you can use the hole on the face of the sensor to access the inclusion button. In Home Assistant you have quite a few entities like we did with the Ecolink. There’s a low battery sensor, open/closed sensor, and battery level sensor, but there is also a “power applied” sensor and a “software failure” sensor. I’m really not sure what these two do.

This sensor works great in applications where you don’t want people seeing the sensor, but it does require you to make a hole in your door, and may not work well in a metal door, although mine did, because metal enclosures can disrupt a Z-Wave signal. These are some things to consider when you’re looking at this sensor.

Fibaro Door / Window Sensor 2

Last but not least, we have the most expensive of all of the sensors we’re looking at today, the Fibaro Door / Window Sensor 2. This Z-Wave device is larger than the Aeotec, but still smaller than the Ecolink. It has a clean and futuristic rounded look that makes you want to pick it up for some weird reason. It has the Fibaro brand printed on the top, but it’s not too intrusive. In contrast with the large size of the sensor, the magnet part of the device is tiny as small as the Aqara sensor’s magnet! It looks like a tiny pill, but this small size does mean that you have to make sure it is lined up properly with the sensor. There is a marking on one side of the sensor and magnet to help with this. One of the device’s stand-out features is that it has a temperature sensor inside it.

The sensor can be mounted with screws or the adhesive backing, but the magnet can only be mounted with the adhesive backing. There is a curved strip of hard plastic on the back that bulges out so it’s not flush with the back of the sensor. Under this plastic is a button that will be depressed when the sensor is mounted to a flat surface. If you pop open the cover, you’ll see another switch inside that is depressed when the cover is in place. These two buttons are used to trigger the tamper alert if the cover is taken off or if the sensor is pulled off of the wall. 

These buttons are also used to pair the device in Home Assistant. To do so, you have to hold down one of the buttons, and then triple click the other one. This puts the device in pairing mode. Alternatively, you could mount it to the door or door frame first, effectively depressing one of the buttons (the one on the back), and then triple click the other button. In Home Assistant there are quite a few entities that show up – more than any of the other sensors in this article, actually. It has the door open or closed sensor, battery percentage, temperature, cover removed, low battery, replace battery, overheat, and underheat. The Cover Removed sensor’s status will be “Unsafe” until both buttons are depressed for about 5 seconds, at which point it becomes “Safe”. However, as soon as one of the buttons is released – if it’s pulled off of the mounting surface or the cover is taken off – it becomes Unsafe again. This could be useful if you wanted to set off an alarm that would be triggered if someone tampered with your sensor.

Favorites & Honorable Mentions

For a budget and basic Zigbee contact sensor, you really can’t go wrong with the Aqara sensor. It has great battery life, with what seems like a decent range compared to some of the others, and looks really good and minimalist when mounted on a door frame. If you’re looking for something similar, but a Z-Wave device, there is another sensor I didn’t cover in this article, but I would recommend – the Zooz ZSE41 Open Close Sensor. You can get this device for fairly cheap at the Smartest House when it’s on sale, and for a couple extra dollars you can pick up the waterproof case that’s designed for it. I covered this sensor in my Mailbox Notifications in Home Assistant video, so if you want to see more about it, check out that video.

If you’re looking for a Zigbee sensor that costs a little more, but also has a temperature sensor, the Centralite contact sensor is a pretty good option. There is another contact sensor that also reports temperature that I would recommend, and that’s the SmartThings/Aeotec Multipurpose sensor. The reason I didn’t cover it is because it isn’t offered on Amazon currently, and is almost always out of stock when it is. This is for good reason, because not only does it have a temperature sensor, it also has a vibration sensor as well. If you want something that has a little longer range, has a temperature sensor, and still looks good, Fibaro might be good for you, but it has quite a price tag!

If you’re looking for a sensor that is fairly well hidden, I would definitely recommend the Aeotec Recessed Door Window sensor. It’s super cool that you can have a wireless sensor that is hidden so nicely. A tamper sensor is not needed if the unwanted visitor doesn’t know it’s even there!

Least Favorites

Here are the ones I would NOT recommend.

First, the Sengled sensor. Don’t get me wrong, the sensor works great, but when you compare it to the Aqara sensor, there’s no contest. I have more Sengled sensors than any of the others, but it’s more expensive than the Aqara and apparently has worse range. Also, I really don’t think it looks as good.

Next, the ThirdReality contact sensor. Even though it takes 2 AAA batteries, it is way too big, and it doesn’t have enough features to make up for its size like the Ecolink does. On top of that, the battery reporting is definitely broken in Home Assistant – at least it is on mine, so I would not recommend you buy this one.

Anyway, thanks for reading!